Shopify x OwlPay Manage Order & Vendor
This guide will take you to go through the Shopify OwlPay Manage Order & Vendor service from 0 to 1.
You can install the OwlPay Manage Order & Vendor App in the Shopify app store.(referred to as the App below)
You must register OwlPay account to use this service. Click here to understand how to activate the OwlPay service.
Quick overview
Follow the 6 steps below to use OwlPay to pay your vendors on Shopify.
- Install App on your Shopify store
- Register and activate OwlPay
- Connect Shopify to OwlPay
- Sync vendor information from Shopify to OwlPay
- Sync order information from Shopify to OwlPay
- Use OwlPay to pay your vendors
How to install the "OwlPay Manage Order & Vendor" App in your Shopify store
Follow the steps below.
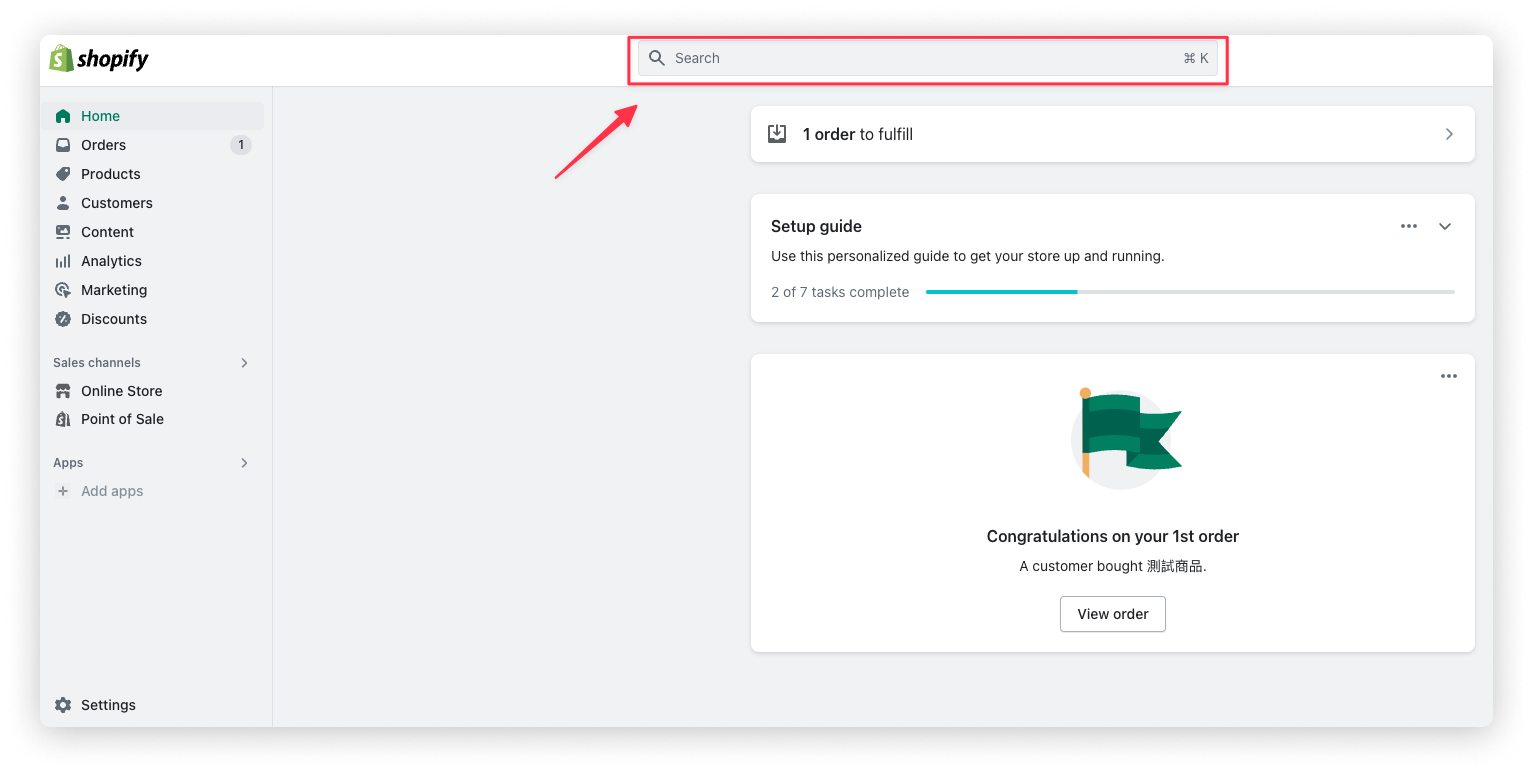
1. Log in to your Shopify store management console and search for OwlPay
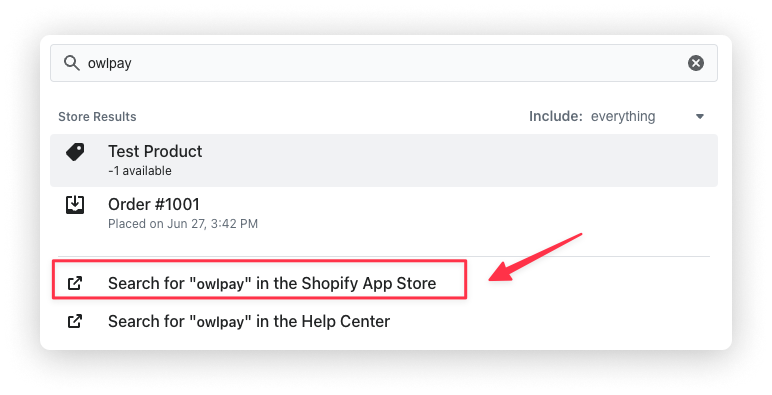
2. Click 'Search for "owlpay" in the Shopify App Store'
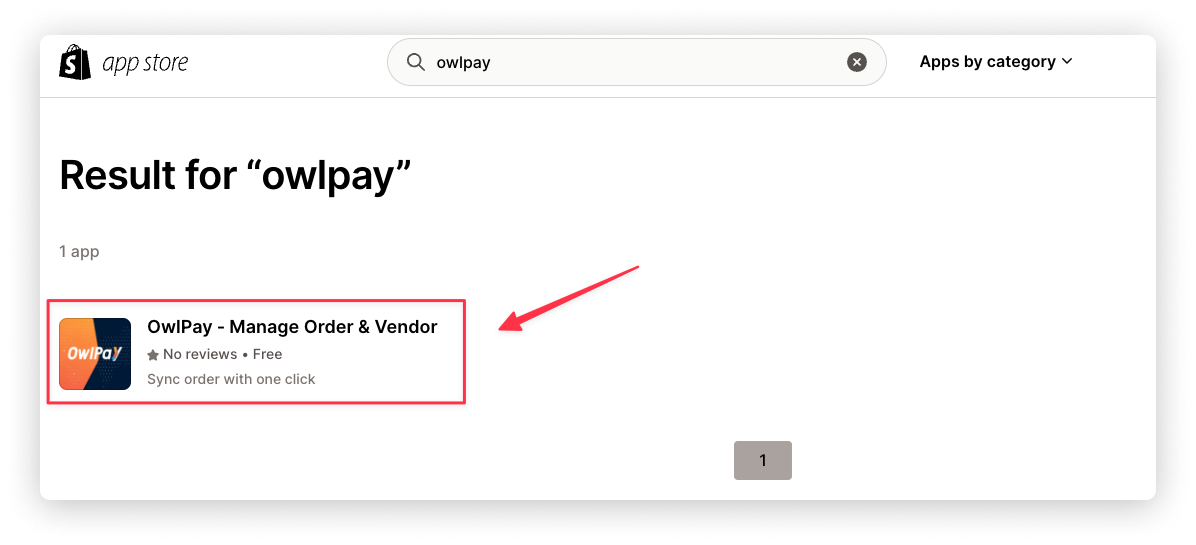
3. Click "OwlPay - Manage Order & Vendor" App in the search results page
4. Click "Add App" > Install app.
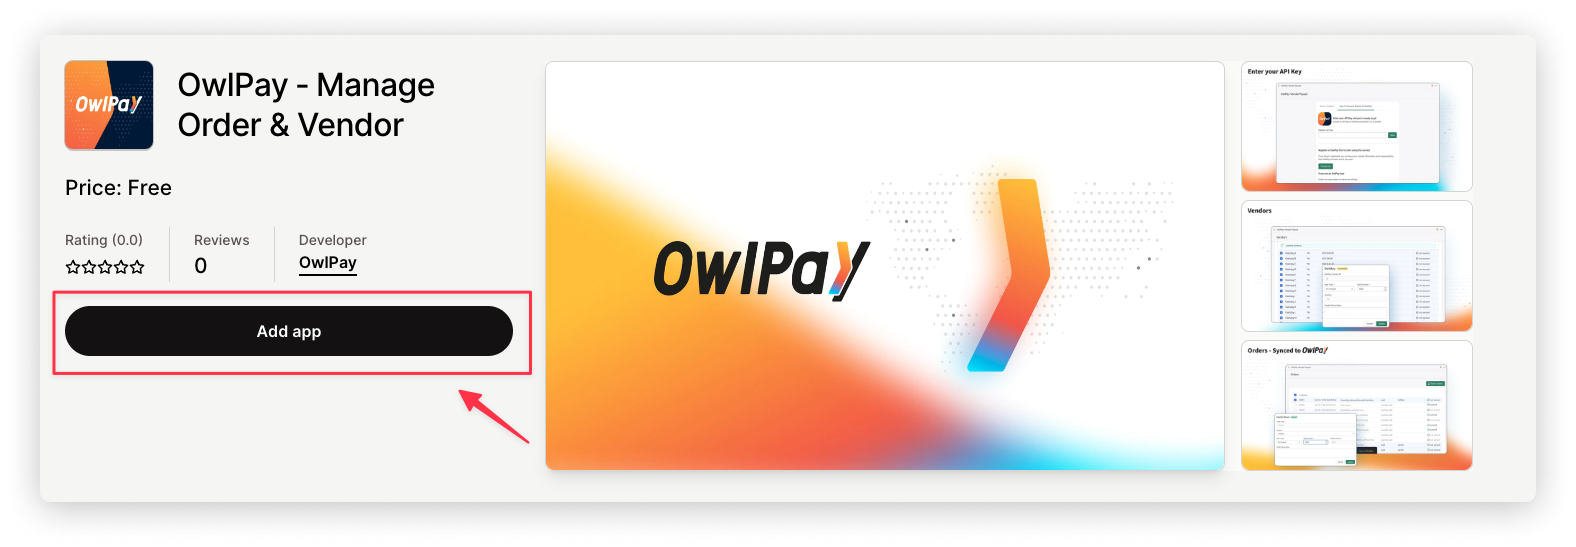
5. After successful installation, click "Approve" to start using the app
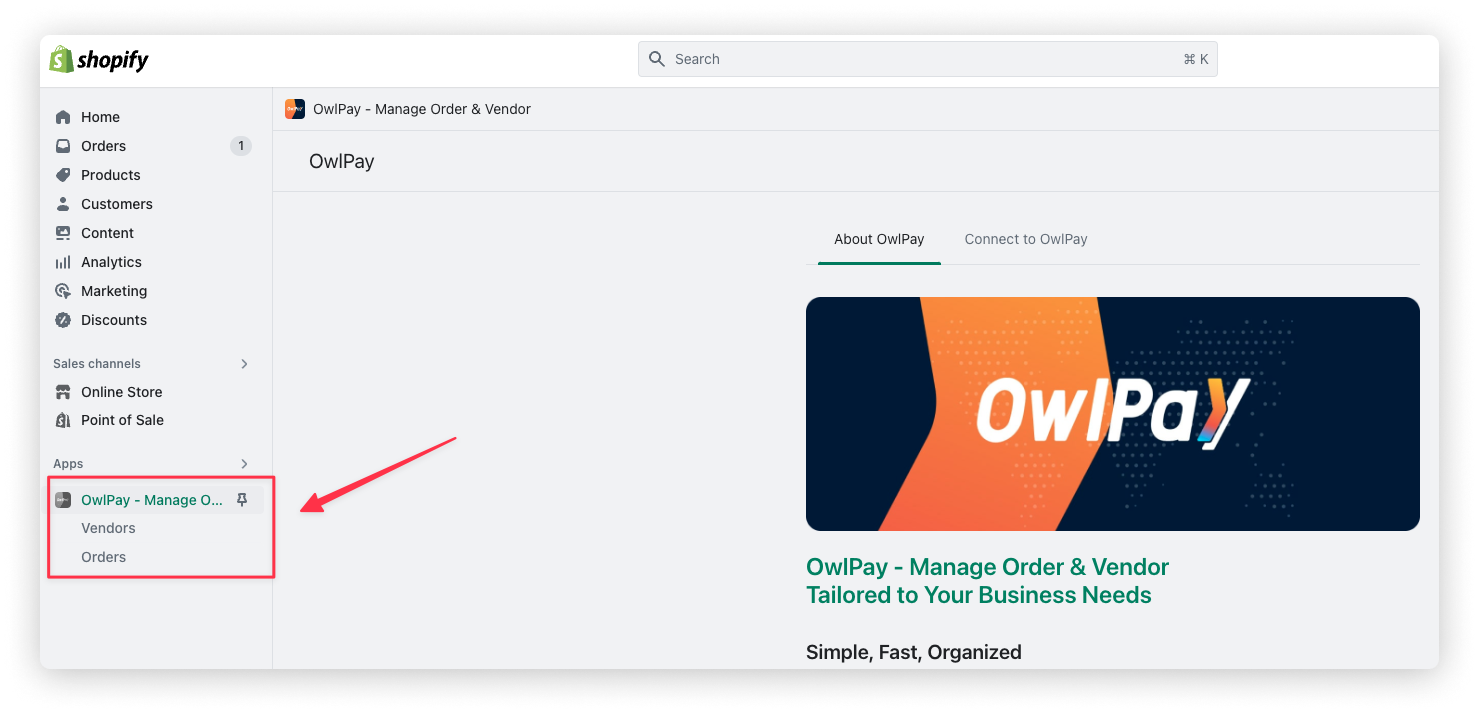
How to connect Shopify to OwlPay
Follow the steps below:
1. Click "How To Connect Shopify To OwlPay"
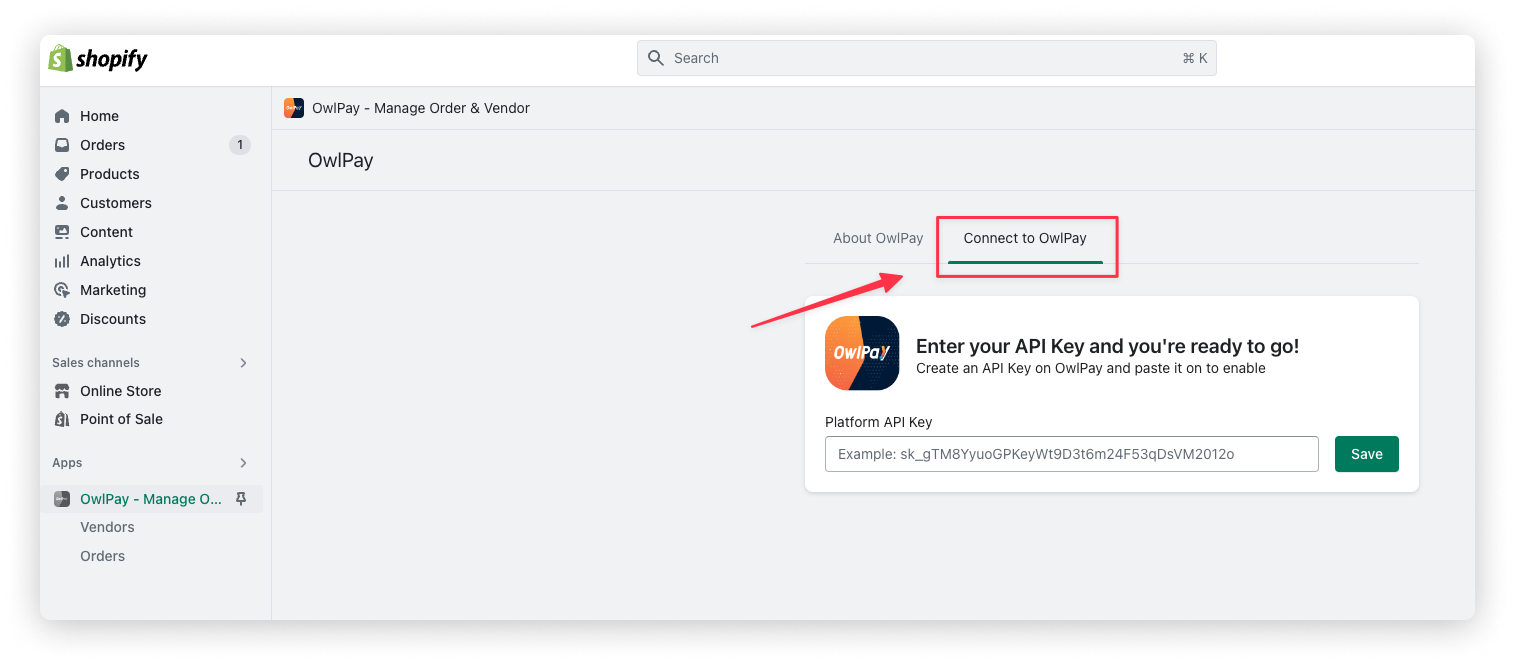
2. Follow the instructions to get the OwlPay API Key
Refer to How to add API Key to get the API Key.
3. Paste the API Key into the "Platform API Key" column and click "Save

You can start using OwlPay Vendor Payout now.
How to sync vendor information from Shopify to OwlPay
Shopify does not provide the vendor management interface in the admin dashboard, which can make it inconvenient for you to make payments.
You can use this feature to sync your vendors on Shopify to OwlPay for management.
To use this feature, you must
- have at least one product profile on the Products page in Shopify.
- have a vendor name in the Vendor field of the Product organization section of the product information in Shopify.
Follow the steps below.
1. Click "Vendors"
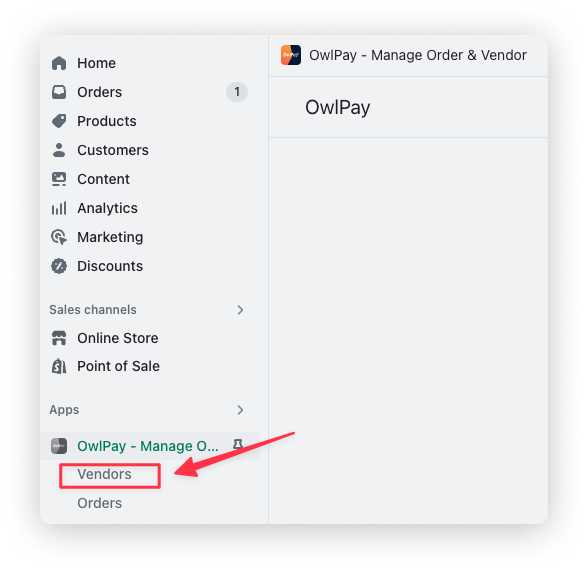
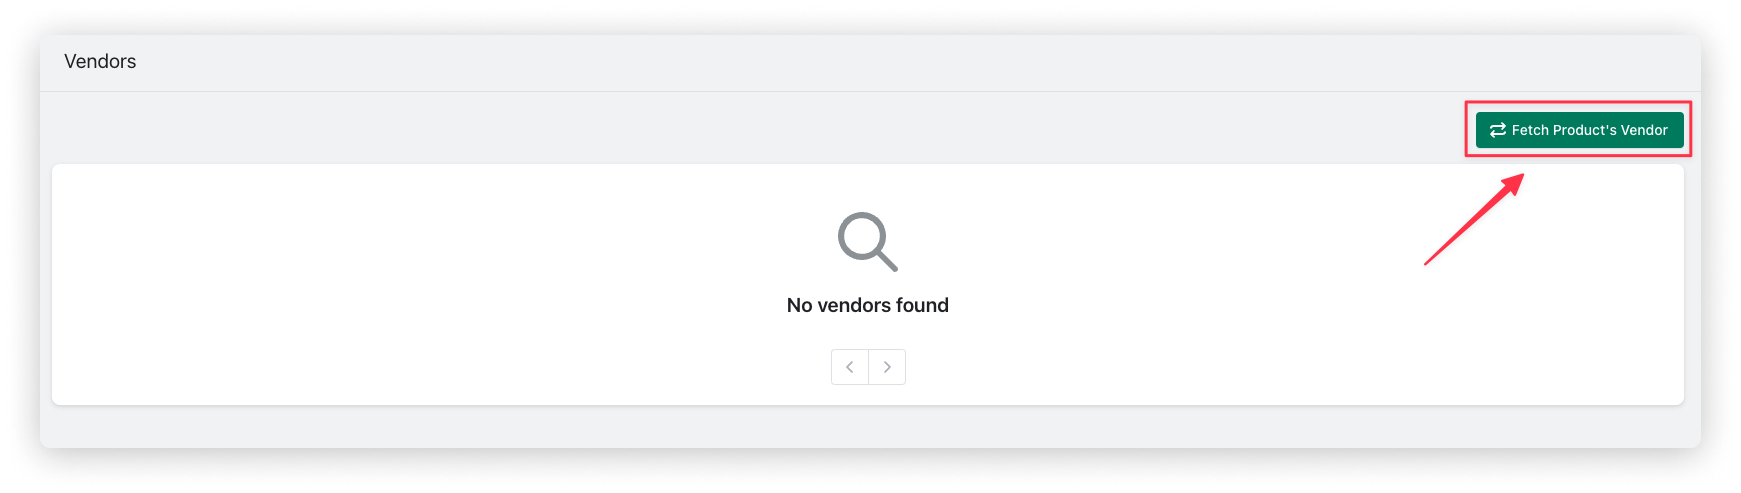
2. Click "Fetch Product's Vendor"
When you first use it, you need to click "Fetch Product's Vendor" to get all the vendors of your products on Shopify on this page.
Later, when you add other vendors to your products, OwlPay Vendor Payout will automatically sync the vendors to this page.
3. Set the split price by Vendor
Set the actual amount you need to pay to the vendor.
There are 2 methods:
- Fix Amount: Pay a fixed amount to the vendor
- Percentage: Pay a specific percentage of the order amount to the vendor
Below are two use-cases to illustrate.
- Fix Amount: You have an order with $1,000 in sales and the actual amount you need to pay to the vendor is $900, you can set
Fix Amount: $900. - Percentage: You have an order with $1,000 in sales and you are paying a fixed amount of 80% of the sales to the vendor, you can set
Percentage: 80.
To set the split price, follow the steps below.
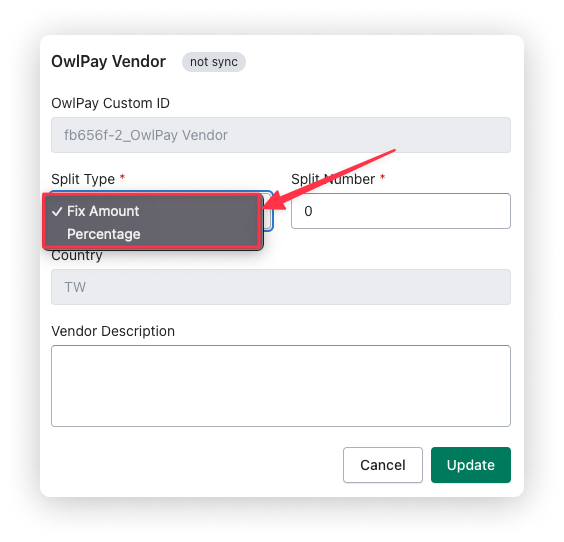
- Move the mouse cursor over the name of the vendor, and click on the ✏️ icon.
- Select the method you want to use in Split Type.
- Enter the amount or percentage you want to pay in Split Number.
- Click "Update".
- If you want to set the split price by "Product", see Set the split price by Product
- If you set the split price for both "Vendor" and "Product," the final order payout amount will be calculated based on the "Product" as a priority.
For example, if you
- Set "Vendor" > "fix amount" to $900
- Set "Product" > "fix amount" to $500
The payout amount for the order will be $500.
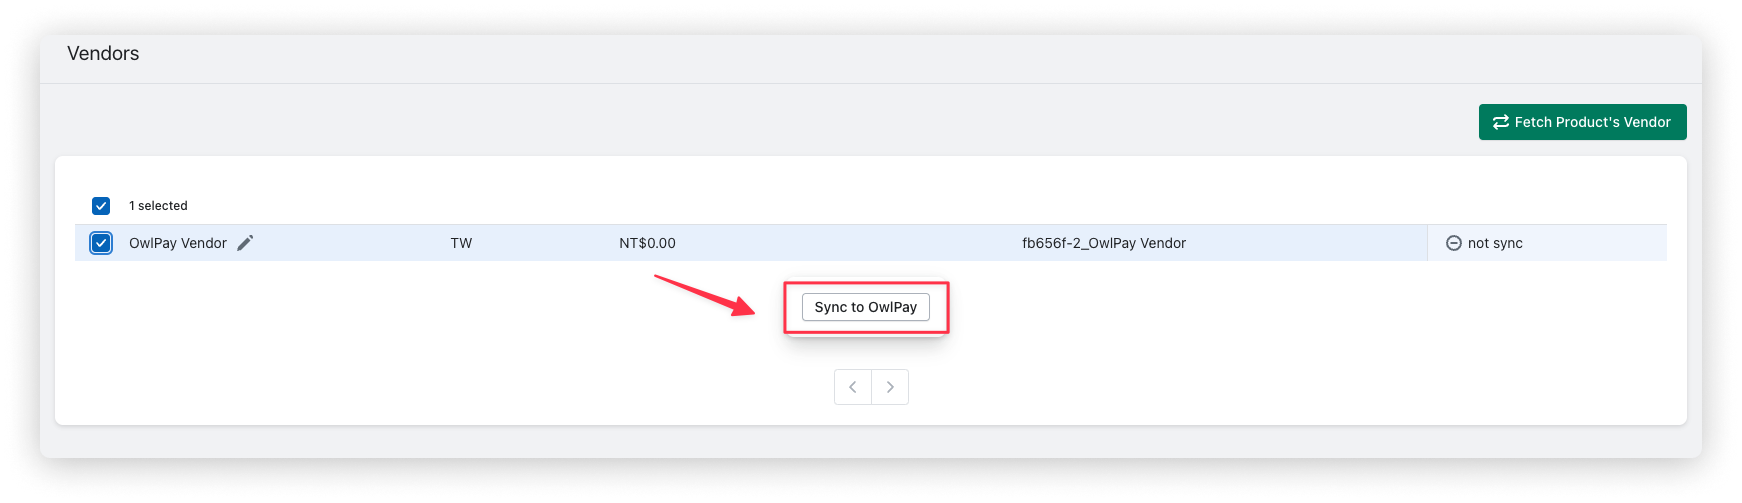
4. Sync the vendor information to OwlPay
Toggle the vendors you want to sync to OwlPay, and click "Sync to OwlPay".
Once done, you can start to manage your vendors on OwlPay.
- We recommended syncing all vendors on Shopify to OwlPay for a better management experience.
- Refer to Vendor Information to learn how to manage vendors on OwlPay.
How to set the split price by Product
In addition to setting the split price by "Vendor", you can also set by "Product".
::: caution Prerequisite You must have at least one product profile on the Products page in Shopify. :::
Follow the steps below.
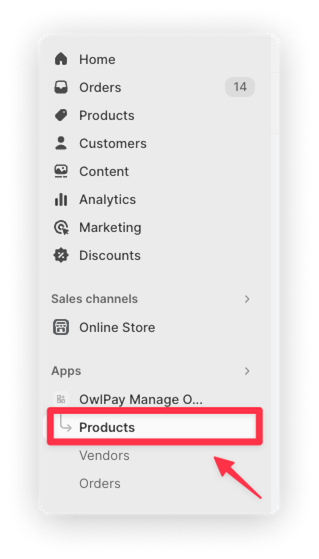
1. Click Products
2. Click "Fetch Products"

3. Set the split price by "Product"
Set the actual amount you need to pay to the vendor.
There are 2 methods:
- Fix Amount: Pay a fixed amount of this product to the vendor
- Percentage: Pay a specific percentage of the product price to the vendor
Below are two use-cases to illustrate.
1. Fix Amount
A product is priced at $500
- The customer purchases product A
- The order amount is $500
You want to pay the vendor $300, so you can set Fix Amount: $300.
2. Percentage
A product is priced at $500
- The customer purchases product A
- The order amount is $500
You want to pay the vendor 50% of the product's selling price, so you can set Percentage: 50.
To set the split price, follow the steps below.
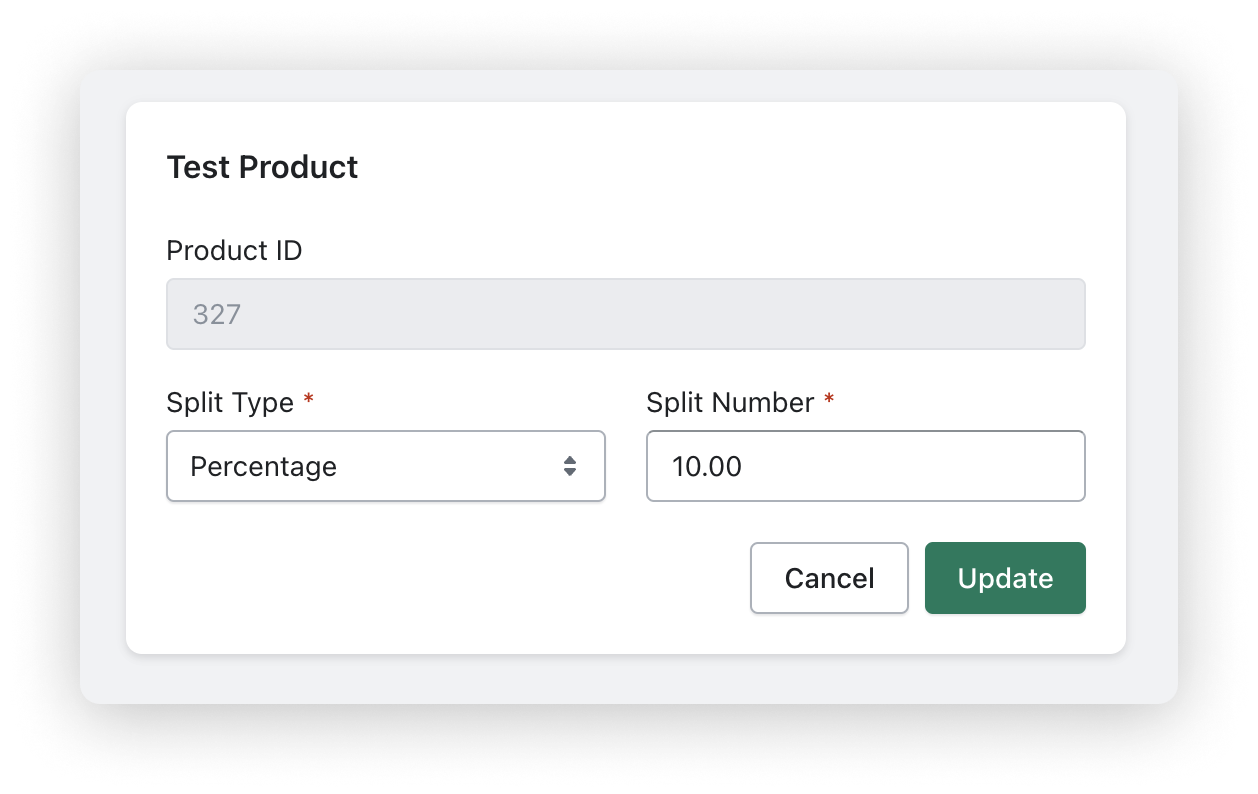
- Move the mouse cursor over the id of the product, and click on the ✏️ icon.
- Select the method you want to use in Split Type.
- Enter the amount or percentage you want to pay in Split Number.
- Click "Update".
- If you want to set the split price by "Vendor", see Set the split price by Vendor
- If you set the split price for both "Vendor" and "Product," the final order payout amount will be calculated based on the "Product" as a priority.
For example, if you
- Set "Vendor" > "fix amount" to $900
- Set "Product" > "fix amount" to $500
The payout amount for the order will be $500.
How to sync order information from Shopify to OwlPay
You must sync your orders on Shopify to OwlPay before sending payments through OwlPay.
::: caution Prerequisite To use this feature, you must
- have at least one order in Shopify.
- sync your vendor to OwlPay in order to use this feature. Refer to How to sync vendor information from Shopify to OwlPay for more details. :::
Follow the steps below.
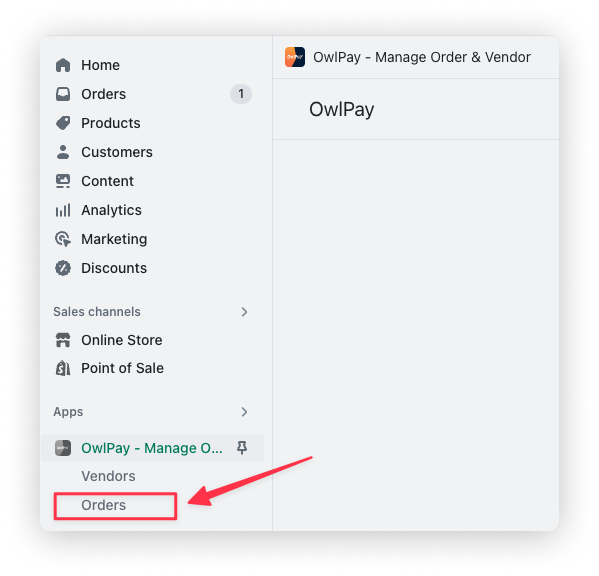
1. Click Orders
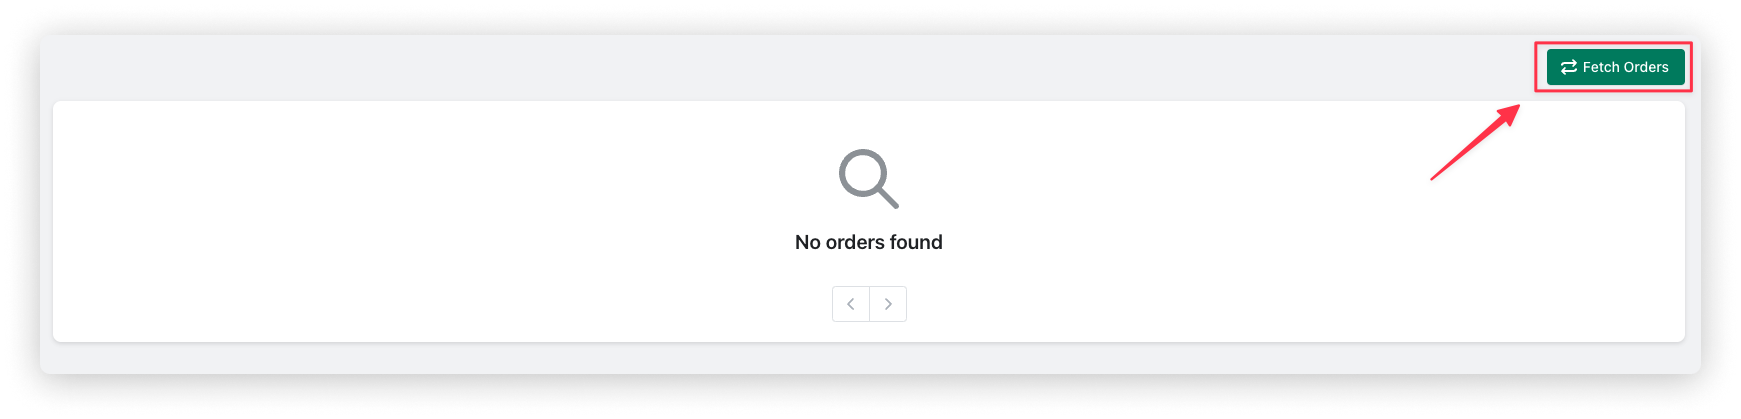
2. Click "Fetch Orders"
When you first use it, you need to click "Fetch Orders" to get all the orders on Shopify on this page.
Later, when you have new orders, OwlPay Vendor Payout will automatically sync the orders to this page.
3. Sync the order information to OwlPay
Toggle the orders you want to sync to OwlPay, and click "Sync to OwlPay".
Once done, you can start to manage your orders on OwlPay.
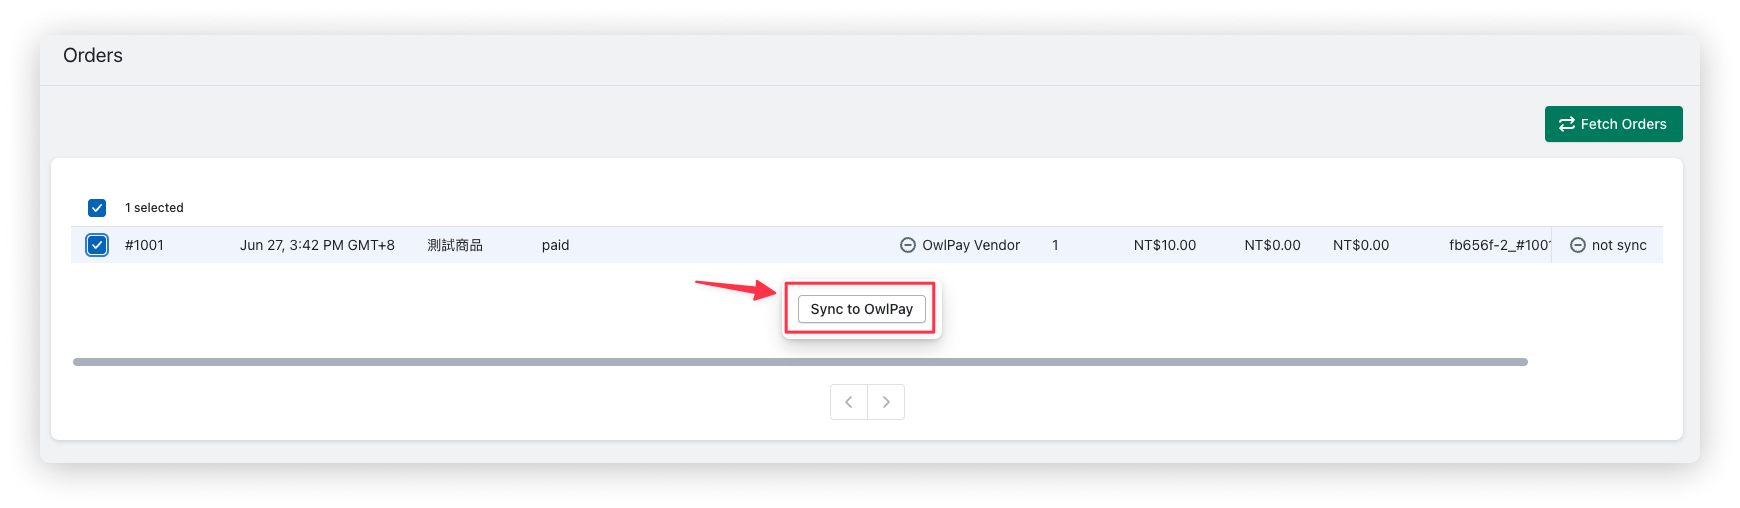
- Only the orders with the payment status
paidcan be synced to OwlPay - We recommended syncing all orders on Shopify to OwlPay for a better management experience.
- Refer to Order to learn how to manage orders on OwlPay.