Vendor information
You can manage vendors of your company on OwlPay and send payouts to them.
How to create a vendor
When you’re on the “Vendor information” page, click “Create vendor”.

Enter the vendor’s name, email, and comments (optional) to add a vendor.

How to import vendor
If you have multiple vendors to import into OwlPay system at one time, you can use the "Import vendor" function.
1. Click "Import vendor"

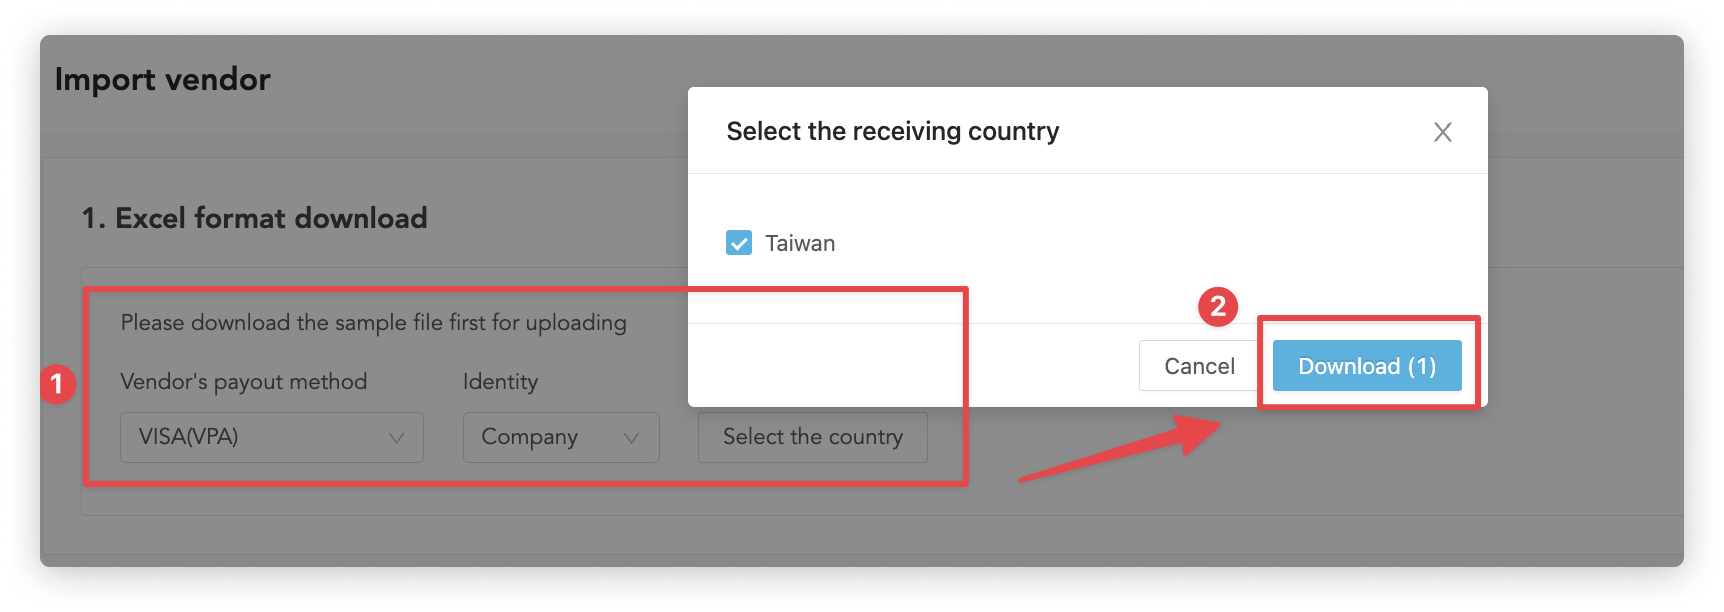
2. Download the Excel form for importing vendors
You have to fill in the vendor information according to the standard form provided by OwlPay.
In the "Excel Form Download" section, select the vendor's
- Identity
- Payout method
- Receiving country
Click "Download" to get the corresponding Excel form.
To inquire about the primary and secondary sectors of your business industry, please use the AML Schema Tool.
After opening the page, follow the below steps:
- Select your payout method, country, and identity under the "Select Schema Condition" section
- Click the "SUBMIT" button
- Look for the "sicSection" on the output form
- Click the "TRY" button on the right side
- Click the "Search" button in the popup window
To inquire about the secondary category of your business industry, follow the below steps:
- Take note of the corresponding code for the "primary (sicSection)" sector. For example, A-Agriculture, Forestry, Fishing, and Hunting
- Click the "TRY" button to the right of sicDivision
- Enter the corresponding code for the "primary" sector in the input box. For example, A. :::
3. Upload the vendor Excel sheet you want to import
In the "Vendor Upload" section, select the vendor's
- Identity
- Payout method
- Receiving country
Click "Upload" and select the corresponding Excel sheet to start importing the vendor.
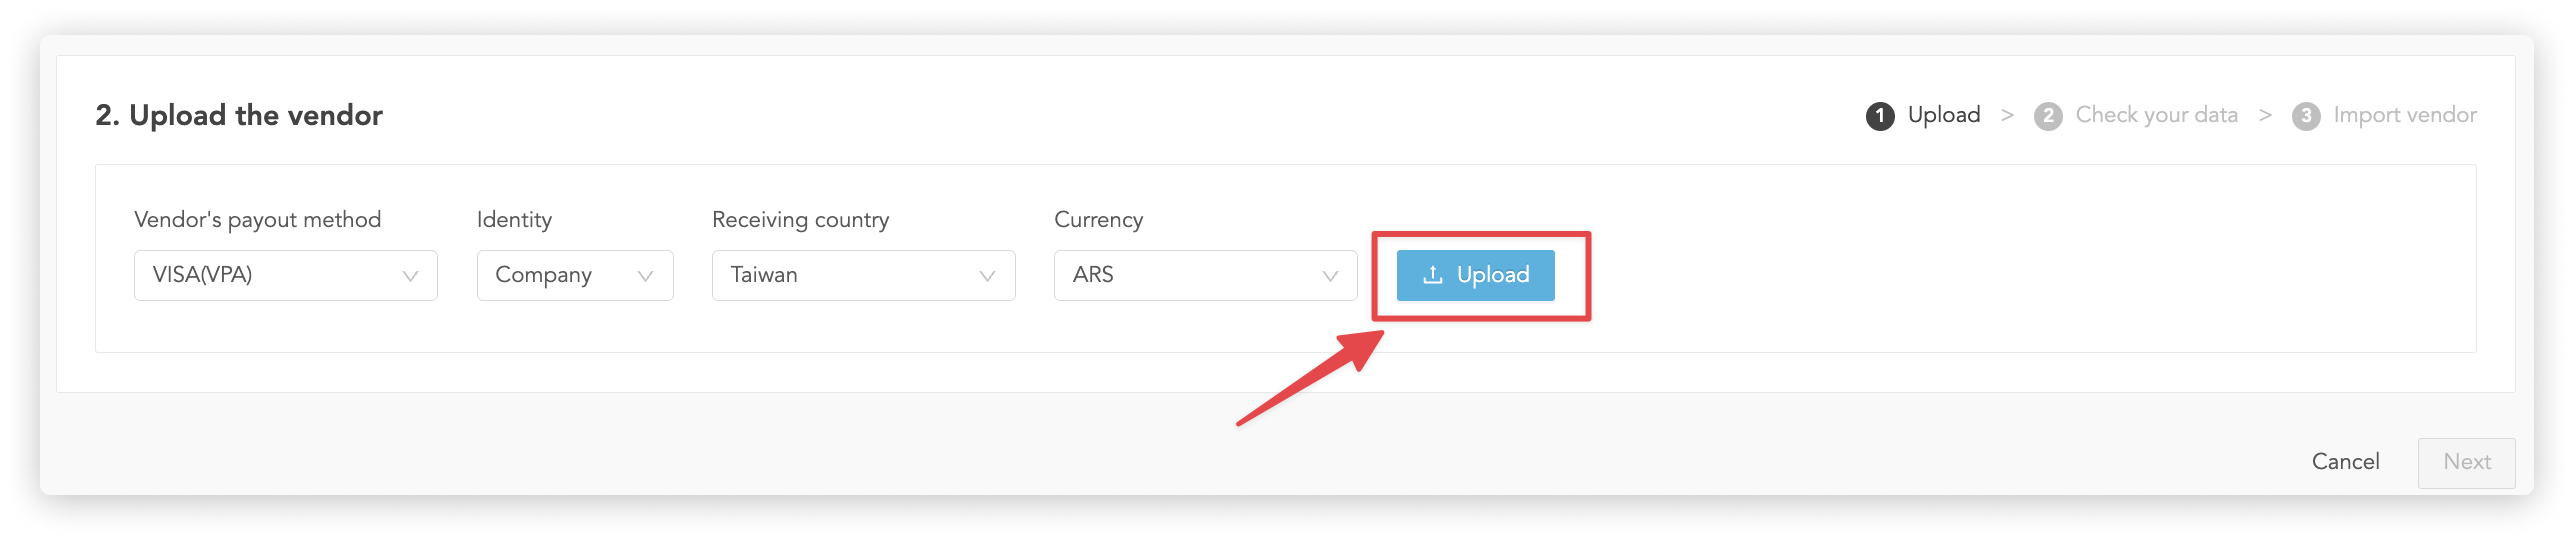
"Import vendor" only supports single Excel form, please upload one Excel file at a time.
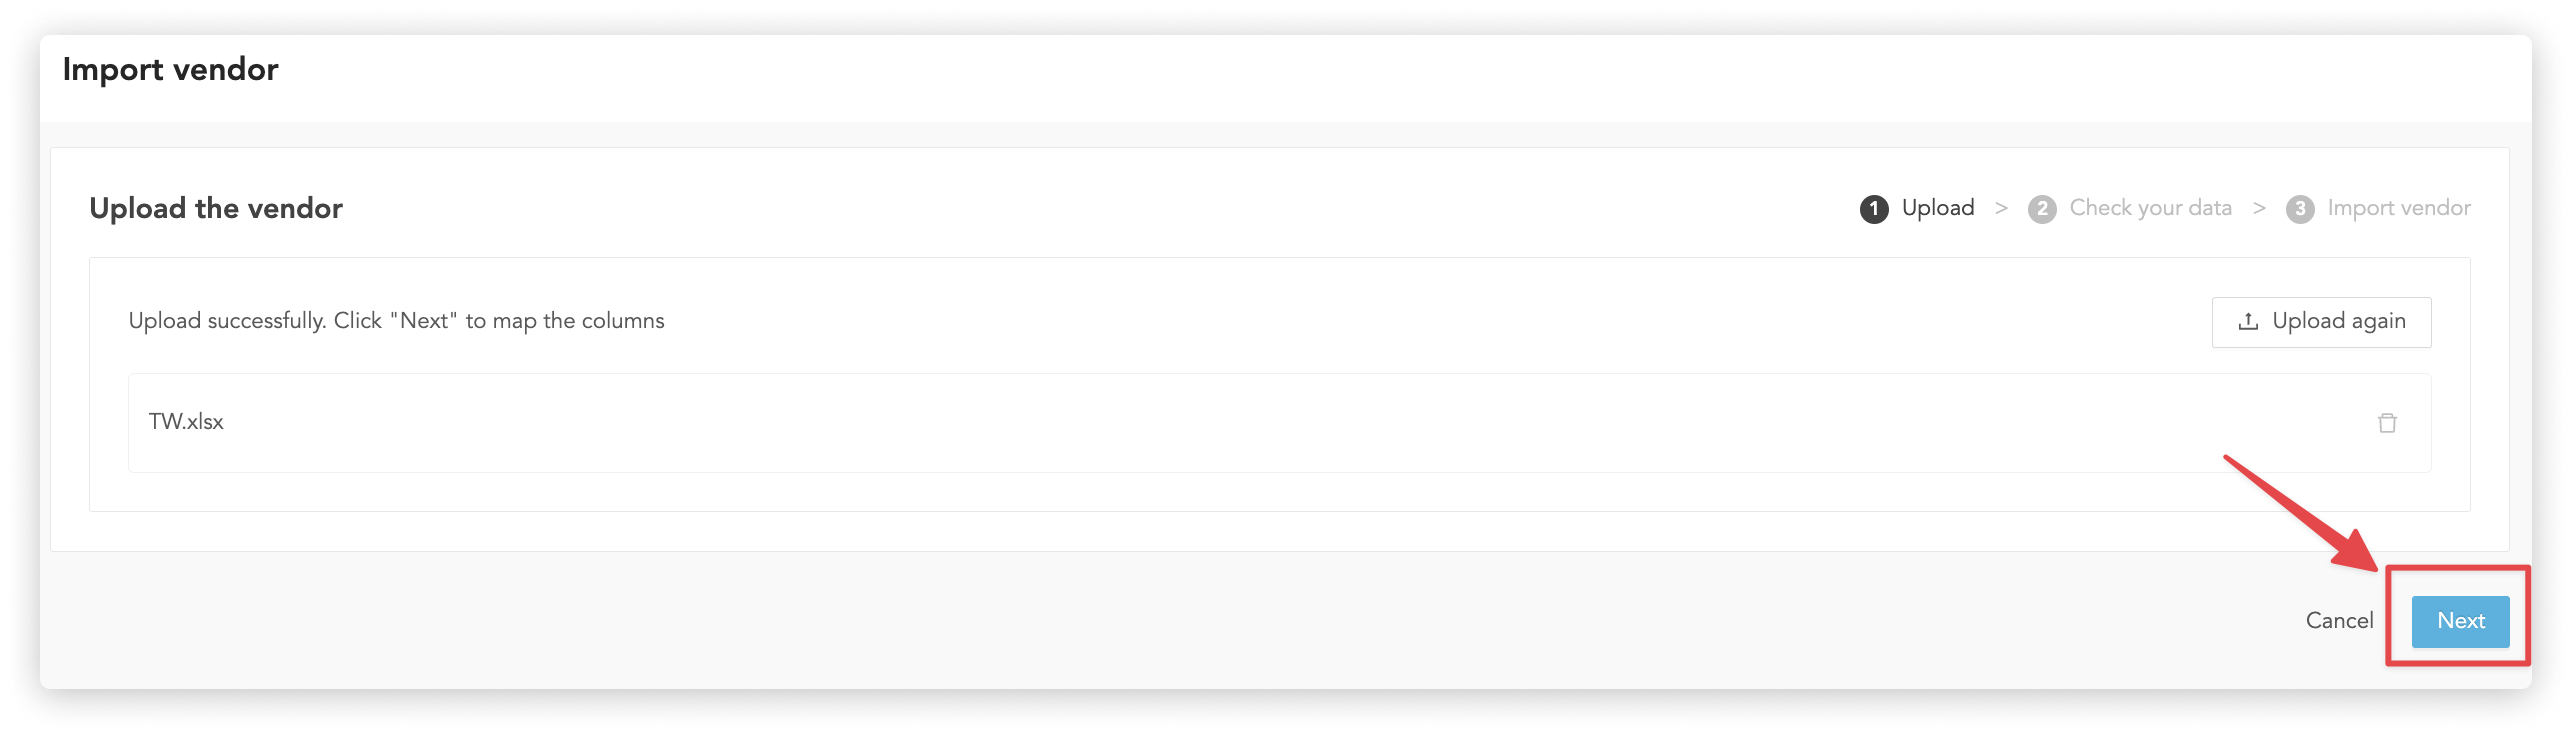
4. Confirm the uploaded file
Confirm that the Excel file you uploaded is correct, and click "Next" when you are done.
5. Map the fields
OwlPay will compare the field names automatically. If your file field name is different from OwlPay field name, you need to select the field manually to concatenate. Click "Next" after the selection is done.
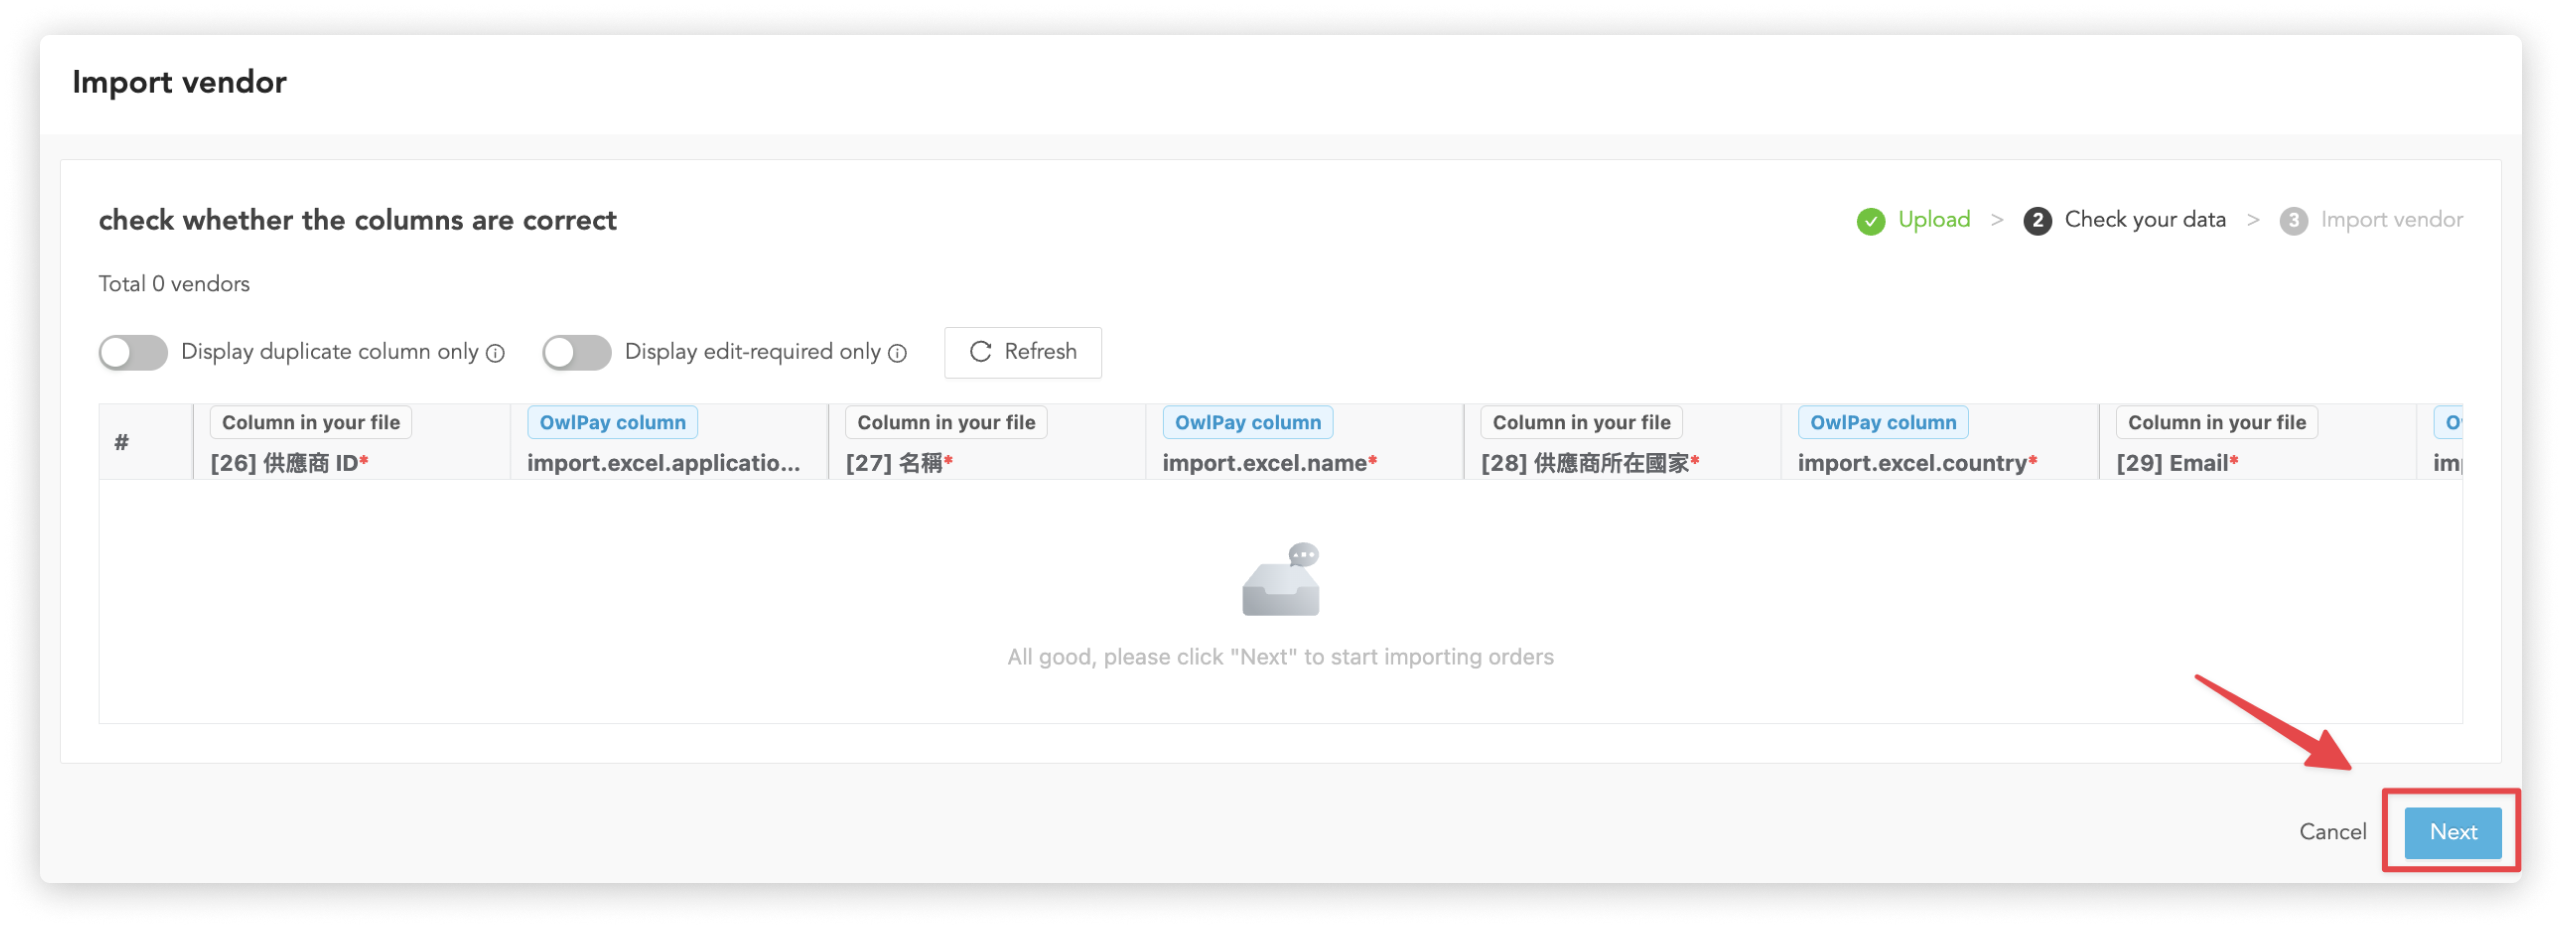
6. Check the content
OwlPay automatically
- checks if there are any fields in the "Upload File" that need to be modified
- displays the fields that need to be modified.
If there is any inconsistent data content, please follow the system prompt to modify it.
Click "Next" after the modification is finished.
7. Import vendors
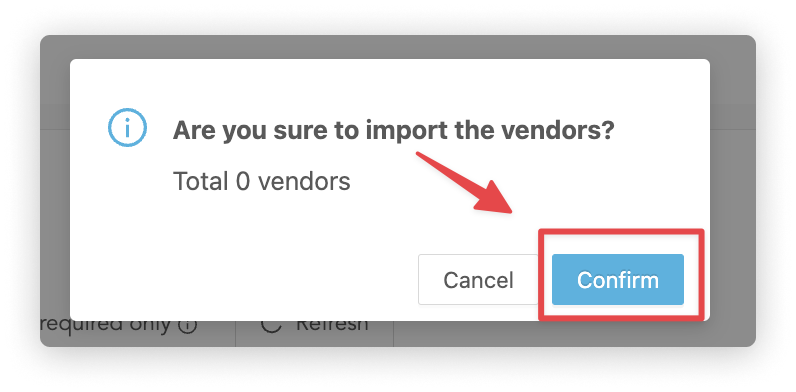
After the OwlPay system is ready, click "Confirm" to import vendors.
How to add receive setting
You need to create a vendor first and then follow the instructions below.
Follow the steps below to set up the vendor receiving payouts information.
We will use the payout method - NIUM BaaS as an example.
1. Click "Vendor information" > click the vendor name you want to set up
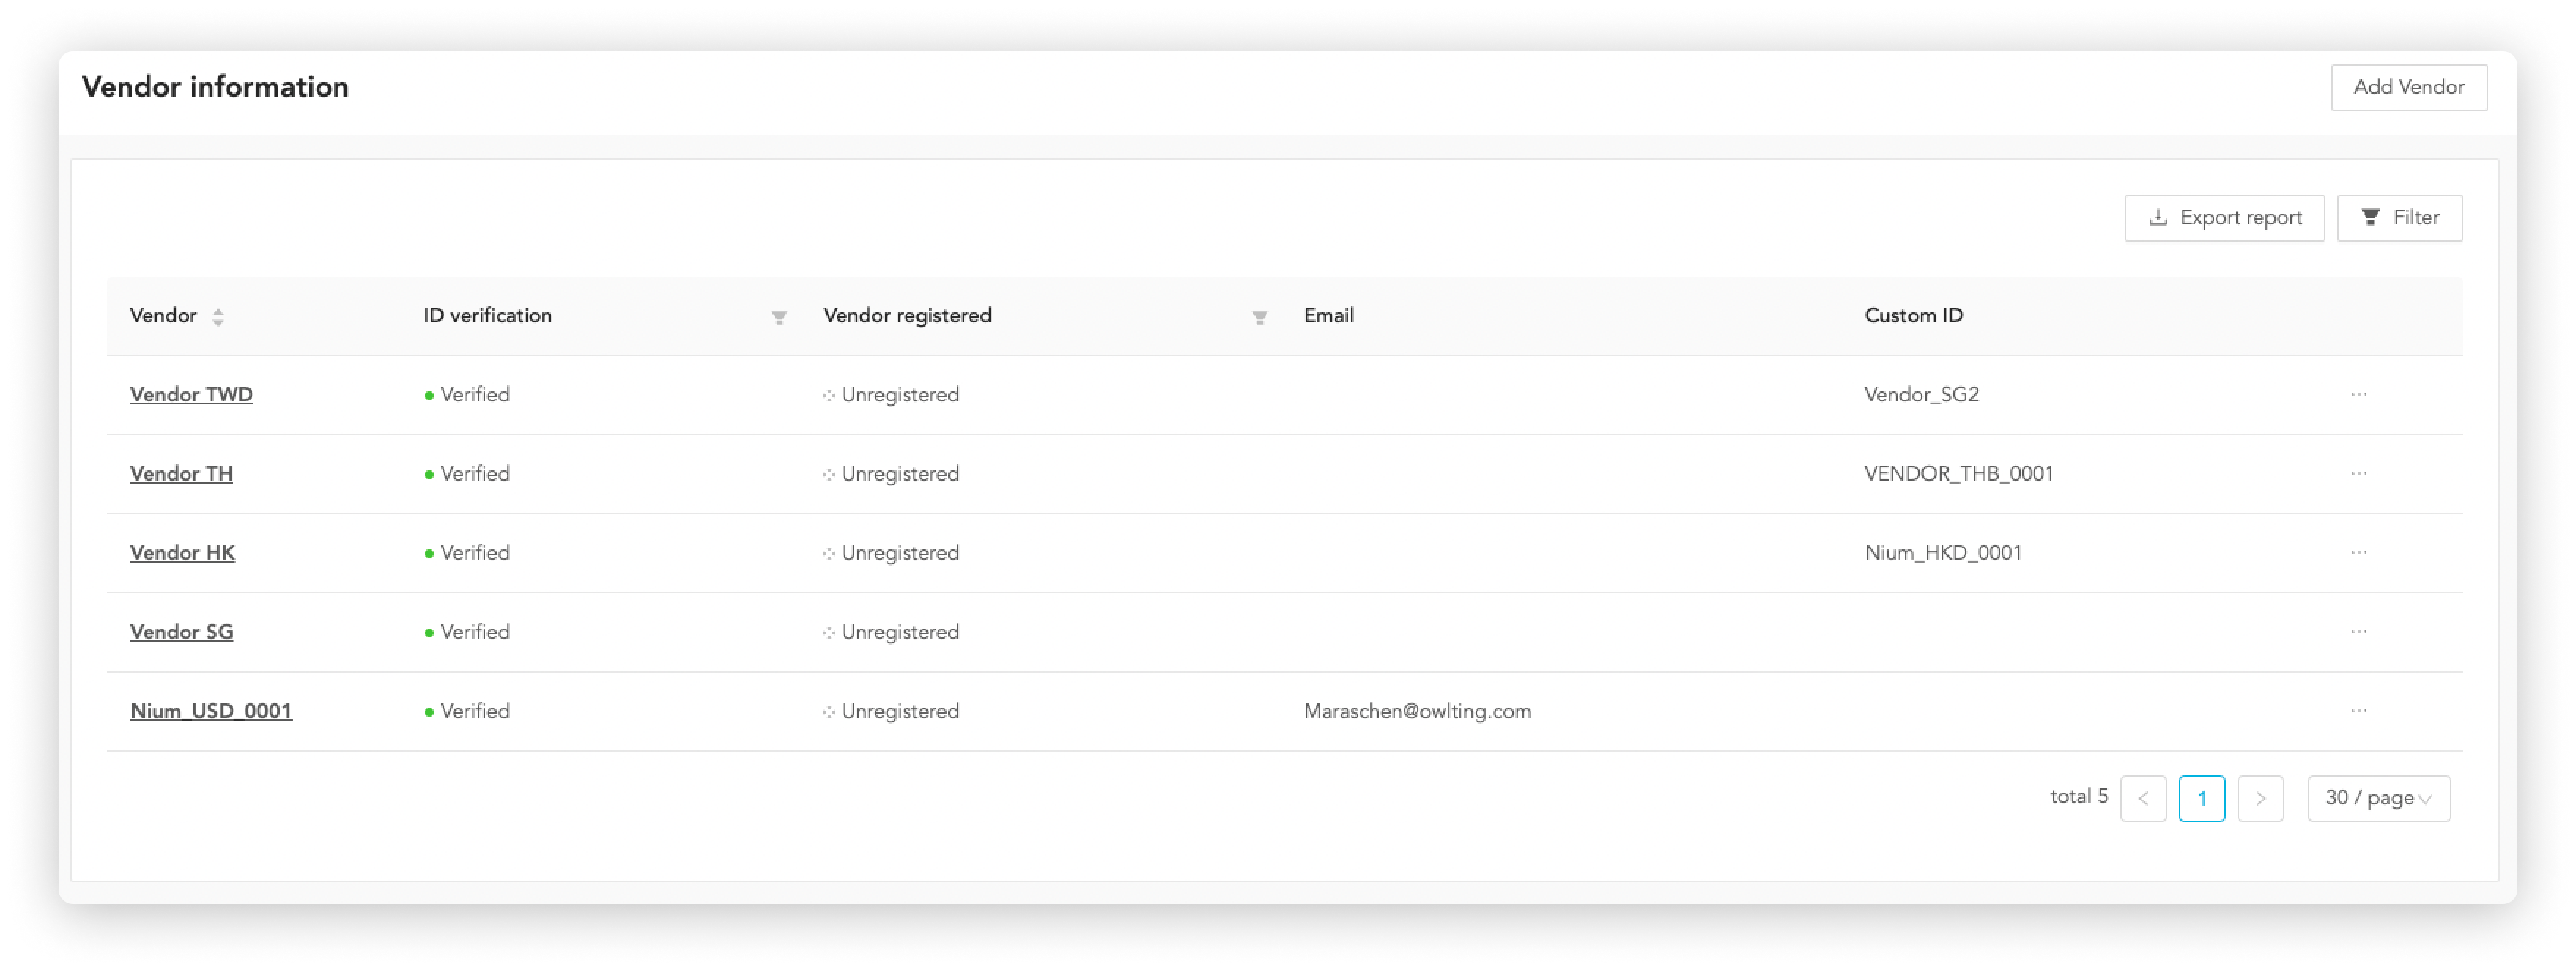
2. Click the "Receive setting" tab
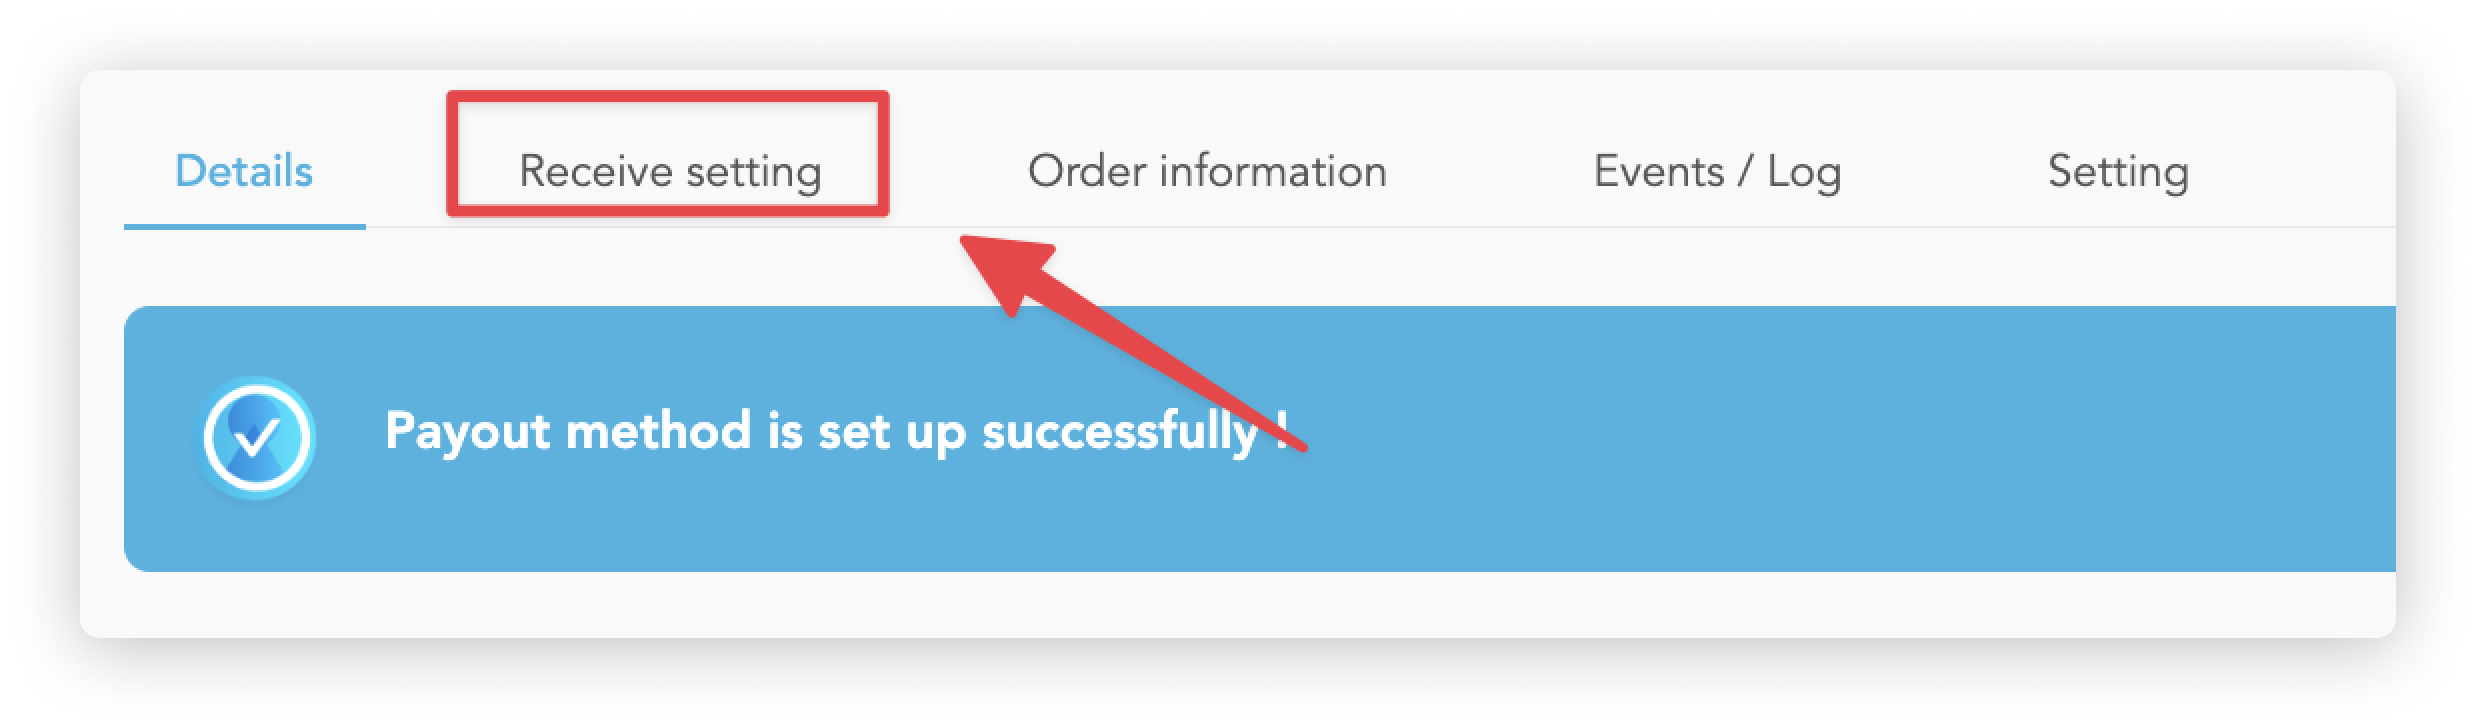
3. Click the country you want to receive payouts
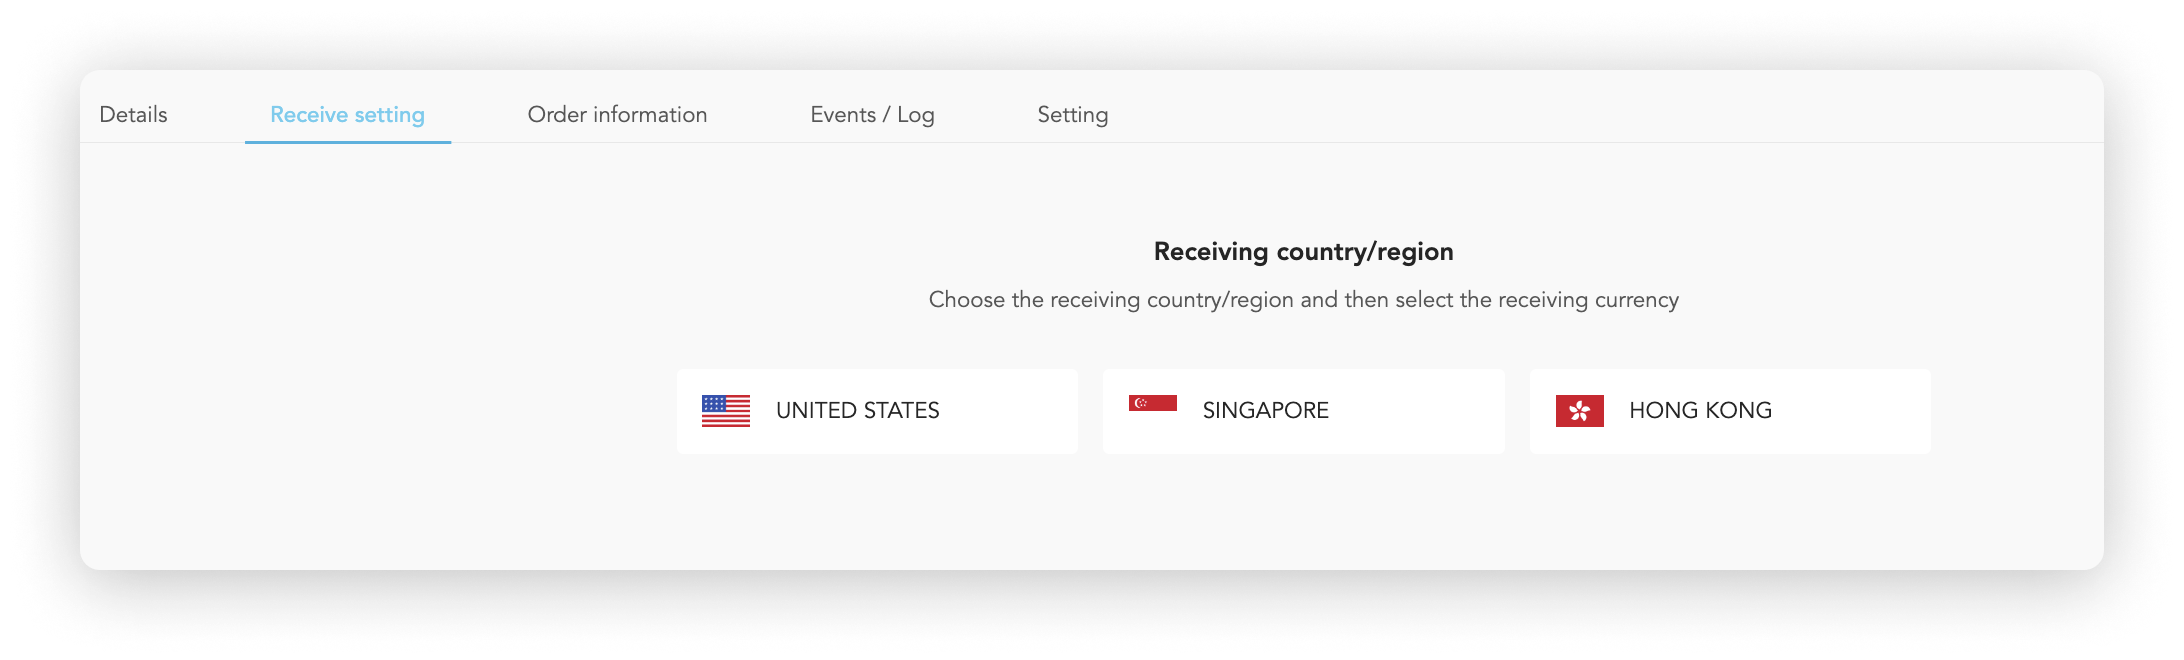
4. Click "Setting" on the currency you want to add
Below is an example of using SGD to receive payouts.
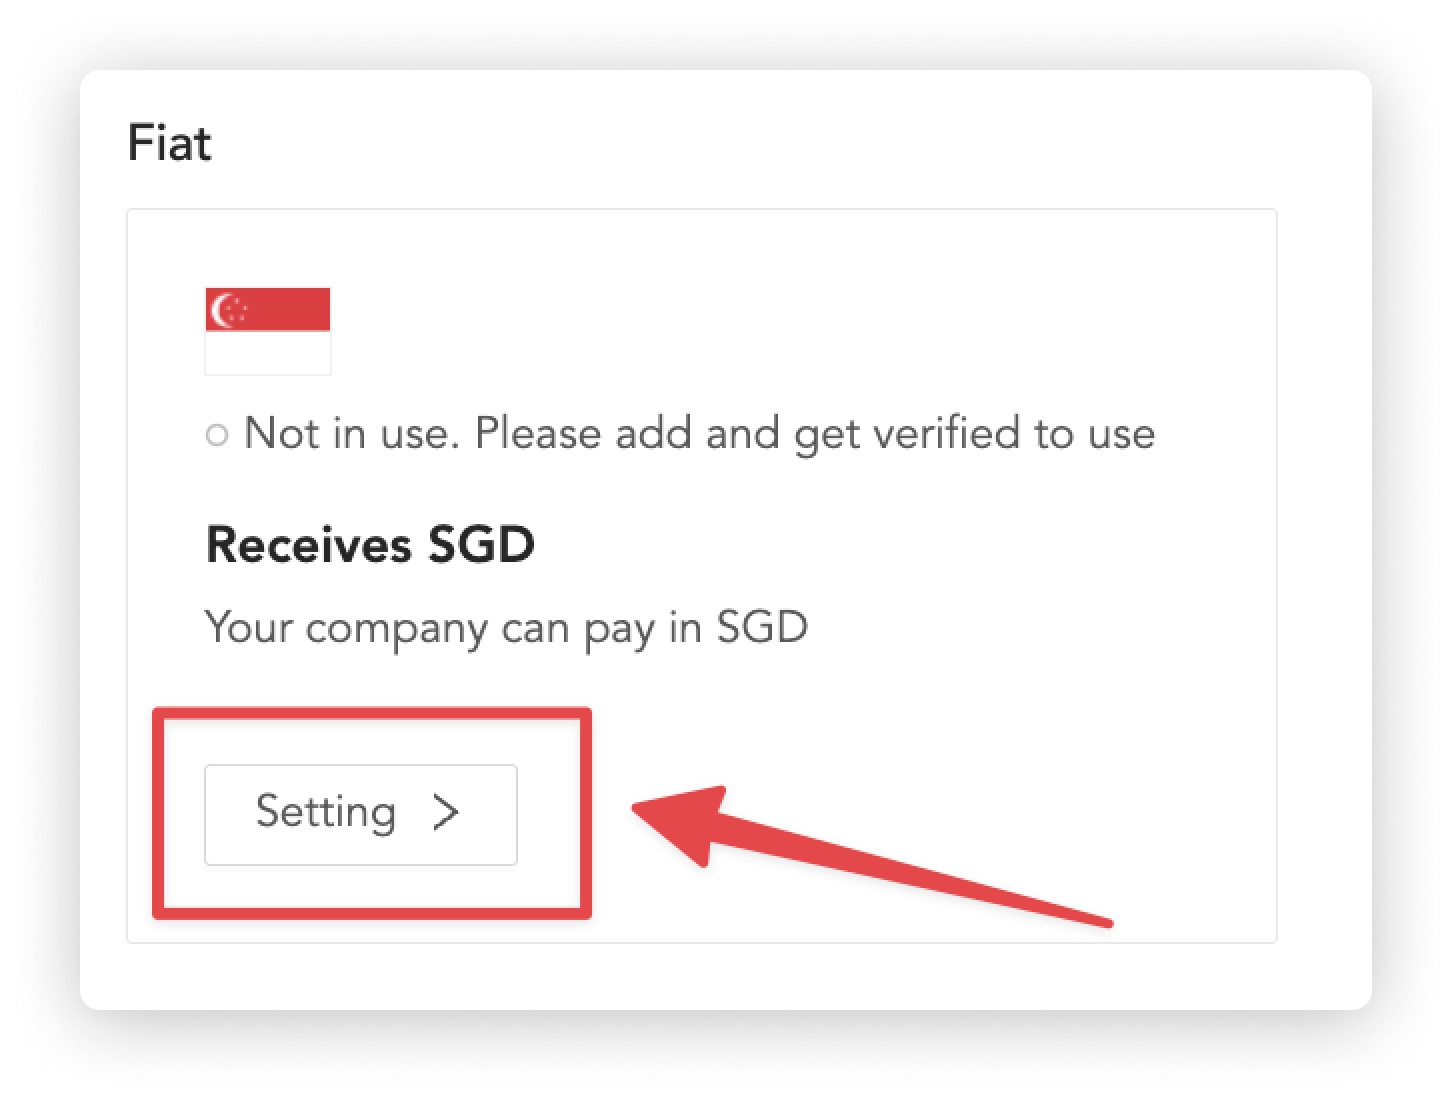
The country you set on the country/region you want to receive payouts page determines the currency that can be set on this page.
For example, if the company clicks "Taiwan", the vendor can only set "New Taiwan Dollars" as the receiving currency.
5. Click "Received by fiat" > "NIUM"
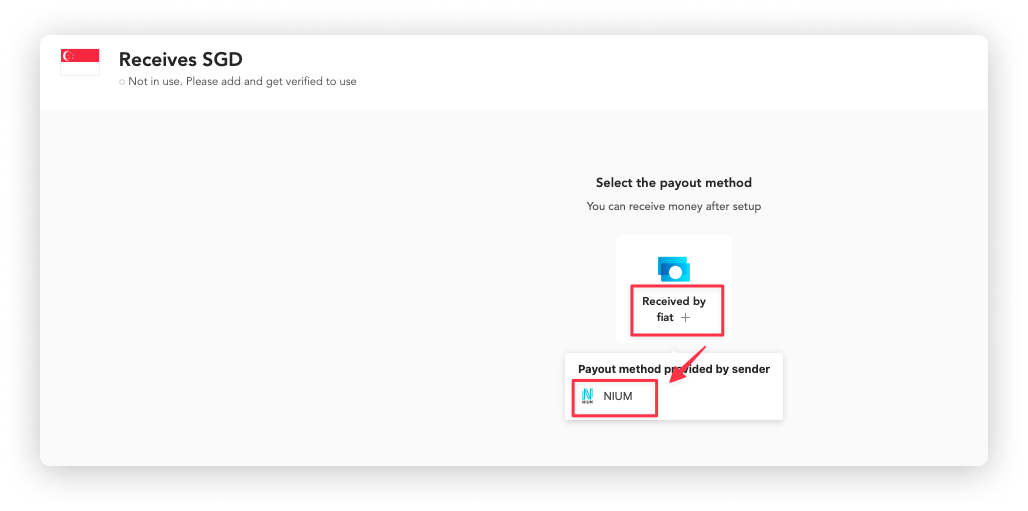
6. Click "Add" on the Company profile section
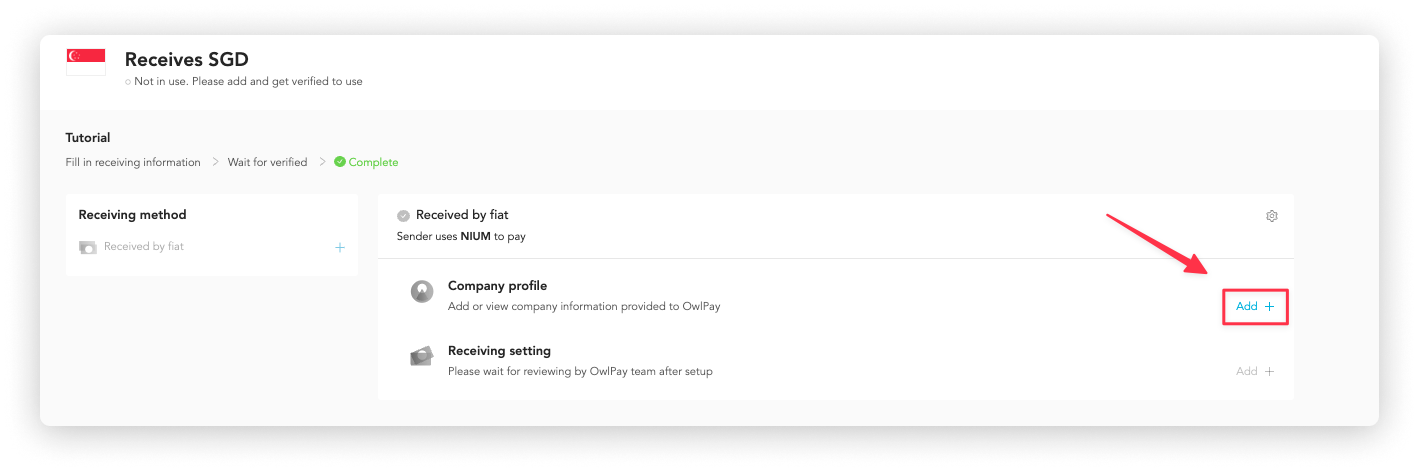
- You will be redirected to the "OwlTing AML Identity Verification" page. Fill in your vendor's receiving account number
- Click "Submit" upon completion.
7. Click "Add" on Receiving setting section
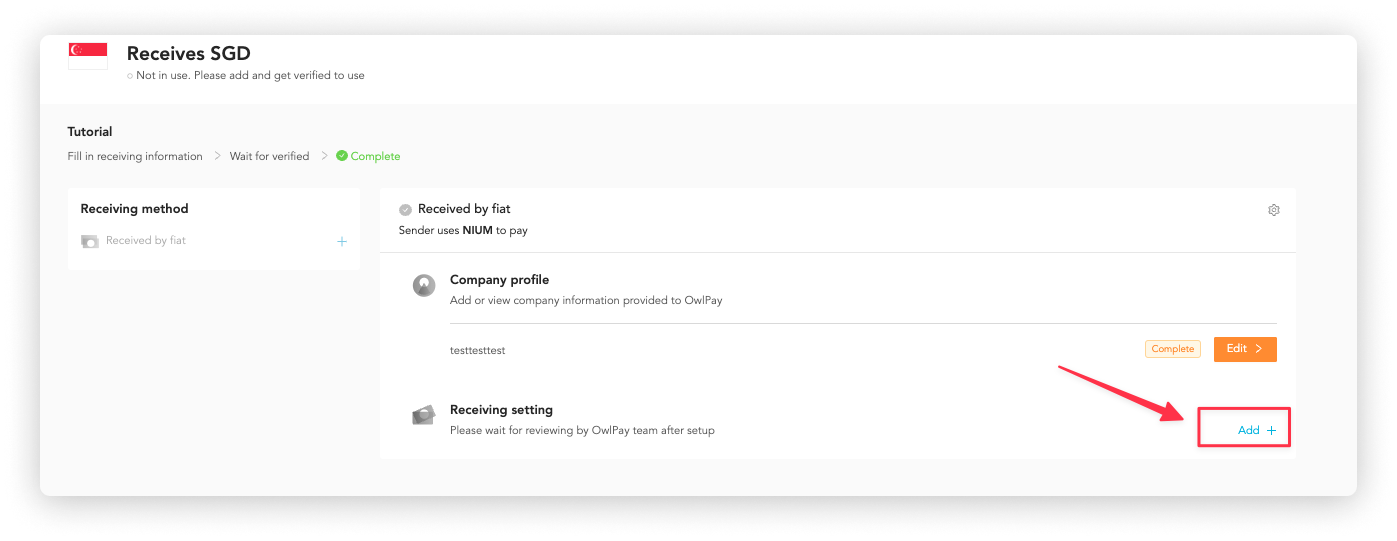
- You will be redirected to the "OwlTing AML Identity Verification" page. Fill in your vendor's receiving account number
- Click "Submit" upon completion.
8. Wait for verification by OwlPay
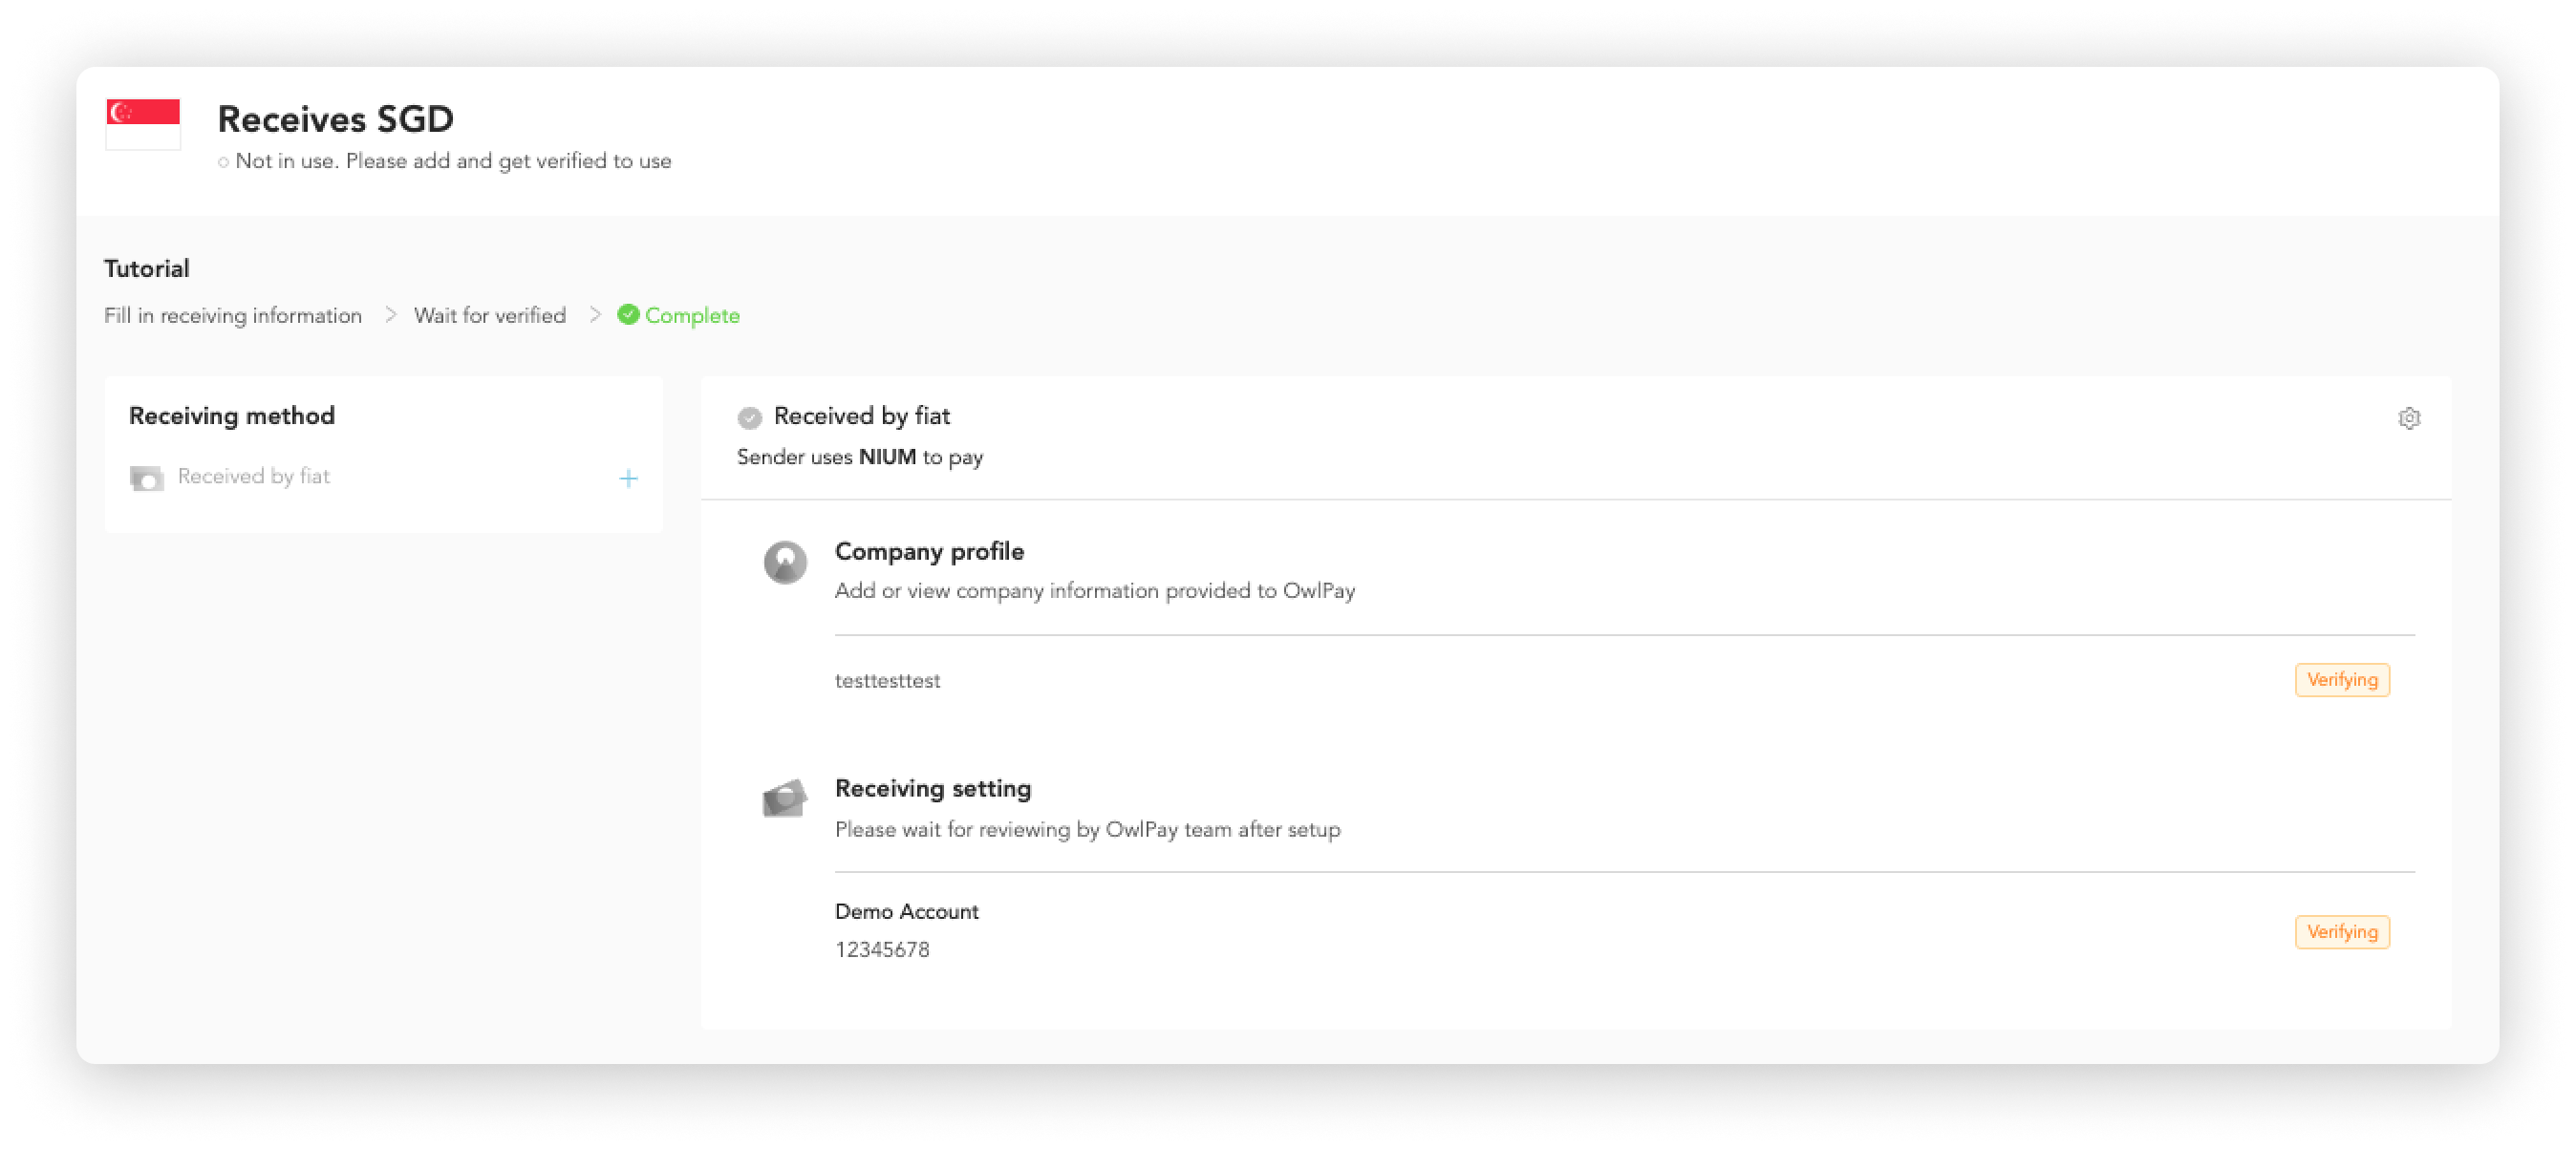
- The OwlPay team will verify this information and notify you through email once the verification is done.
- You can start to receive payouts through SGD now.
How to add the USDC receiving payout (Stablecoin)
You must complete below 1 steps first:
1. Click "Vendor information" > click the vendor name you want to set up
2. Click the "Receive setting" tab
3. Choose the Receiving country/region
4. Click "Setting" on USDC
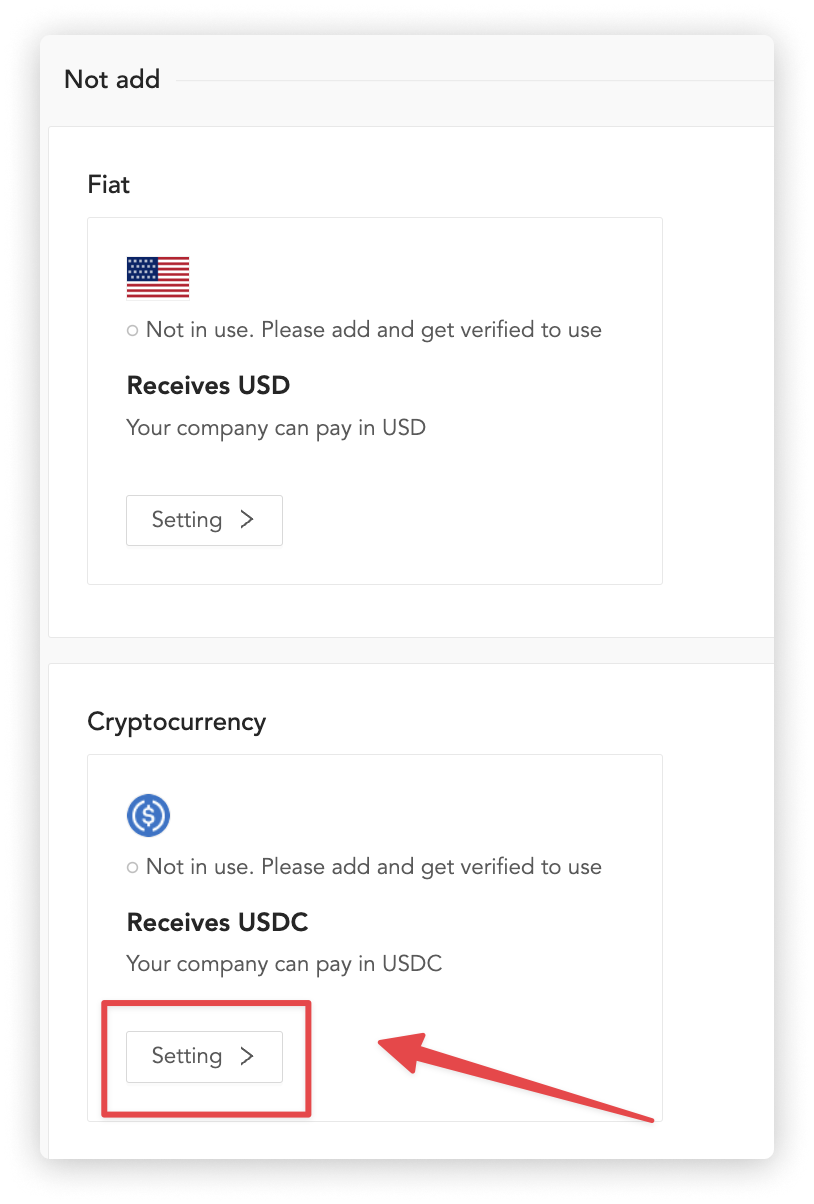
5. Click "Stablecoin" > click "Circle"
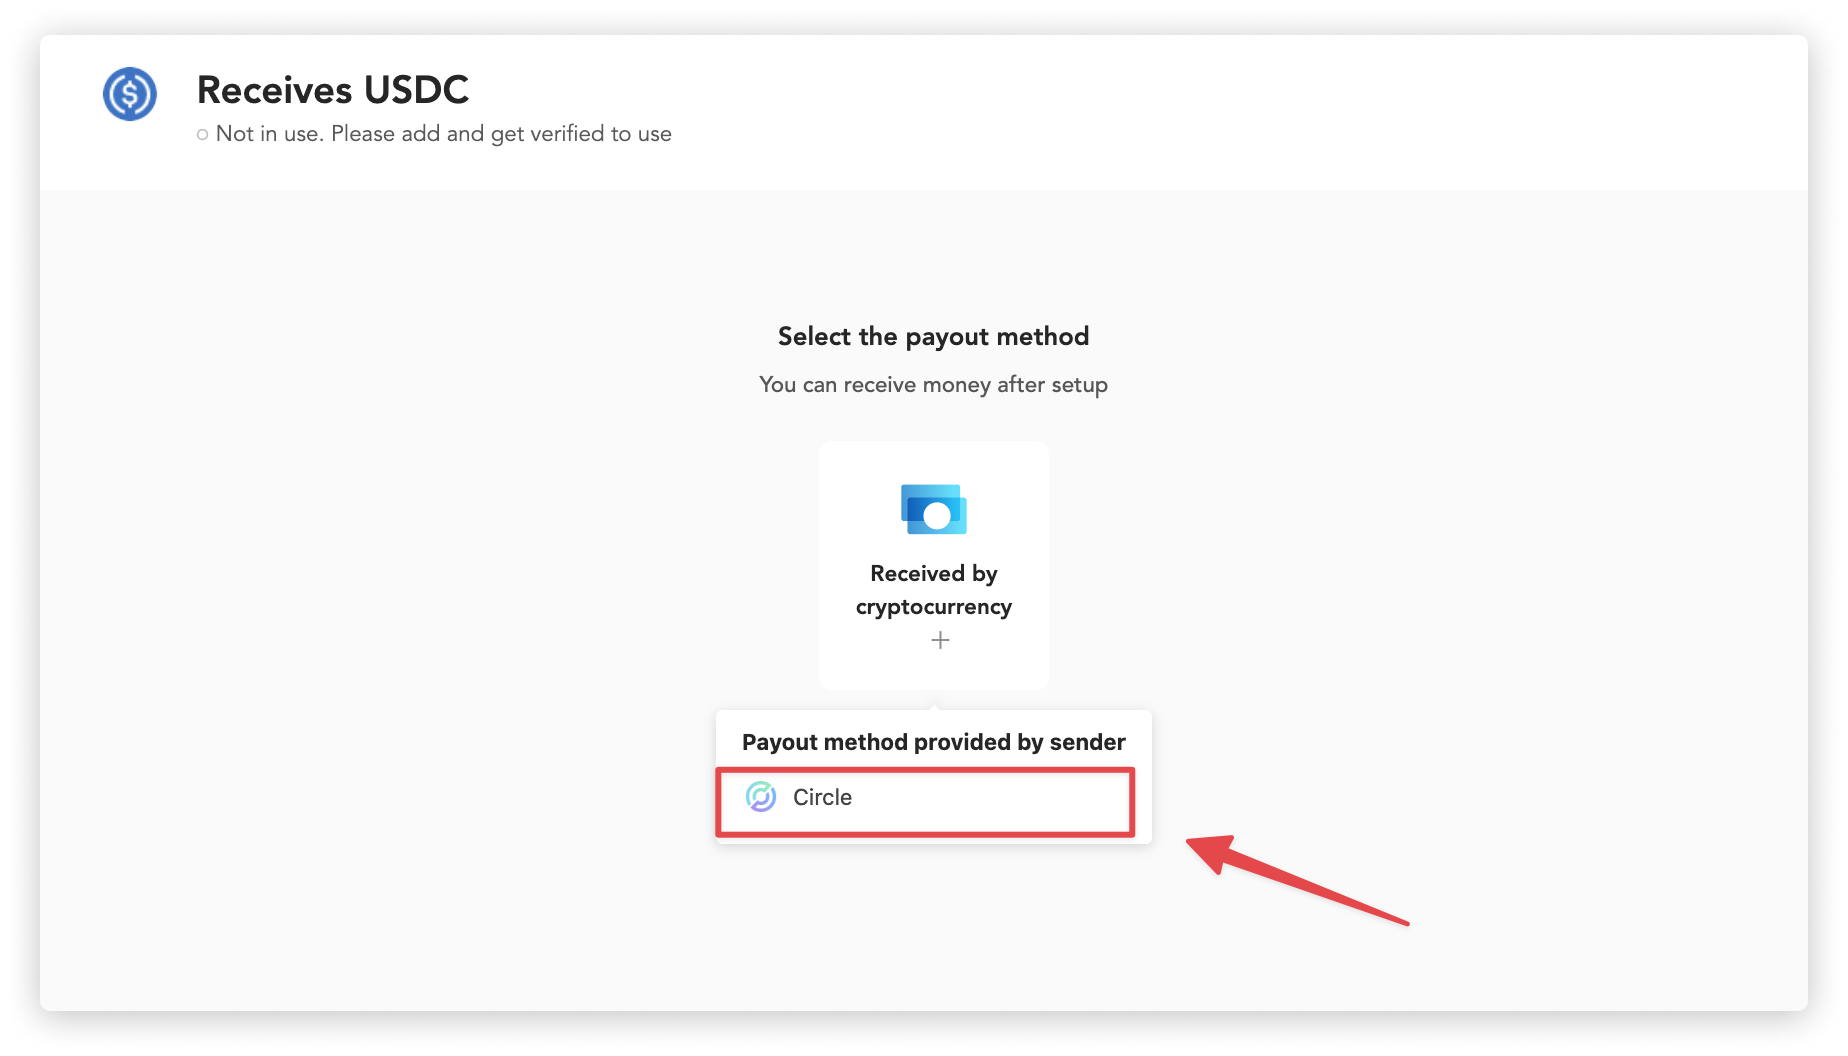
6. Click "Add" on Company information section
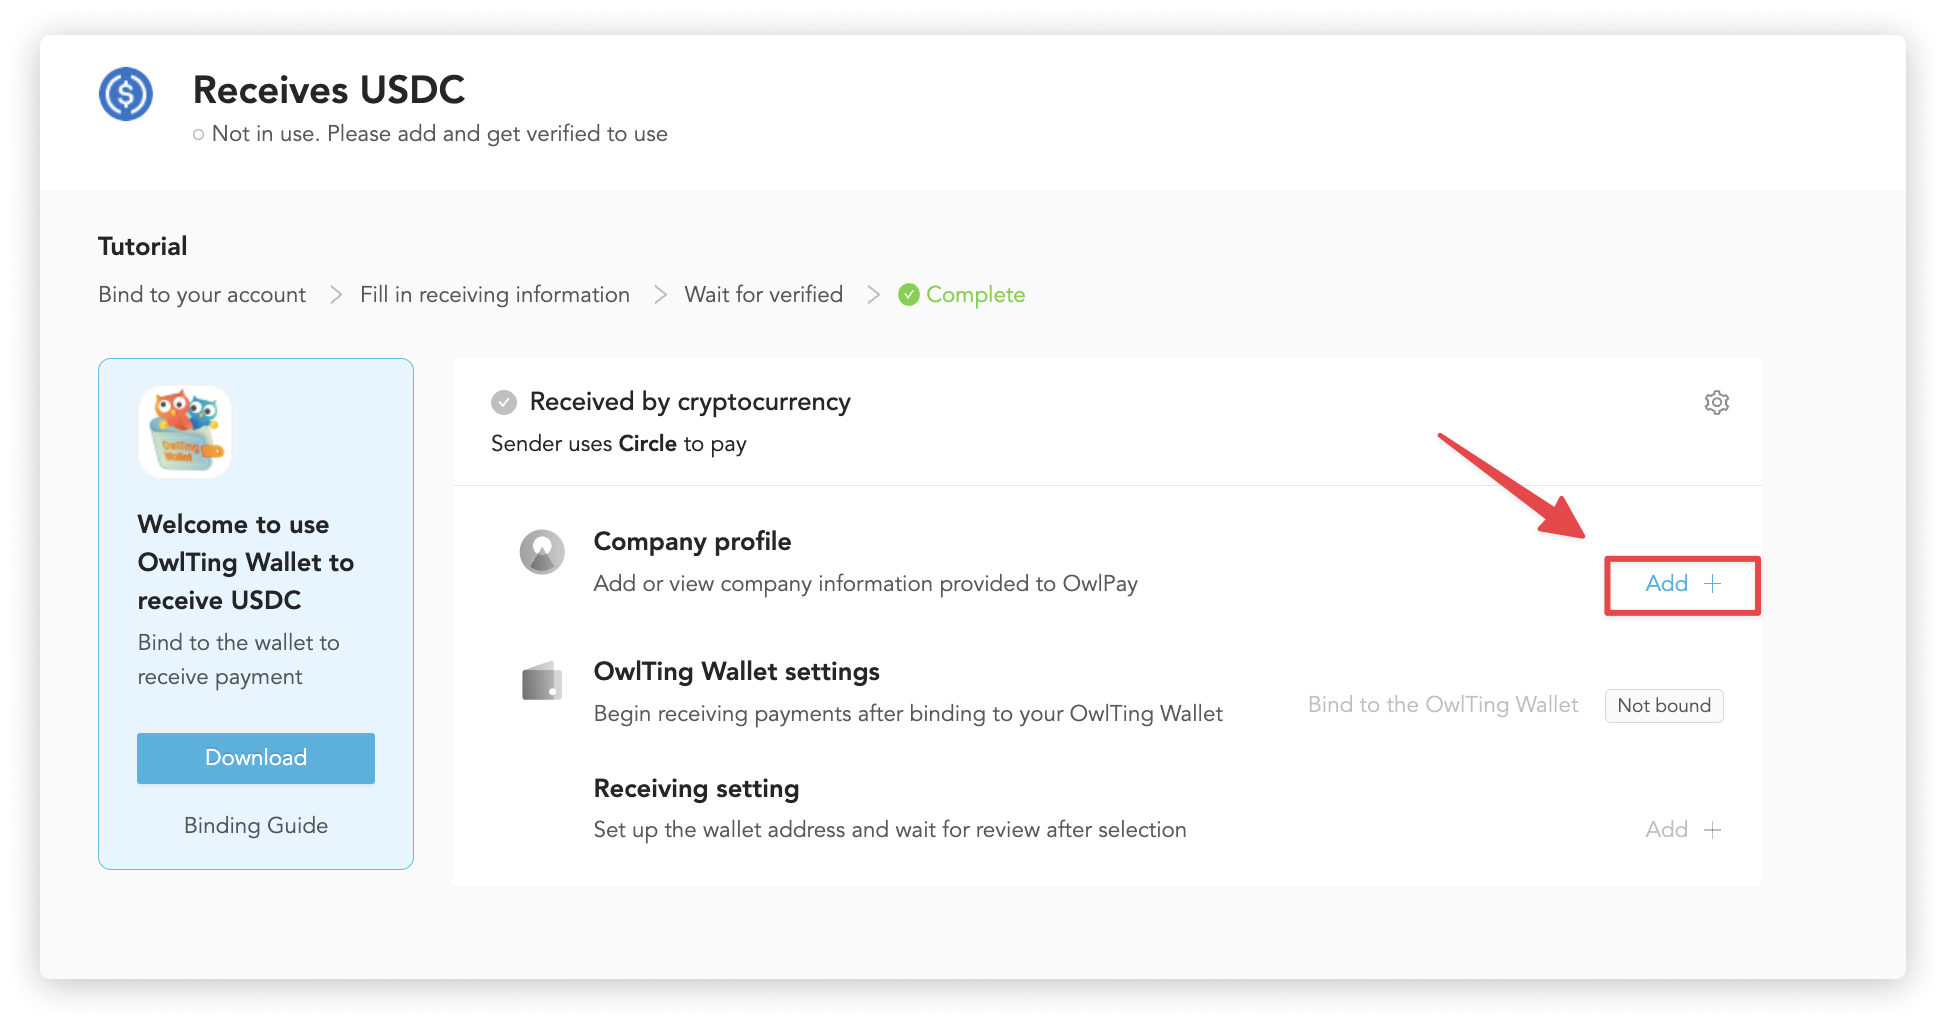
- You will be redirected to the "AML - KYC Identity Verification" page.
- Fill in your vendor's receiving account number and click "Send" after completing.
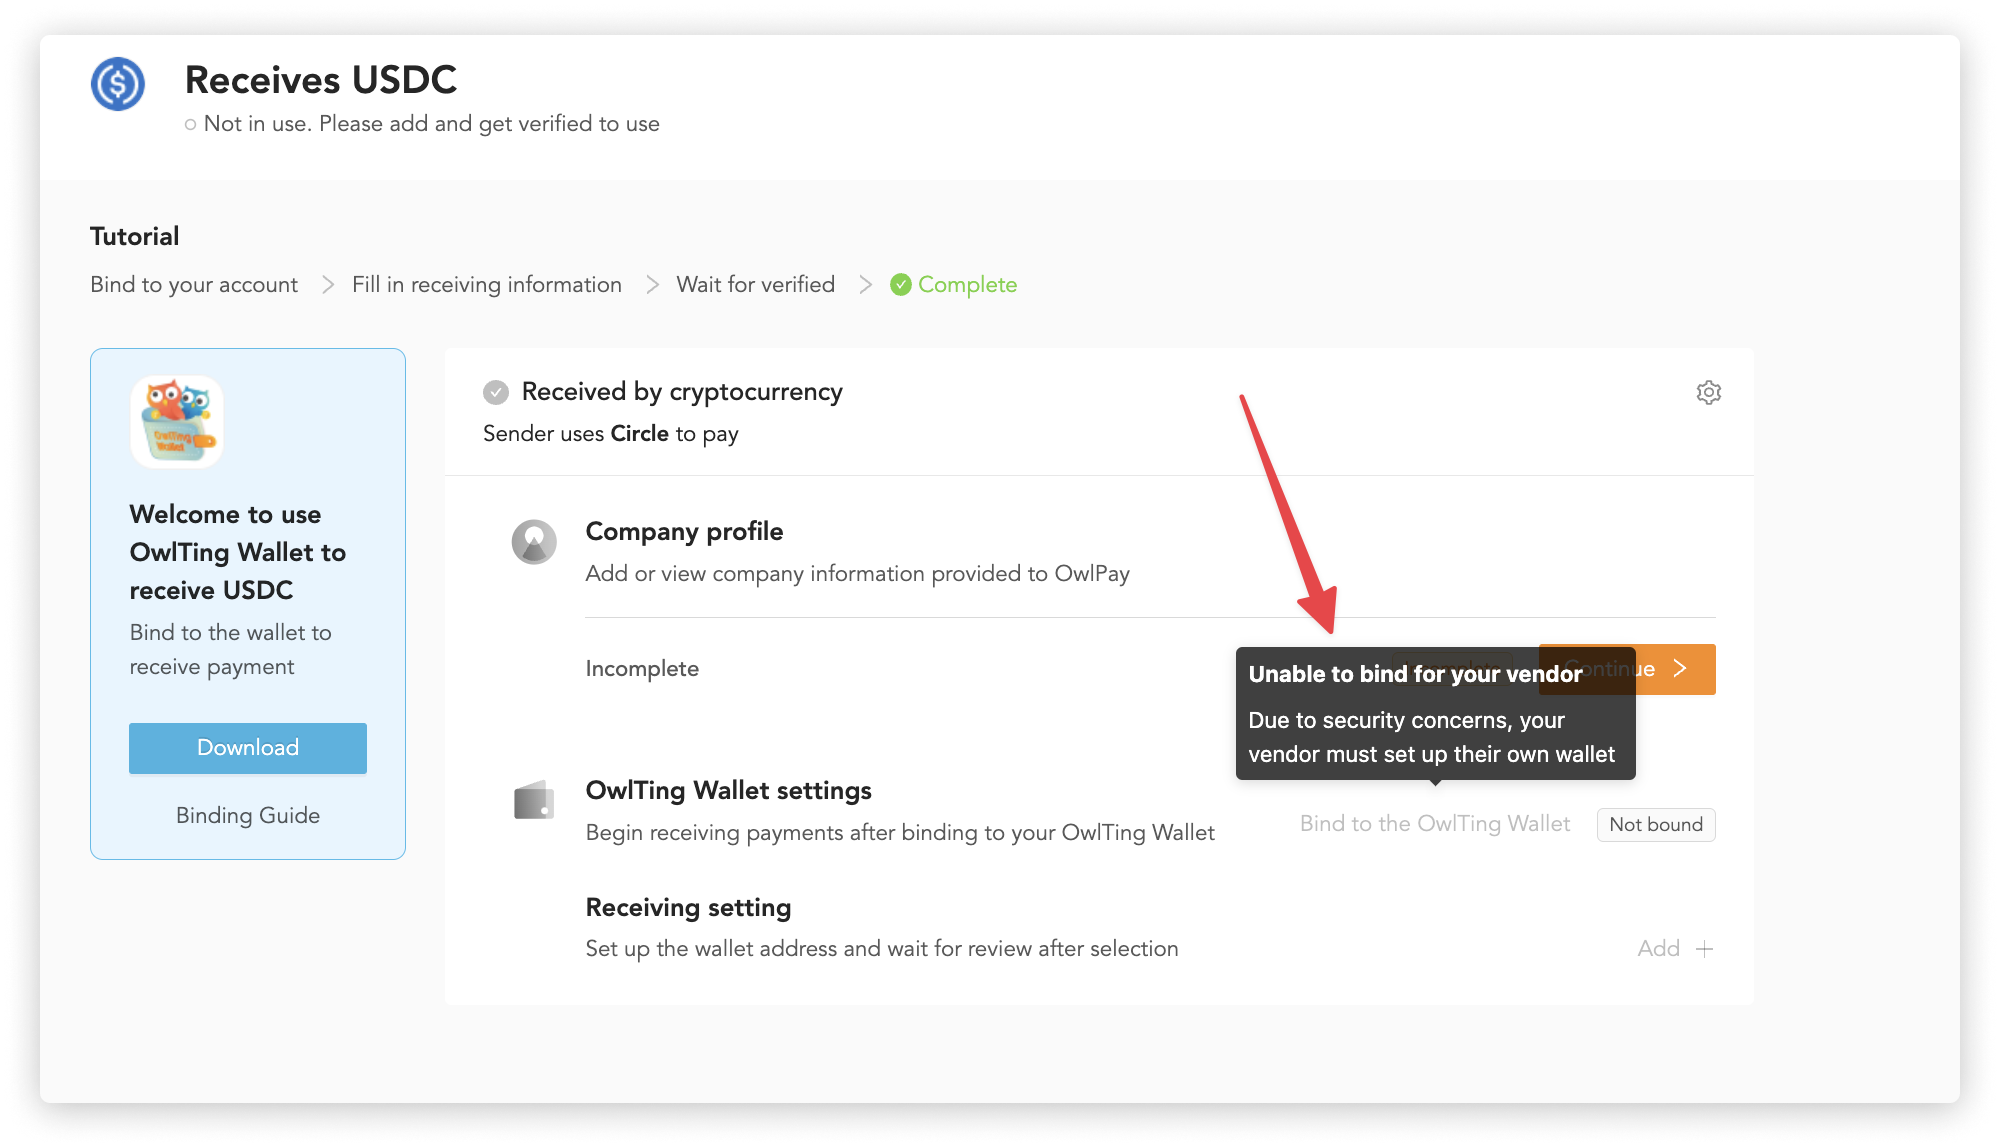
7. Inform your vendor to click "Bind the OwlTing Wallet" on the OwlTing Wallet section
You cannot bind the OwlTing Wallet for your vendor.
The vendor must use the OwlTing Wallet on his phone to complete the binding process.
Please inform the vendor to bind the wallet on the "USDC Receiving" page. (refer to Click "Bind the OwlTing Wallet" on the OwlTing Wallet section
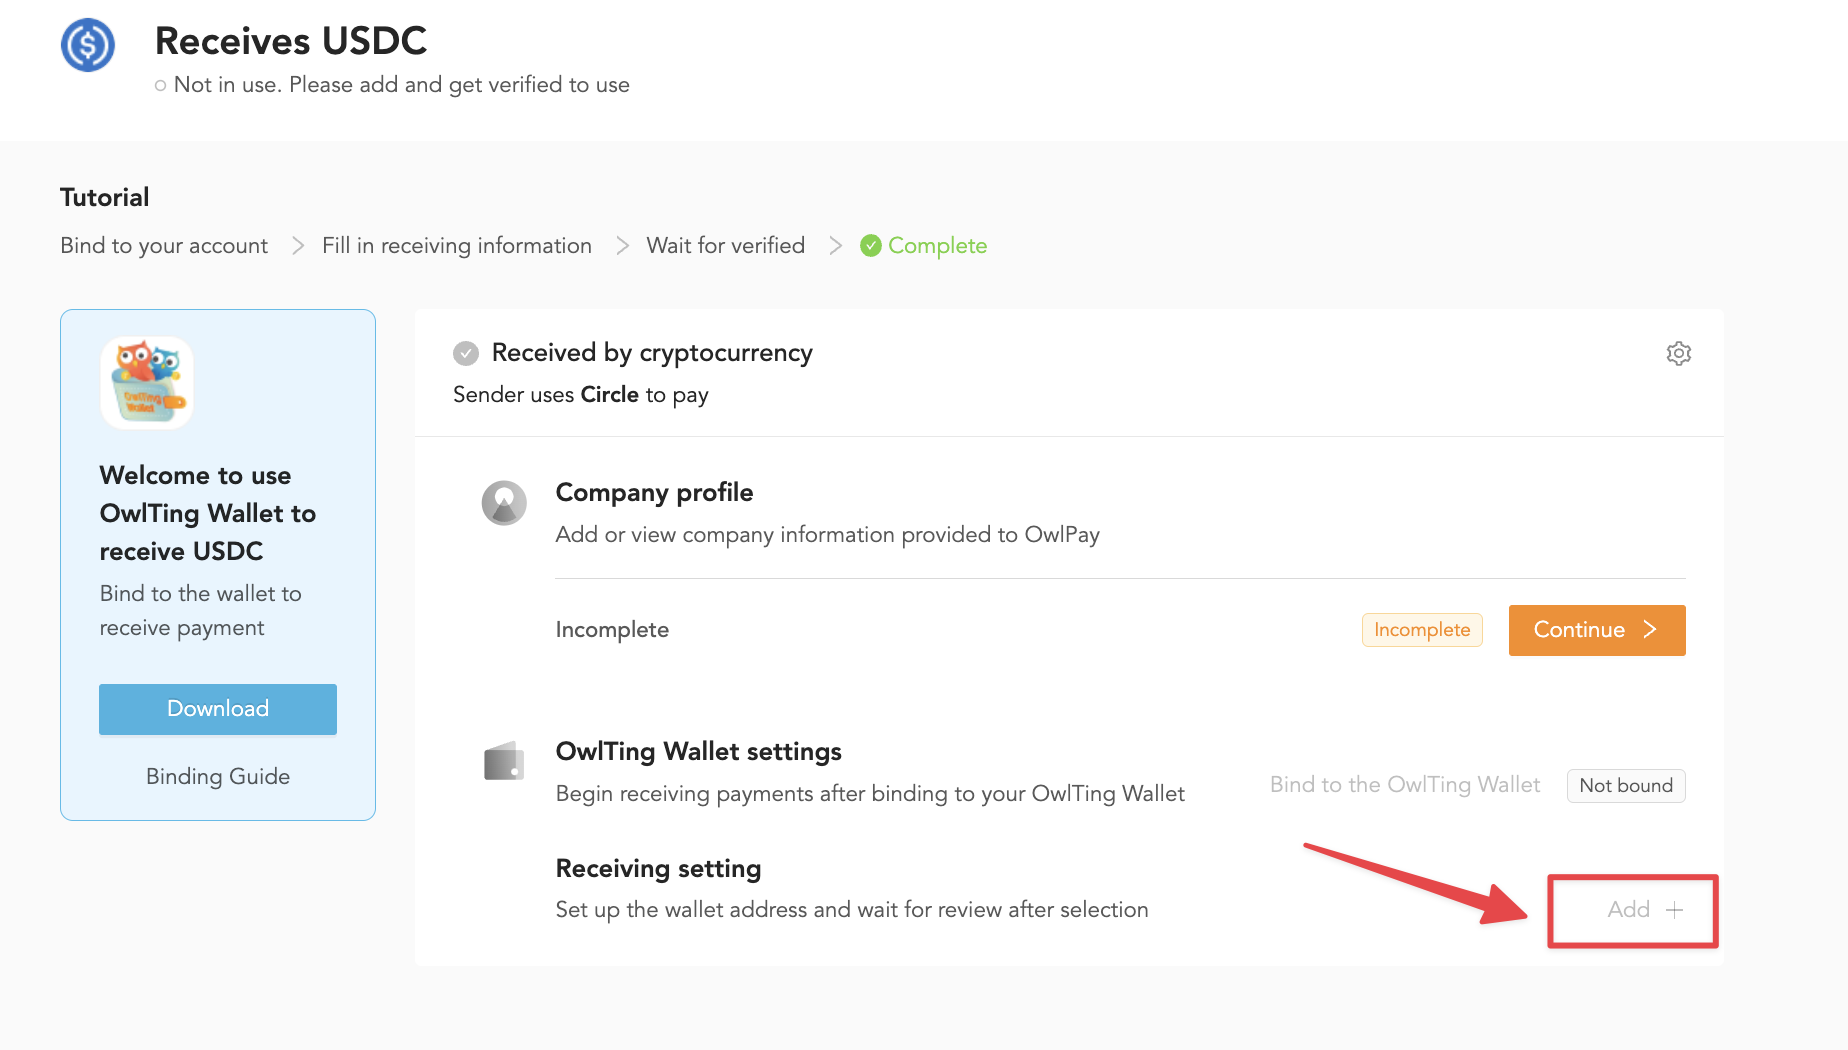
8. Inform your vendor to "Add" on the Receiving setting section
You can not add the receiving information for your vendor. Please inform the vendor to add.
9. Wait for verifying
The OwlPay team will verify this information and notify you through email once the verification is done.
How to edit receiving setting
Follow the steps below to edit the vendor receiving setting.
1. Go to "Settings" > "Vendor Information", click the name of the vendor you want to configure
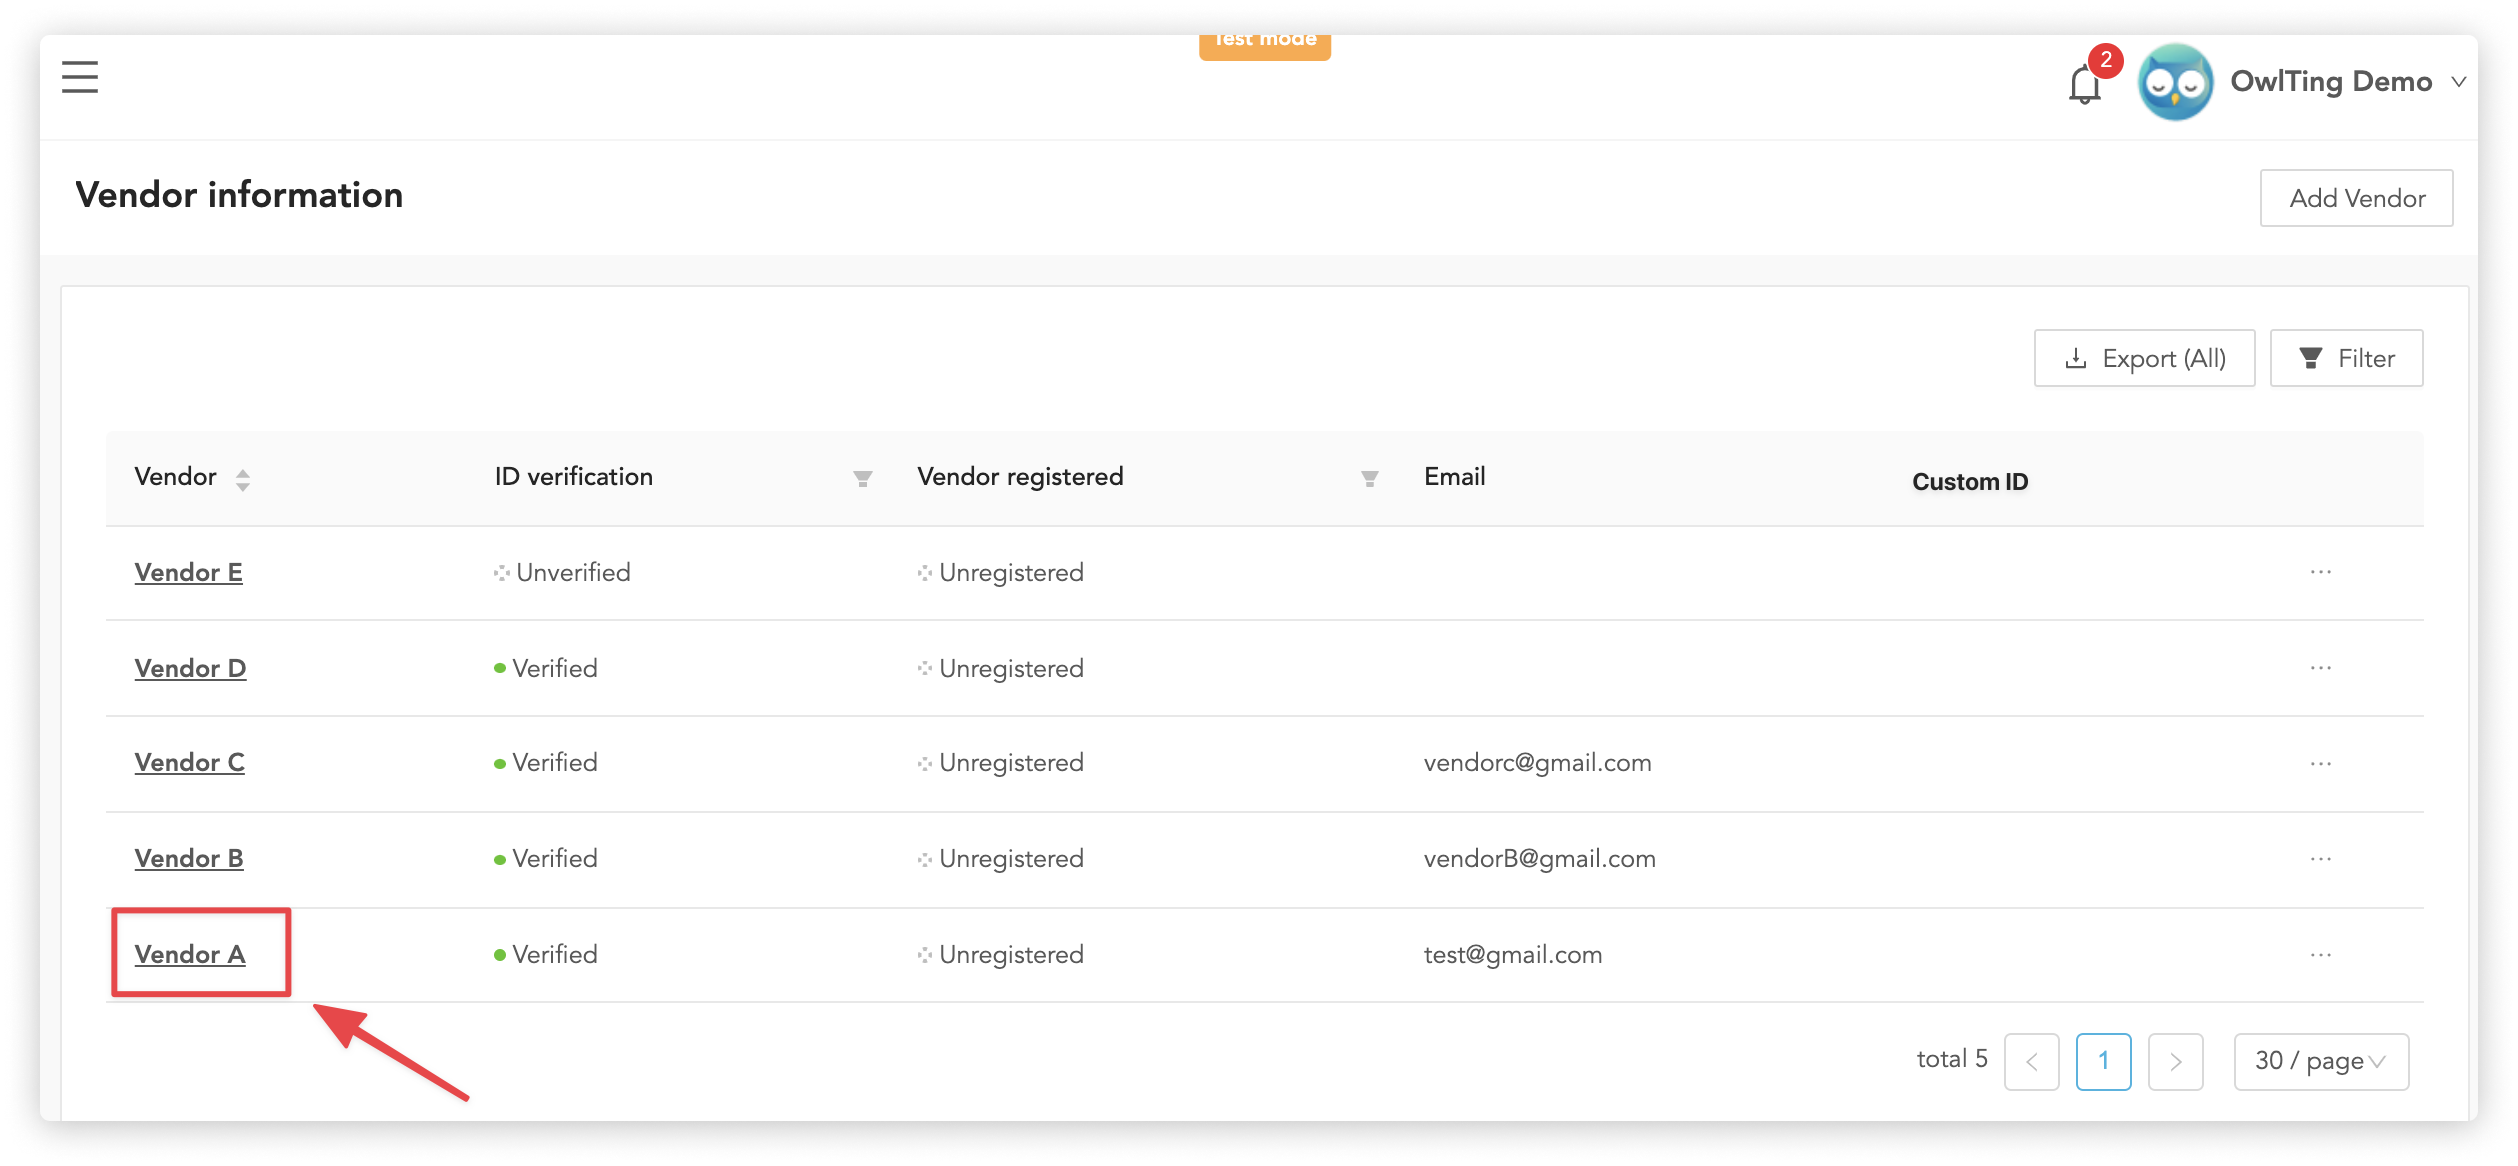
2. Click on the "Receiving Settings" tab

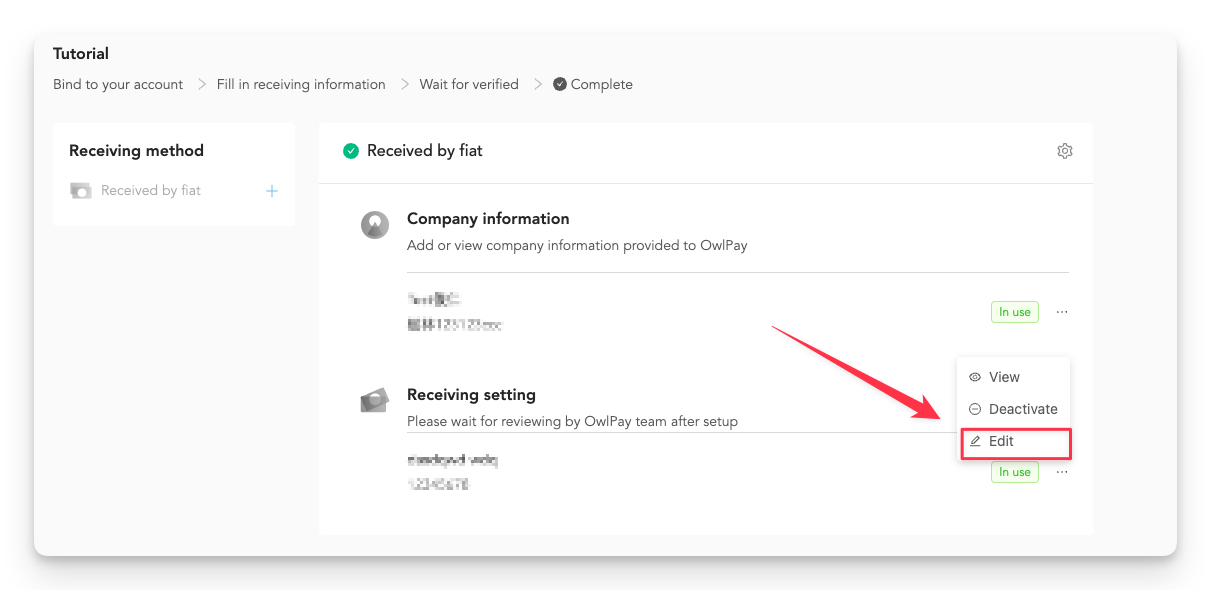
5. In the receiving settings section, click ... > Edit
How to view and edit vendor information
On the "Vendor information" page, click vendor name to view and edit vendor information.
On the specific vendor information page, you will see 3 sections:
- Details
- Receive setting
- Order information
- Events/ Log
Details
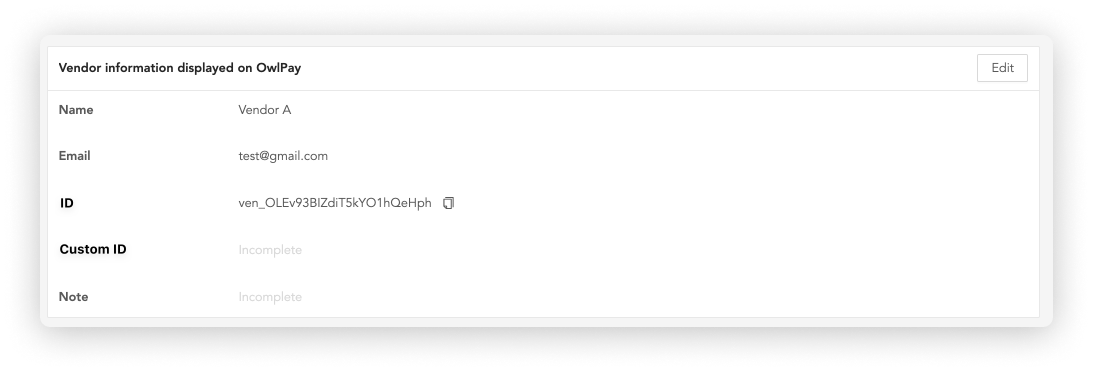
This vendor information will display on OwlPay.
- Name: vendor's display name on OwlPay platform
- Email: vendor’s contact email
- ID: vendor’s system id on OwlPay. If you have any engineering issues in the future, you can provide this id to your OwlPay contact window. Our engineering team can troubleshoot your issues more quickly.
- Custom ID: you can enter a more memorable id for your vendors to facilitate management.
- Note: you can add notes on this vendor.
Receive setting
Refer to Add receiving payout information.
Order information
Display all order information of this vendor.
Events/ Log
Show the history of the vendor's actions on the OwlPay platform:
- Event Log: Actions performed by the vendor on OwlPay
- Log: API log, this block is mainly for the developer's reference
How to invite vendor to join OwlPay
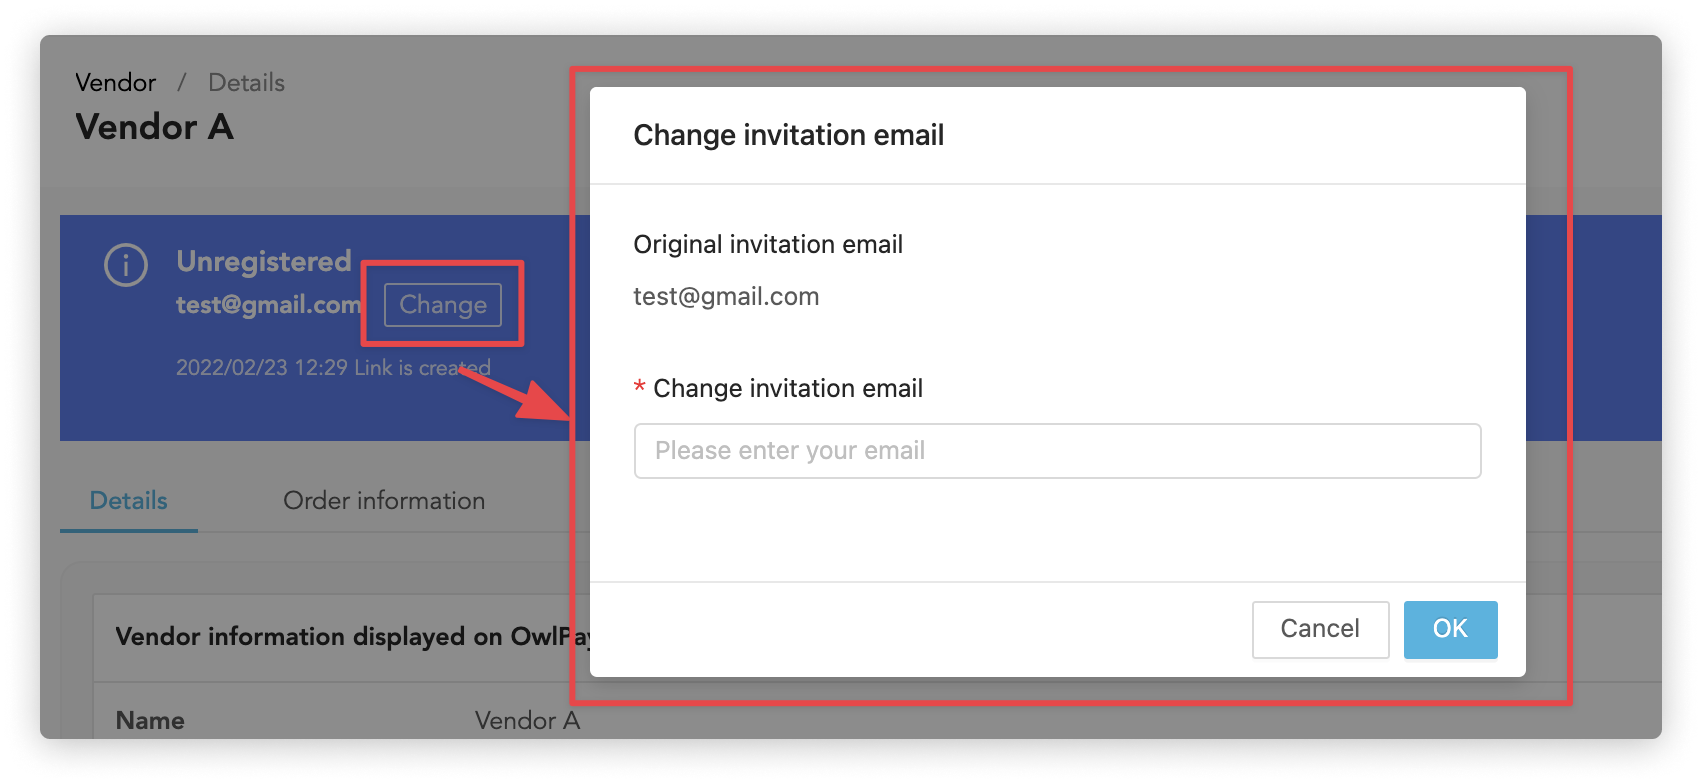
You can invite your company's vendor(s) to join OwlPay to facilitate subsequent payout processing. When you first add a vendor, OwlPay will send an invitation email to your vendor contact's email.
If the vendor contact does not receive the email, you can :
- Change Email: change to the correct email and click "Resend Invitation”
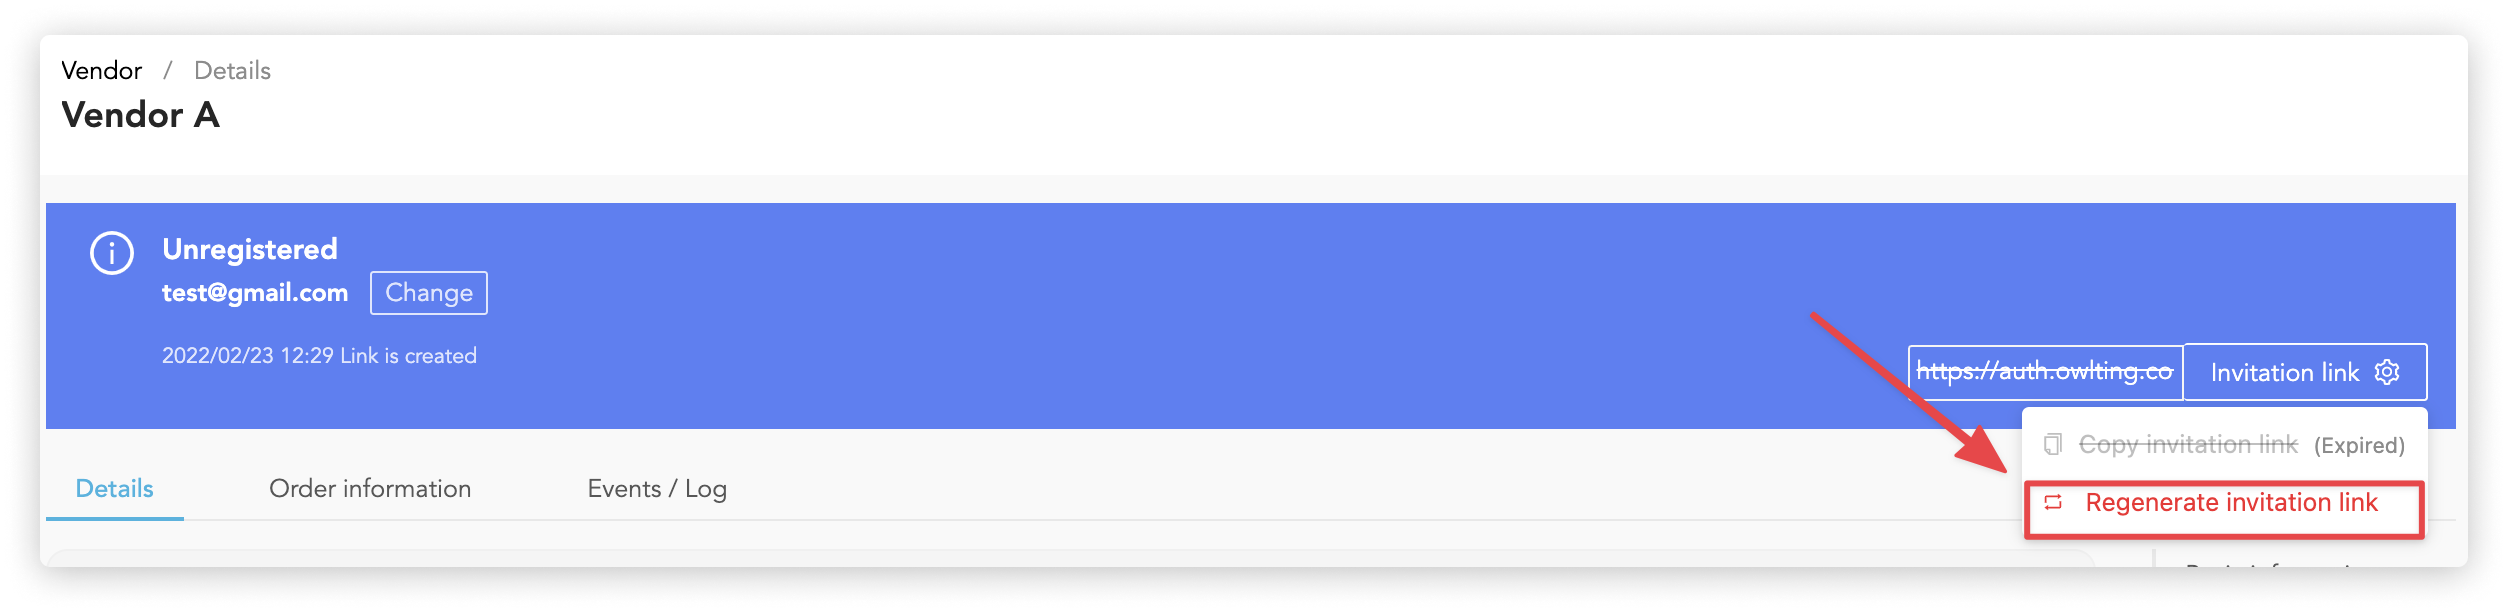
- Copy invitation link: Copy the invitation link and provide it to the vendor contact to sign up for OwlPay directly through the link
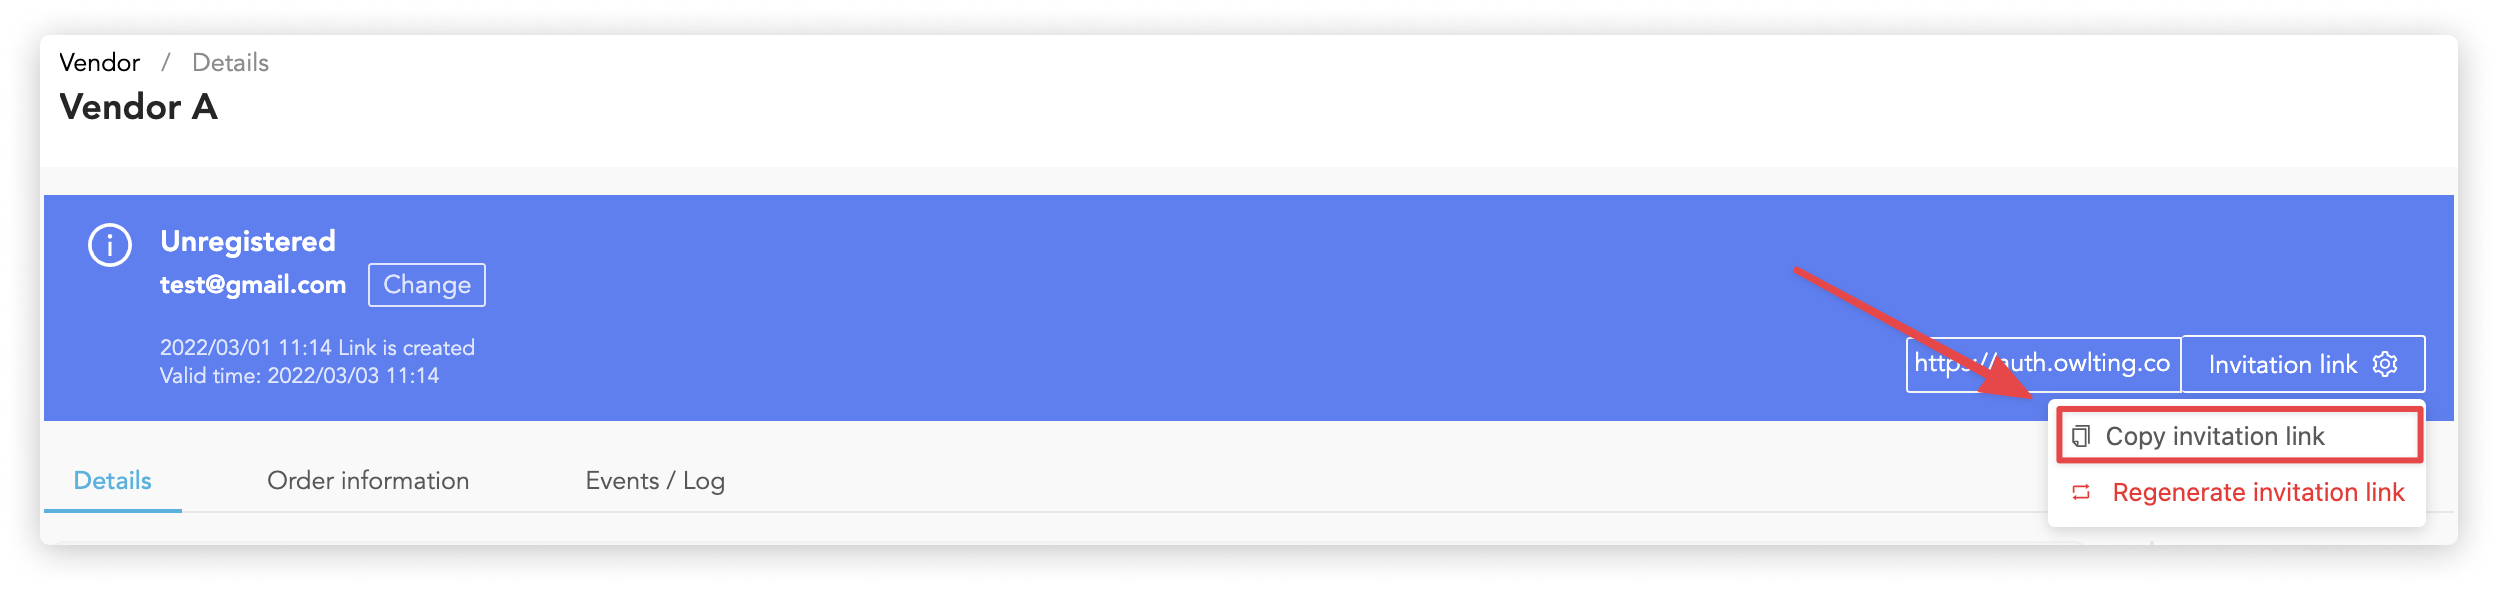
- Regenerate invitation link: If the system says that the invitation link has expired, you can click "Regenerate Invitation Link" and send it to the supplier contact again.