Payout
Making payout to the specific vendor through OwlPay.
"Payout" refers to the remittance of your reconciliation order sales to the vendor through OwlPay's partner banks. You can specify when each payout request should be remitted.
Make sure you complete the Two-step verification before you start the payout process.
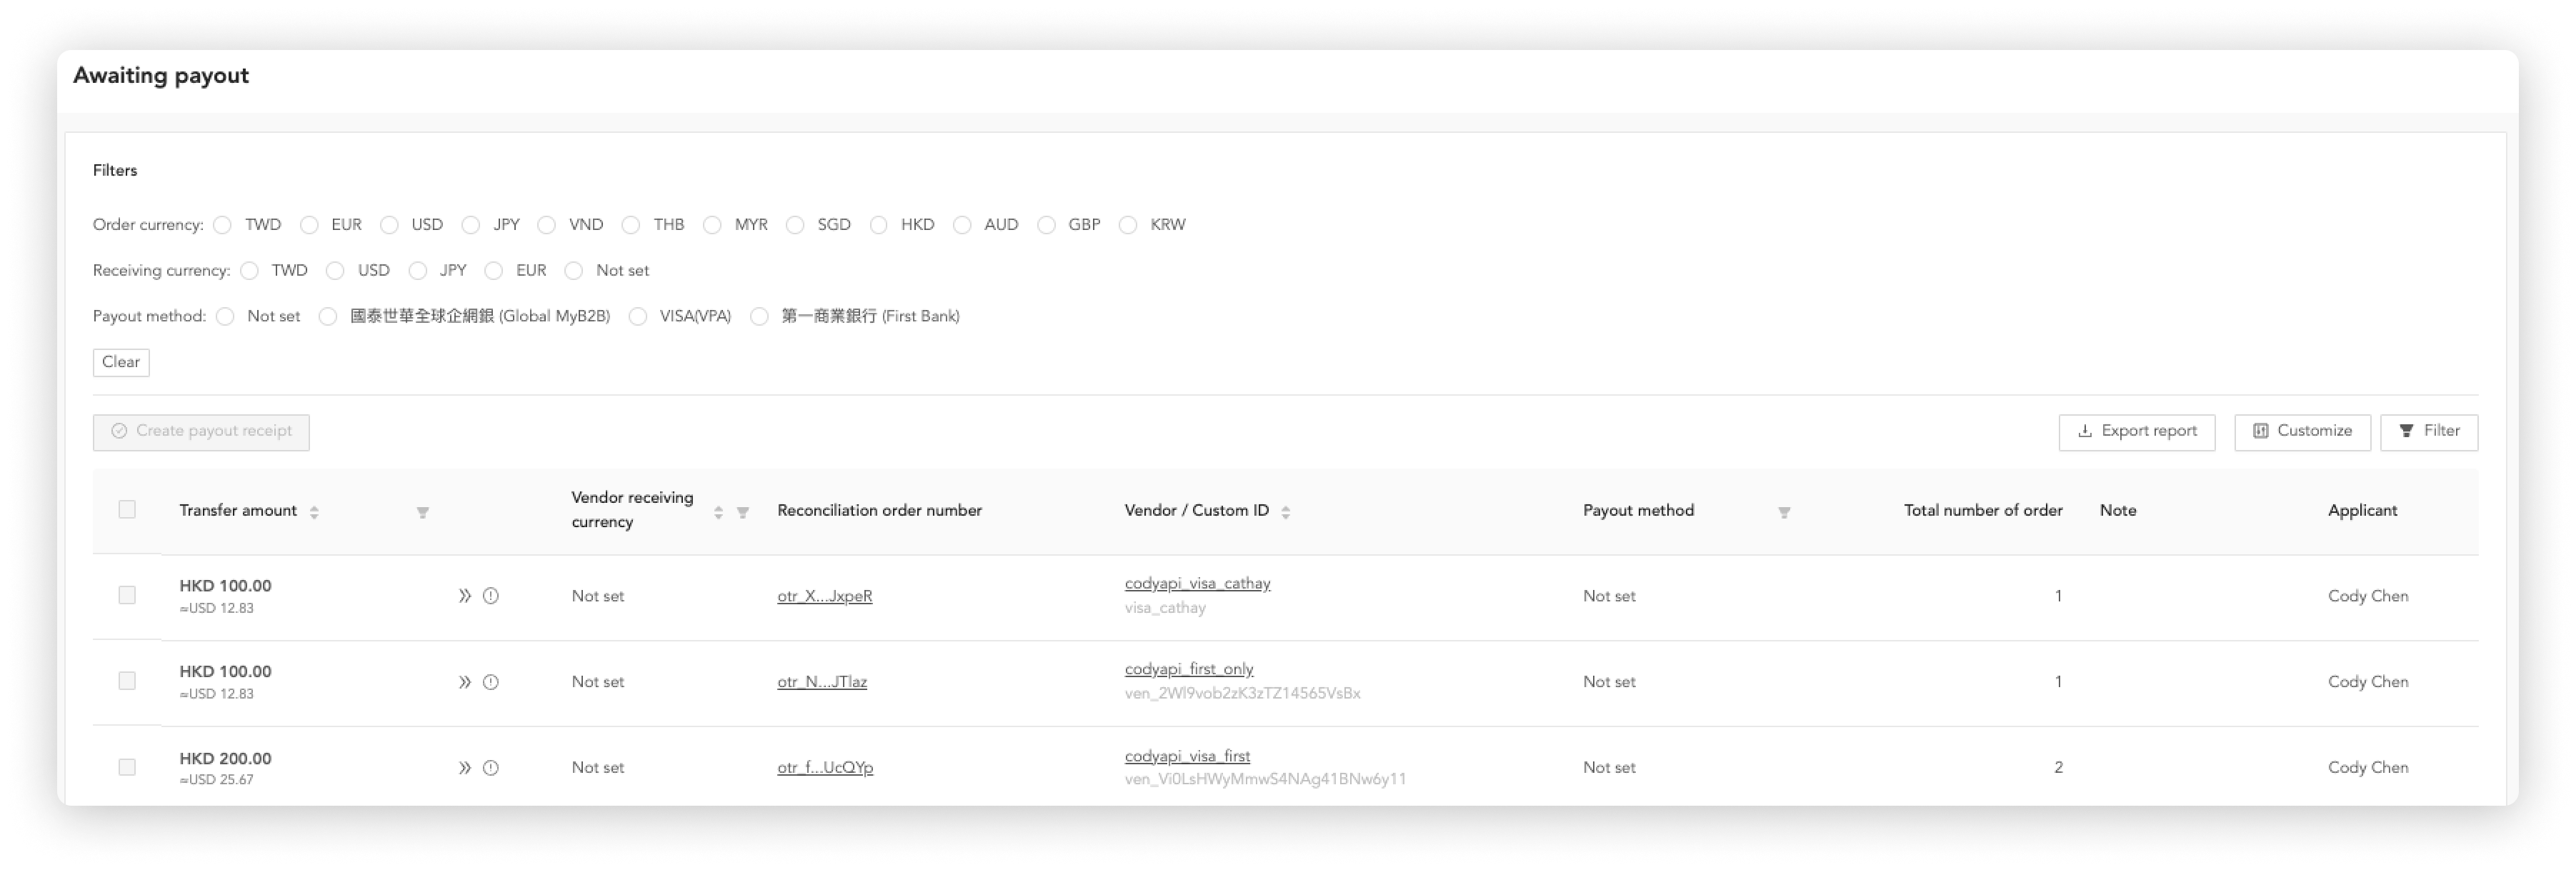
How to view reconciliation order available for payout
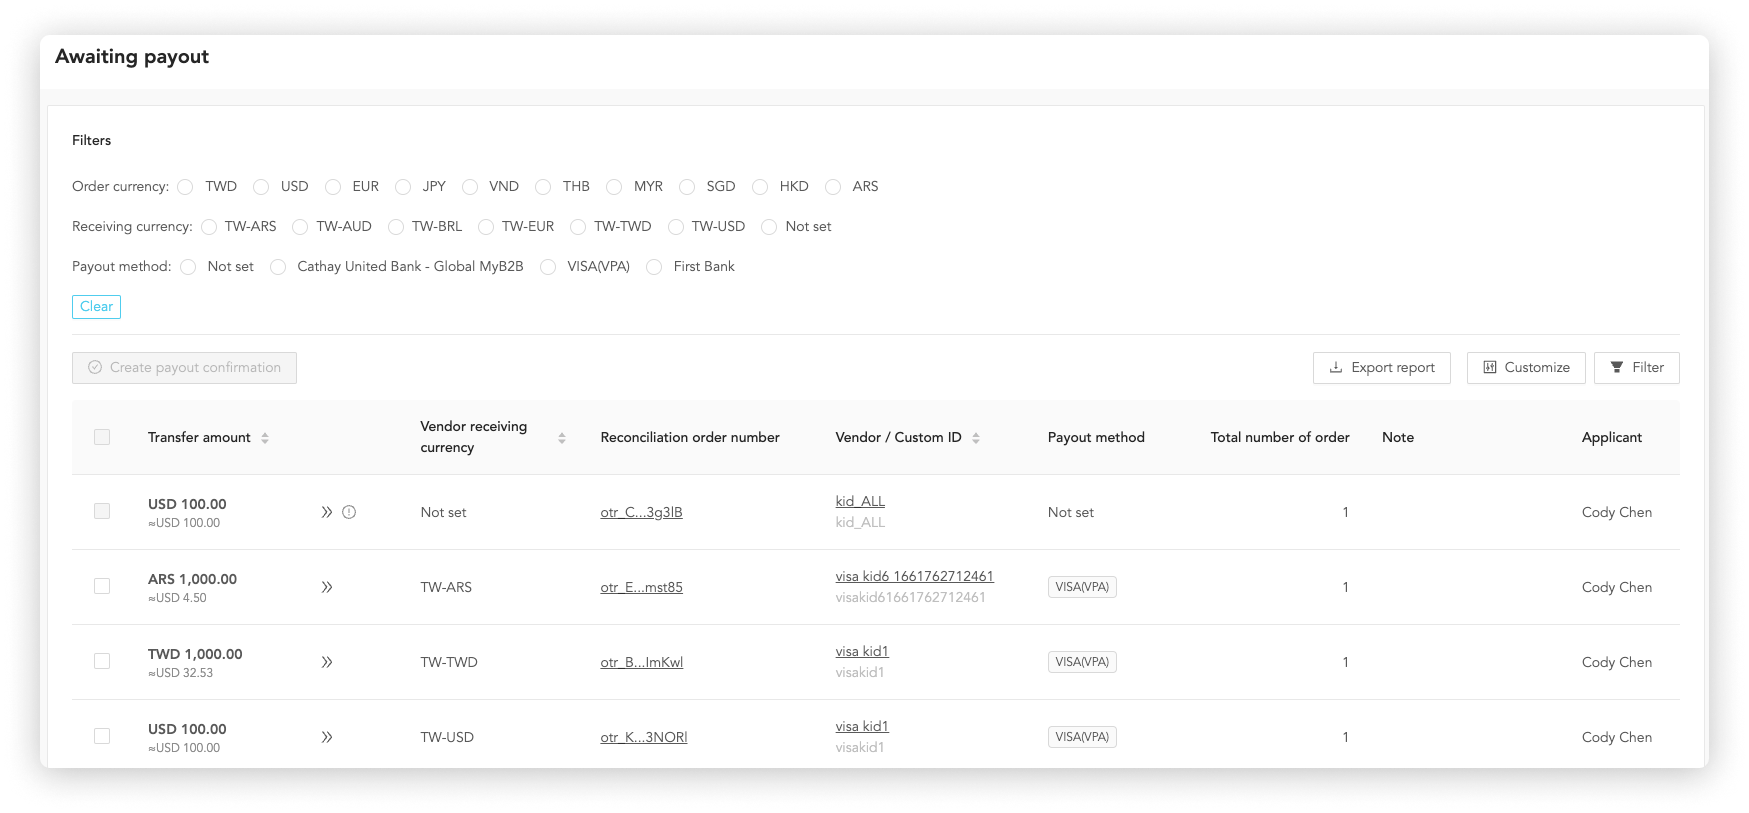
On the "Payout > Awaiting payout" page, you can see all reconciliation orders available for payout in the following columns.
How to pay
Follow the steps below:
- Filter the reconciliation order
- Create payout confirmation
- Click "pay"
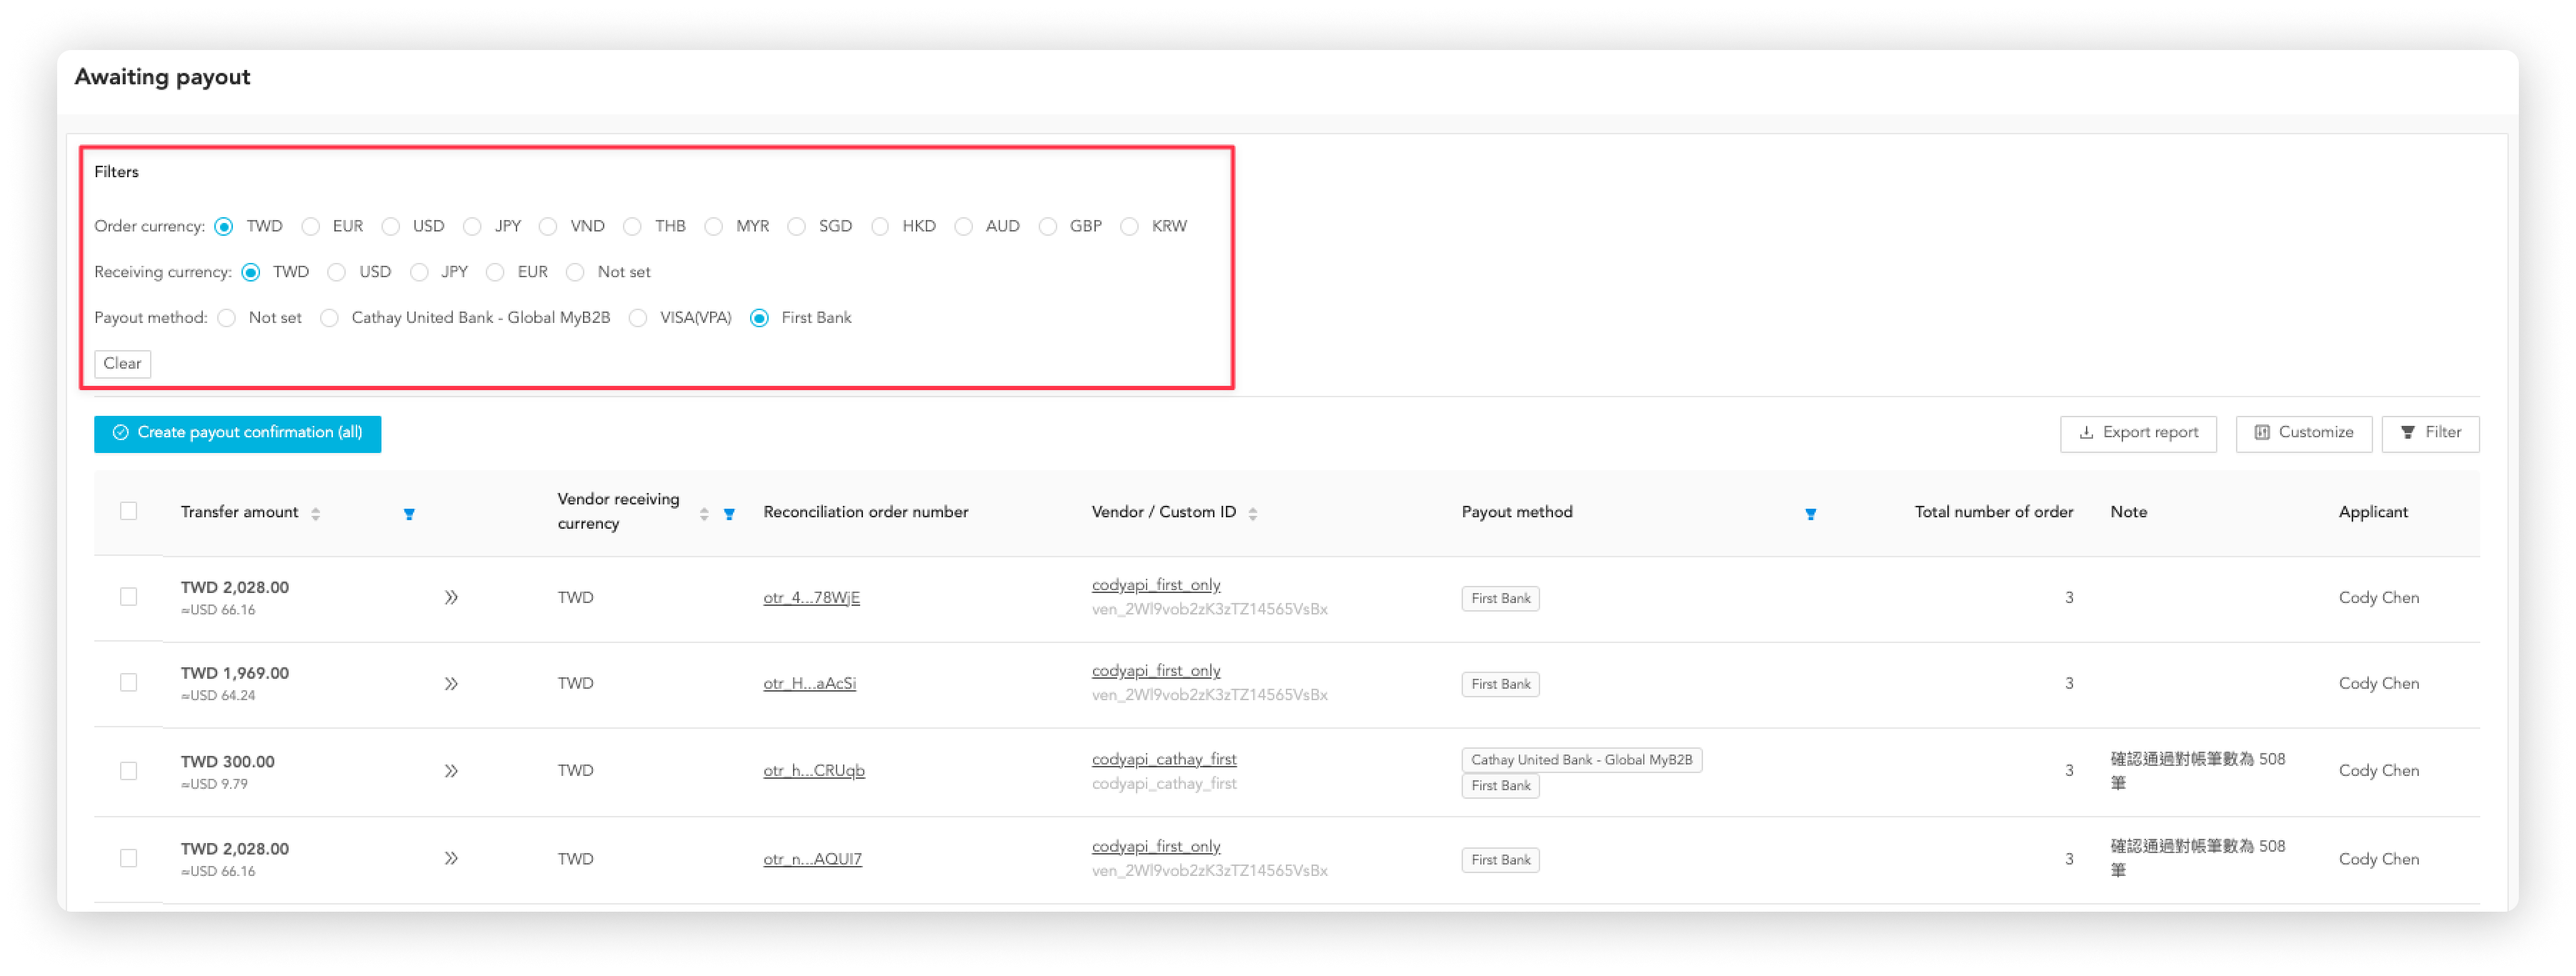
1. Filter the reconciliation order
In the "Filters" area, choose the conditions matching your payout.
Below is an example:
- Order currency: TWD
- Receiving currency: TWD
- Payout method: First Bank
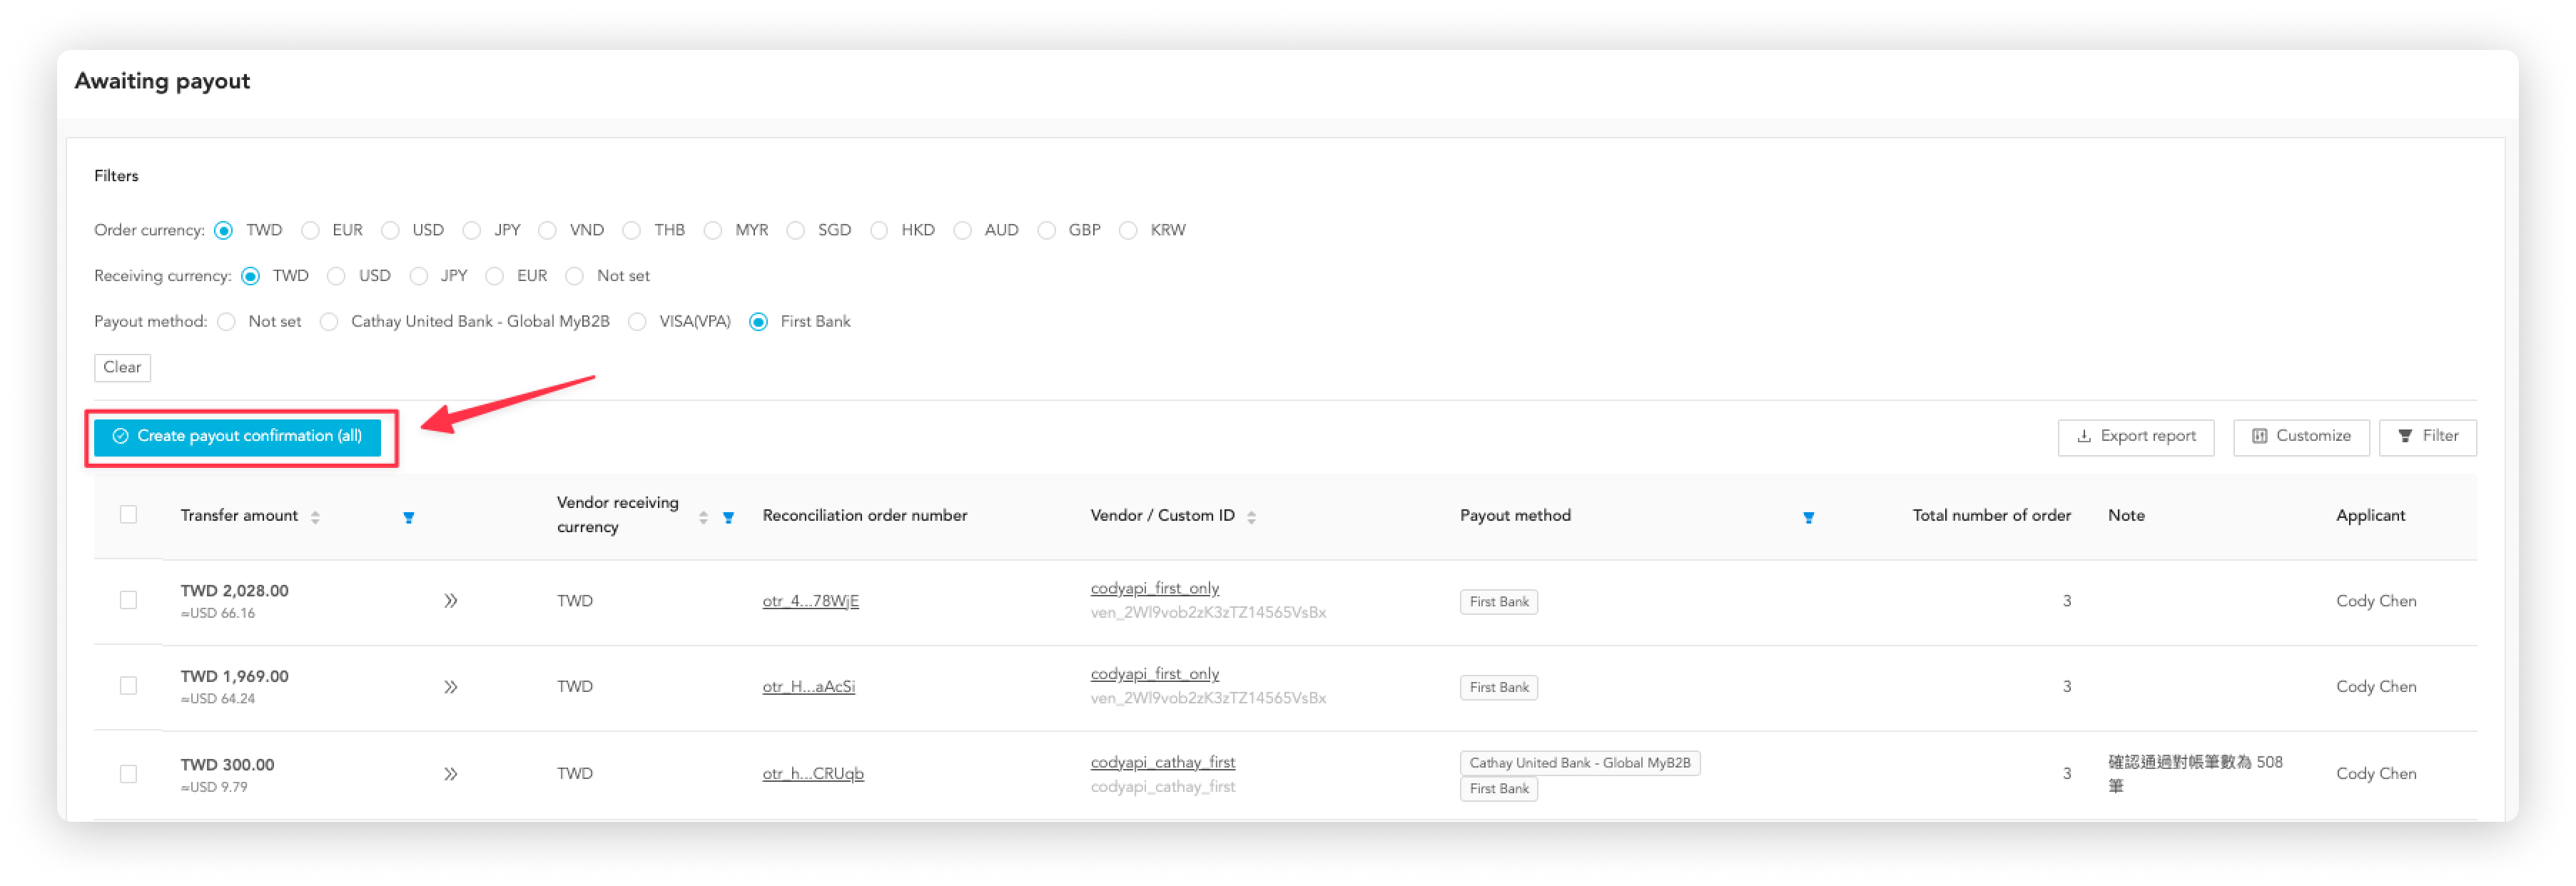
2. Create payout confirmation
Use one of the following ways to create payout:
- Create payout confirmation (all)
- Create payout confirmation (select)
2-1. Create payout confirmation (all)
Follow the steps below:
- Click "Create payout confirmation (all)"
- Click "Confirm"
- Select a date to pay
- Click "Confirm"
- Reconciliation orders with the same currency will be aggregated into 1 payout confirmation.
- You can add a comment in the "Transaction Description", and the comment will be displayed in your bank account transaction details.
- Since the bank opening hours in Taiwan ends at 15:30, OwlPay will notify the bank system at 15:30 for payouts that are requested before 15:30 of the day.
- If the payout request time is beyond 15:30 on the same day, you must set the appointment time. OwlPay will notify the bank system for payout on the date you specified.
- After OwlPay notifies the bank, the payout will be executed according to the actual operation status of the bank. If the transaction is closed due to (1) a non-business day (2) force majeure (3) other reasons, it will be executed again on the next business day.
- If a payout error occurs, the error message will be displayed on the OwlPay payout confirmation details page.
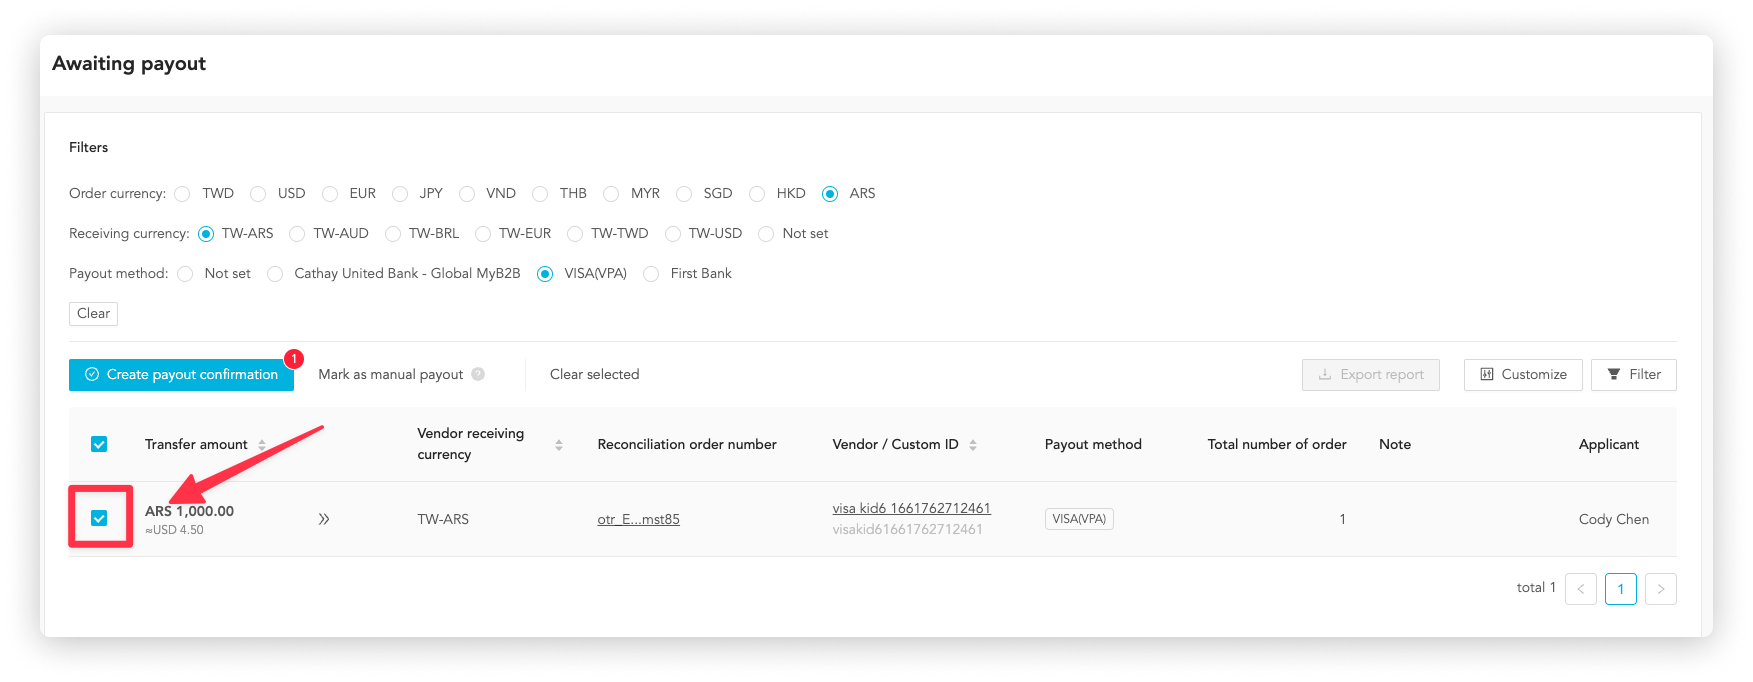
2-2. Create payout confirmation (select)
Follow below the steps below:
- Toggle the Checkbox on the left side of each payout request
- Click "Create payout confirmation" to start the payout process (you can select multiple requests at one time)

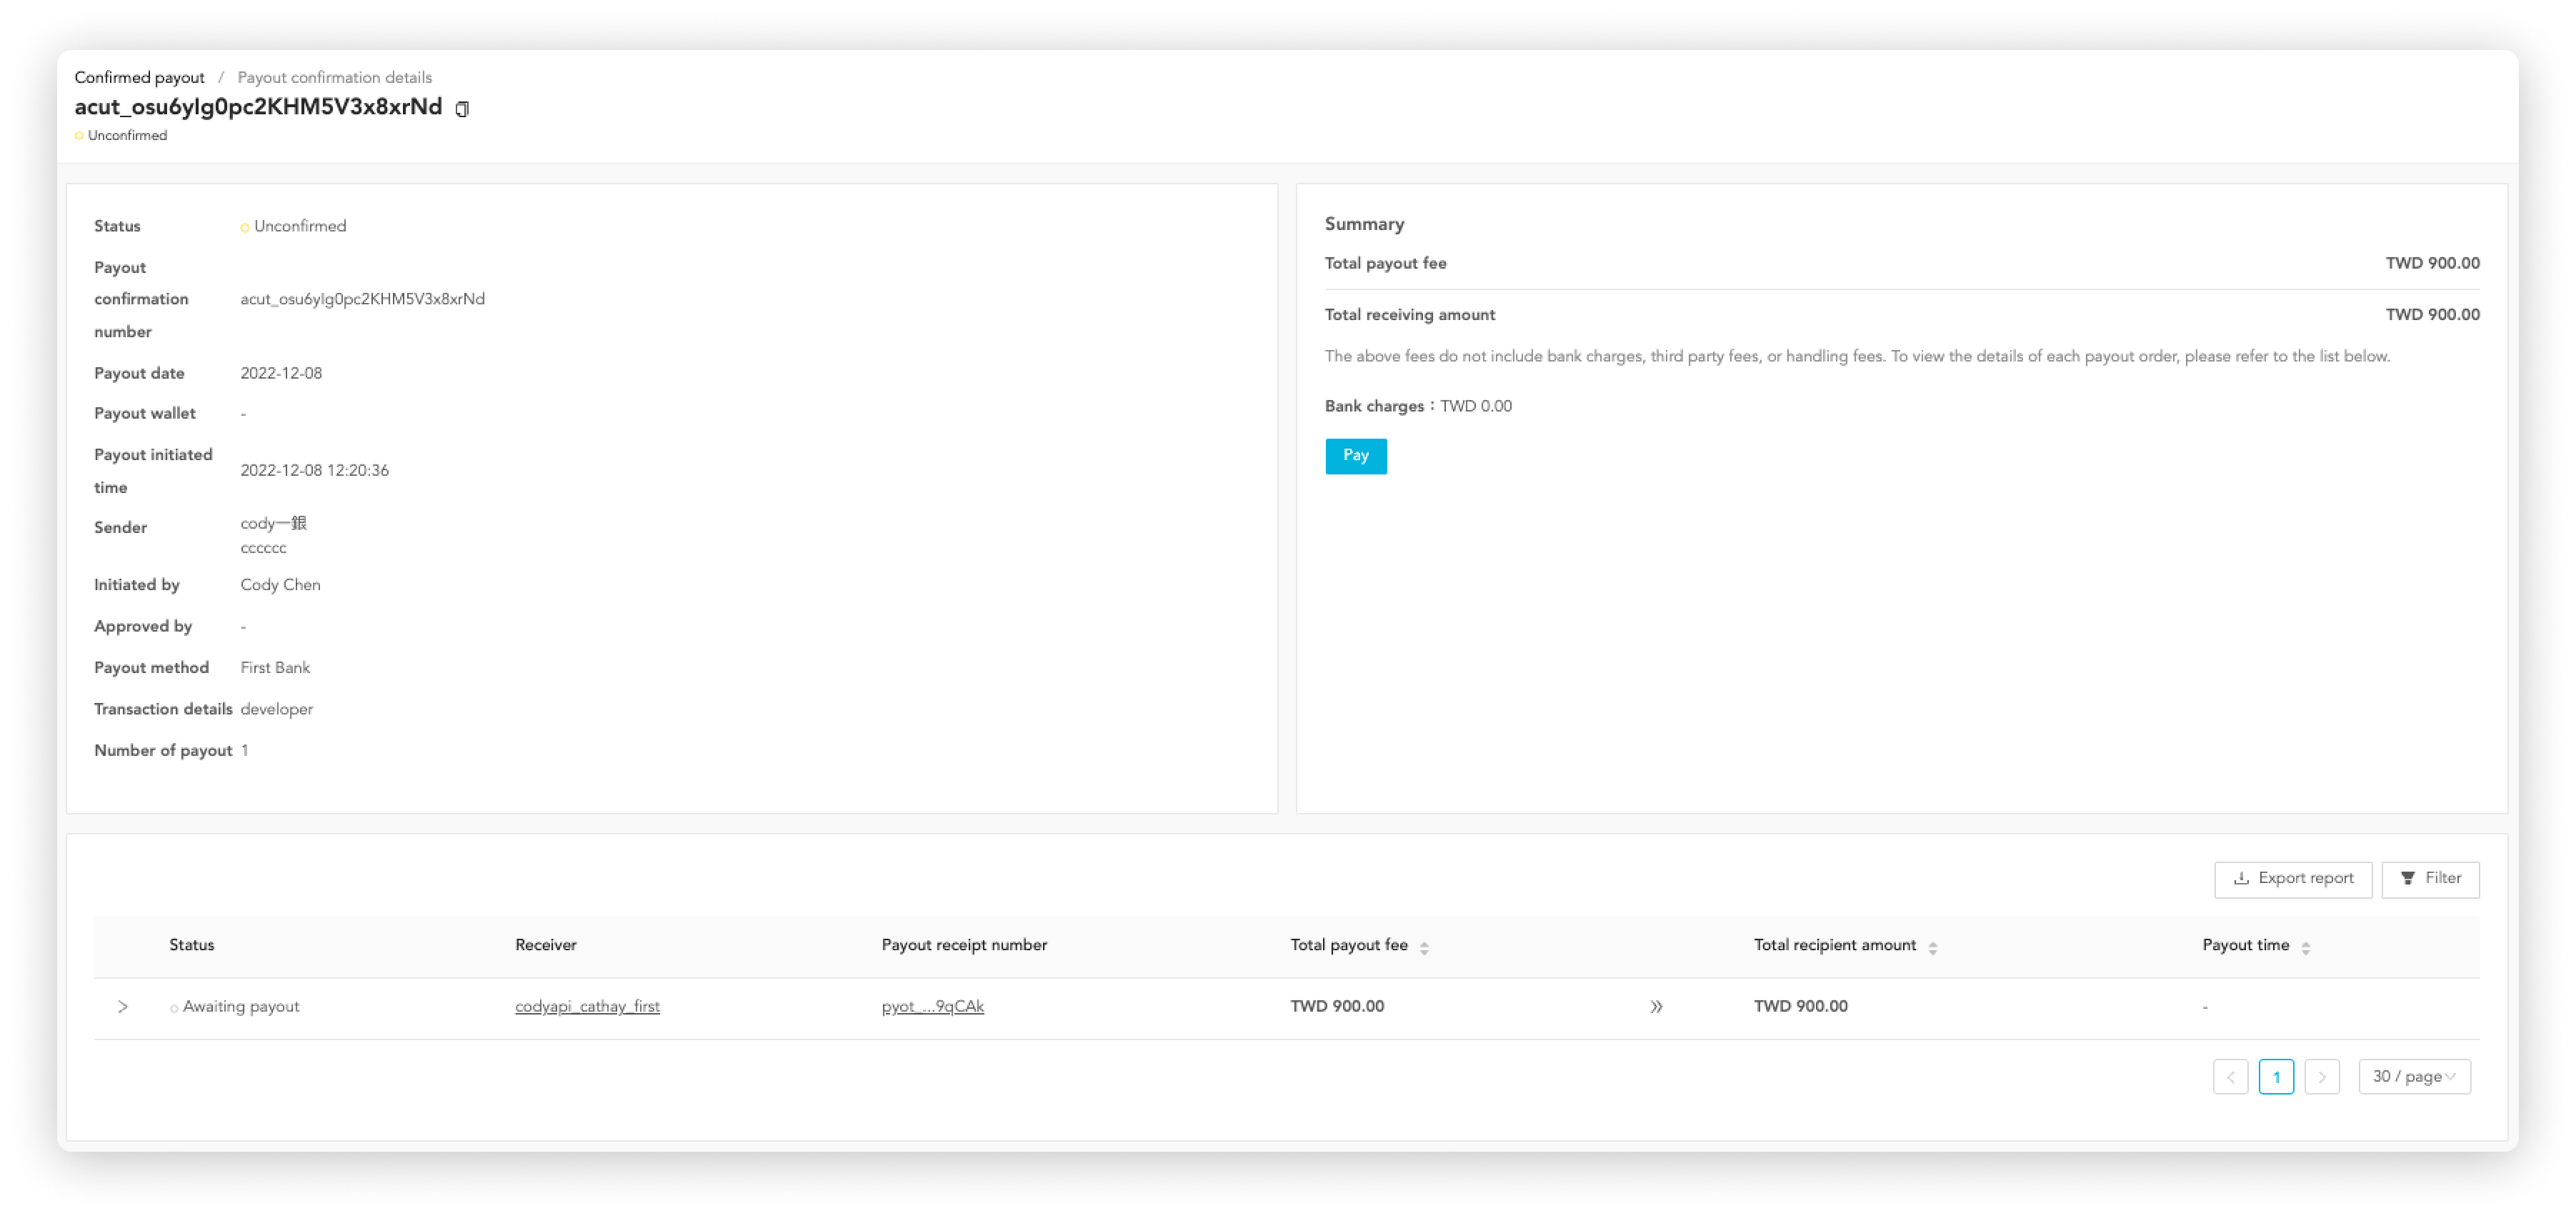
3. Click "Pay"
On the "Payout > Confirmed payout" page, you can see the payout confirmation order that is sent in the "2-1 Step".
Click that "Payout confirmation order".

On the "Payout confirmation details" page, you will see two different "Pay" buttons according to the different Payout methods you set up.
3-1. For payout methods other than VISA Commercial Card and Account Payables
You will see "Pay" on the screen.
Click "Pay" and follow the Two-step verification to complete the payout.
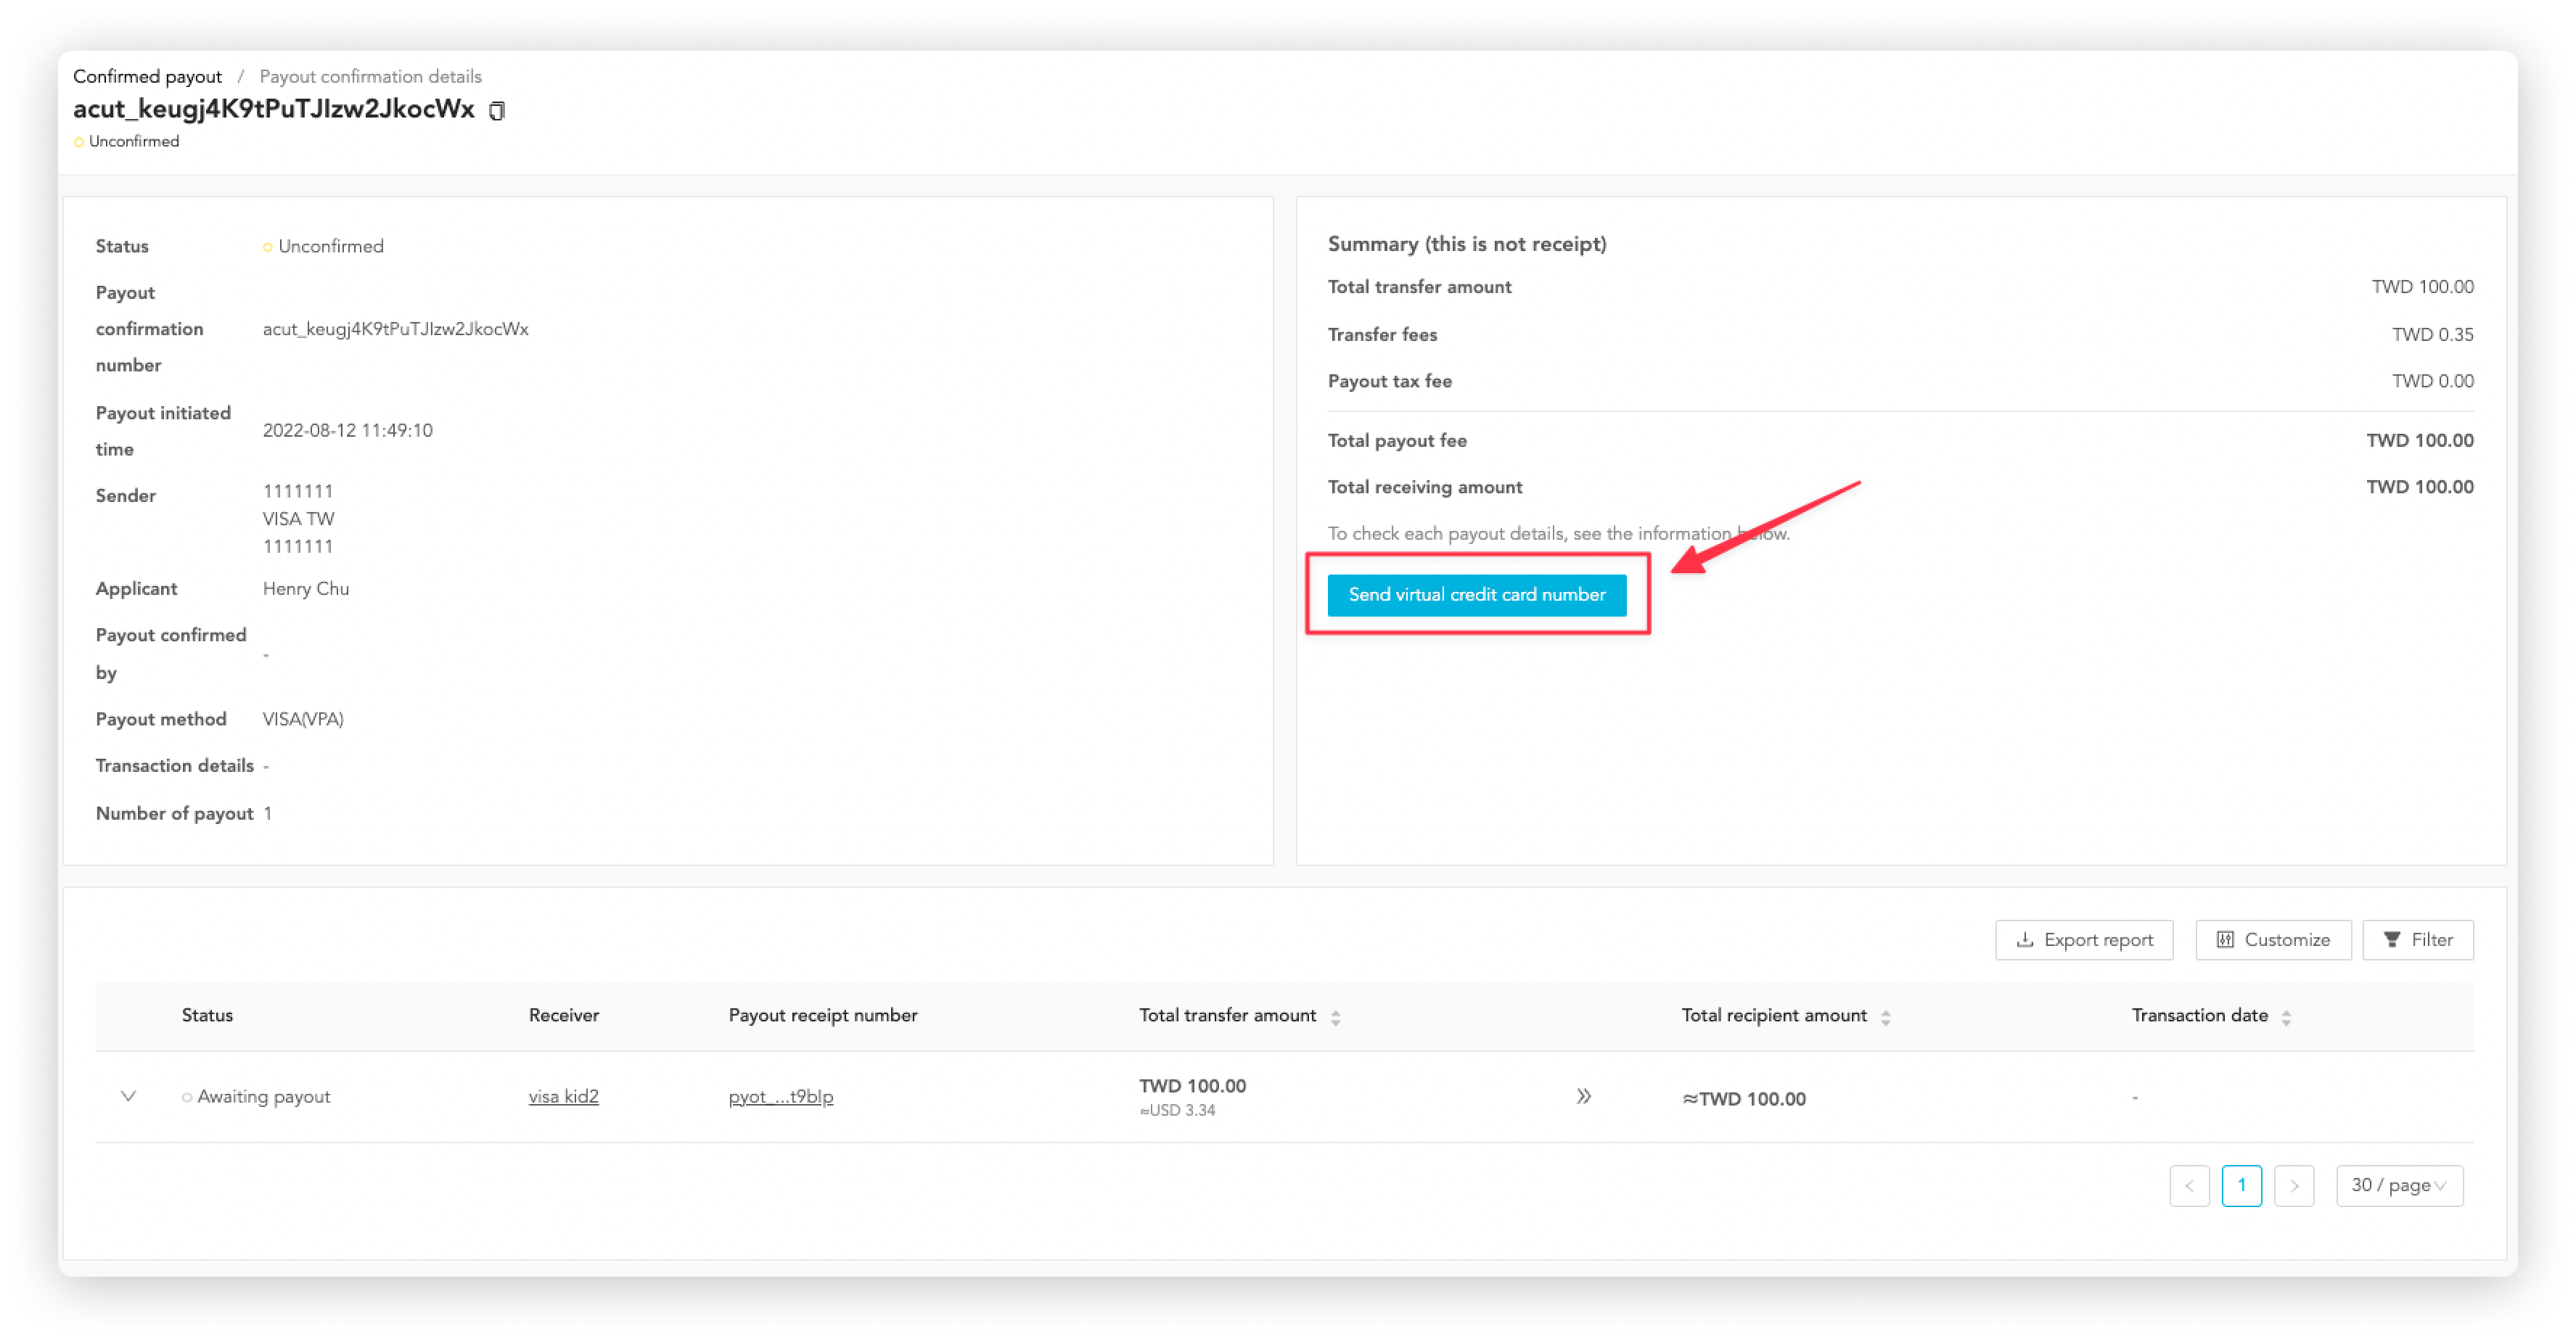
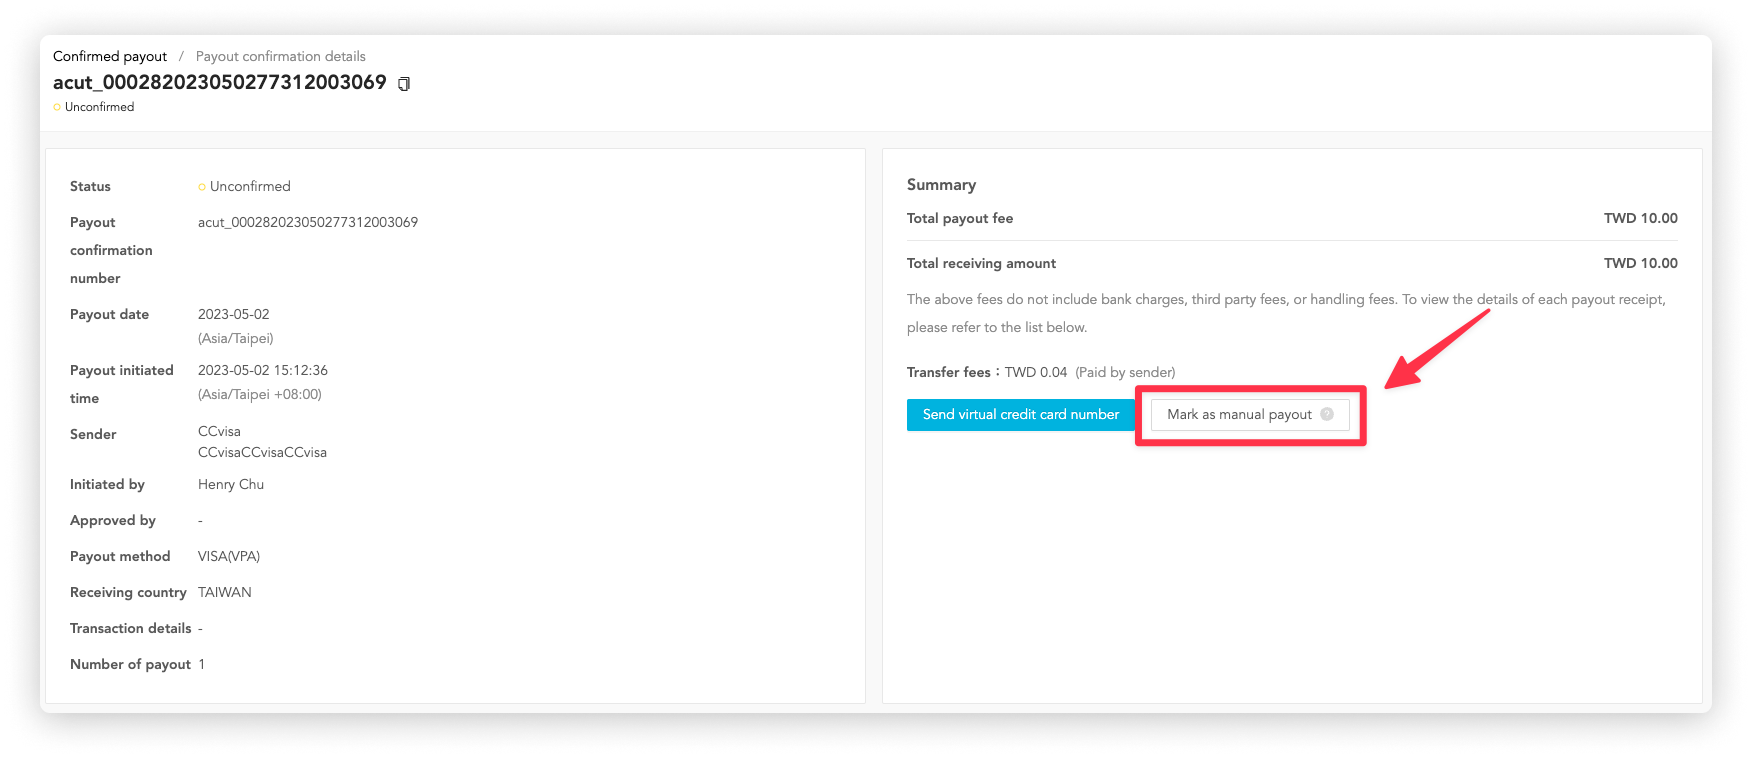
3-2. For VISA Commercial Card and Account Payables
You will see the "Send virtual credit card number" button on the screen.
Click the button and follow the Two-step verification to complete the payout.
How to "mark as paid" manually
If you have made a payout outside of OwlPay (e.g. through an ATM transfer), you can use this feature to mark the pending payout confirmation order as "Manually paid". Once marked, the order will be recognized by the OwlPay system as paid.
You have two ways to manually mark a payout confirmation order as paid:
- On the "Awaiting payout" page
- On the "Confirmed payout" page
Follow the steps below to complete the process.
Method 1: On the "Awaiting payout" page
1. Click "Payout" > "Awaiting payout"
2. Select the reconciliation order(s) you want to mark as manually paid
3. Click "Mark as paid"

4. Set the payout date, transaction fee, and click "Confirm"

5. Complete Two-step verification
Follow the on-screen instructions to complete two-step verification and mark the order as manually paid.
Method 2: On the "Confirmed payout" page
You have already created a "Payment Confirmation order".
1. Click "Payout" > "Confirmed payout"

2. Click the "Payout confirmation number" that you want to mark as paid

3. Click "Mark as paid"
4. Set the payout date, transaction fee, and click "Confirm"
5. Complete Two-step verification
Follow the on-screen instructions to complete two-step verification and mark the order as manually paid.
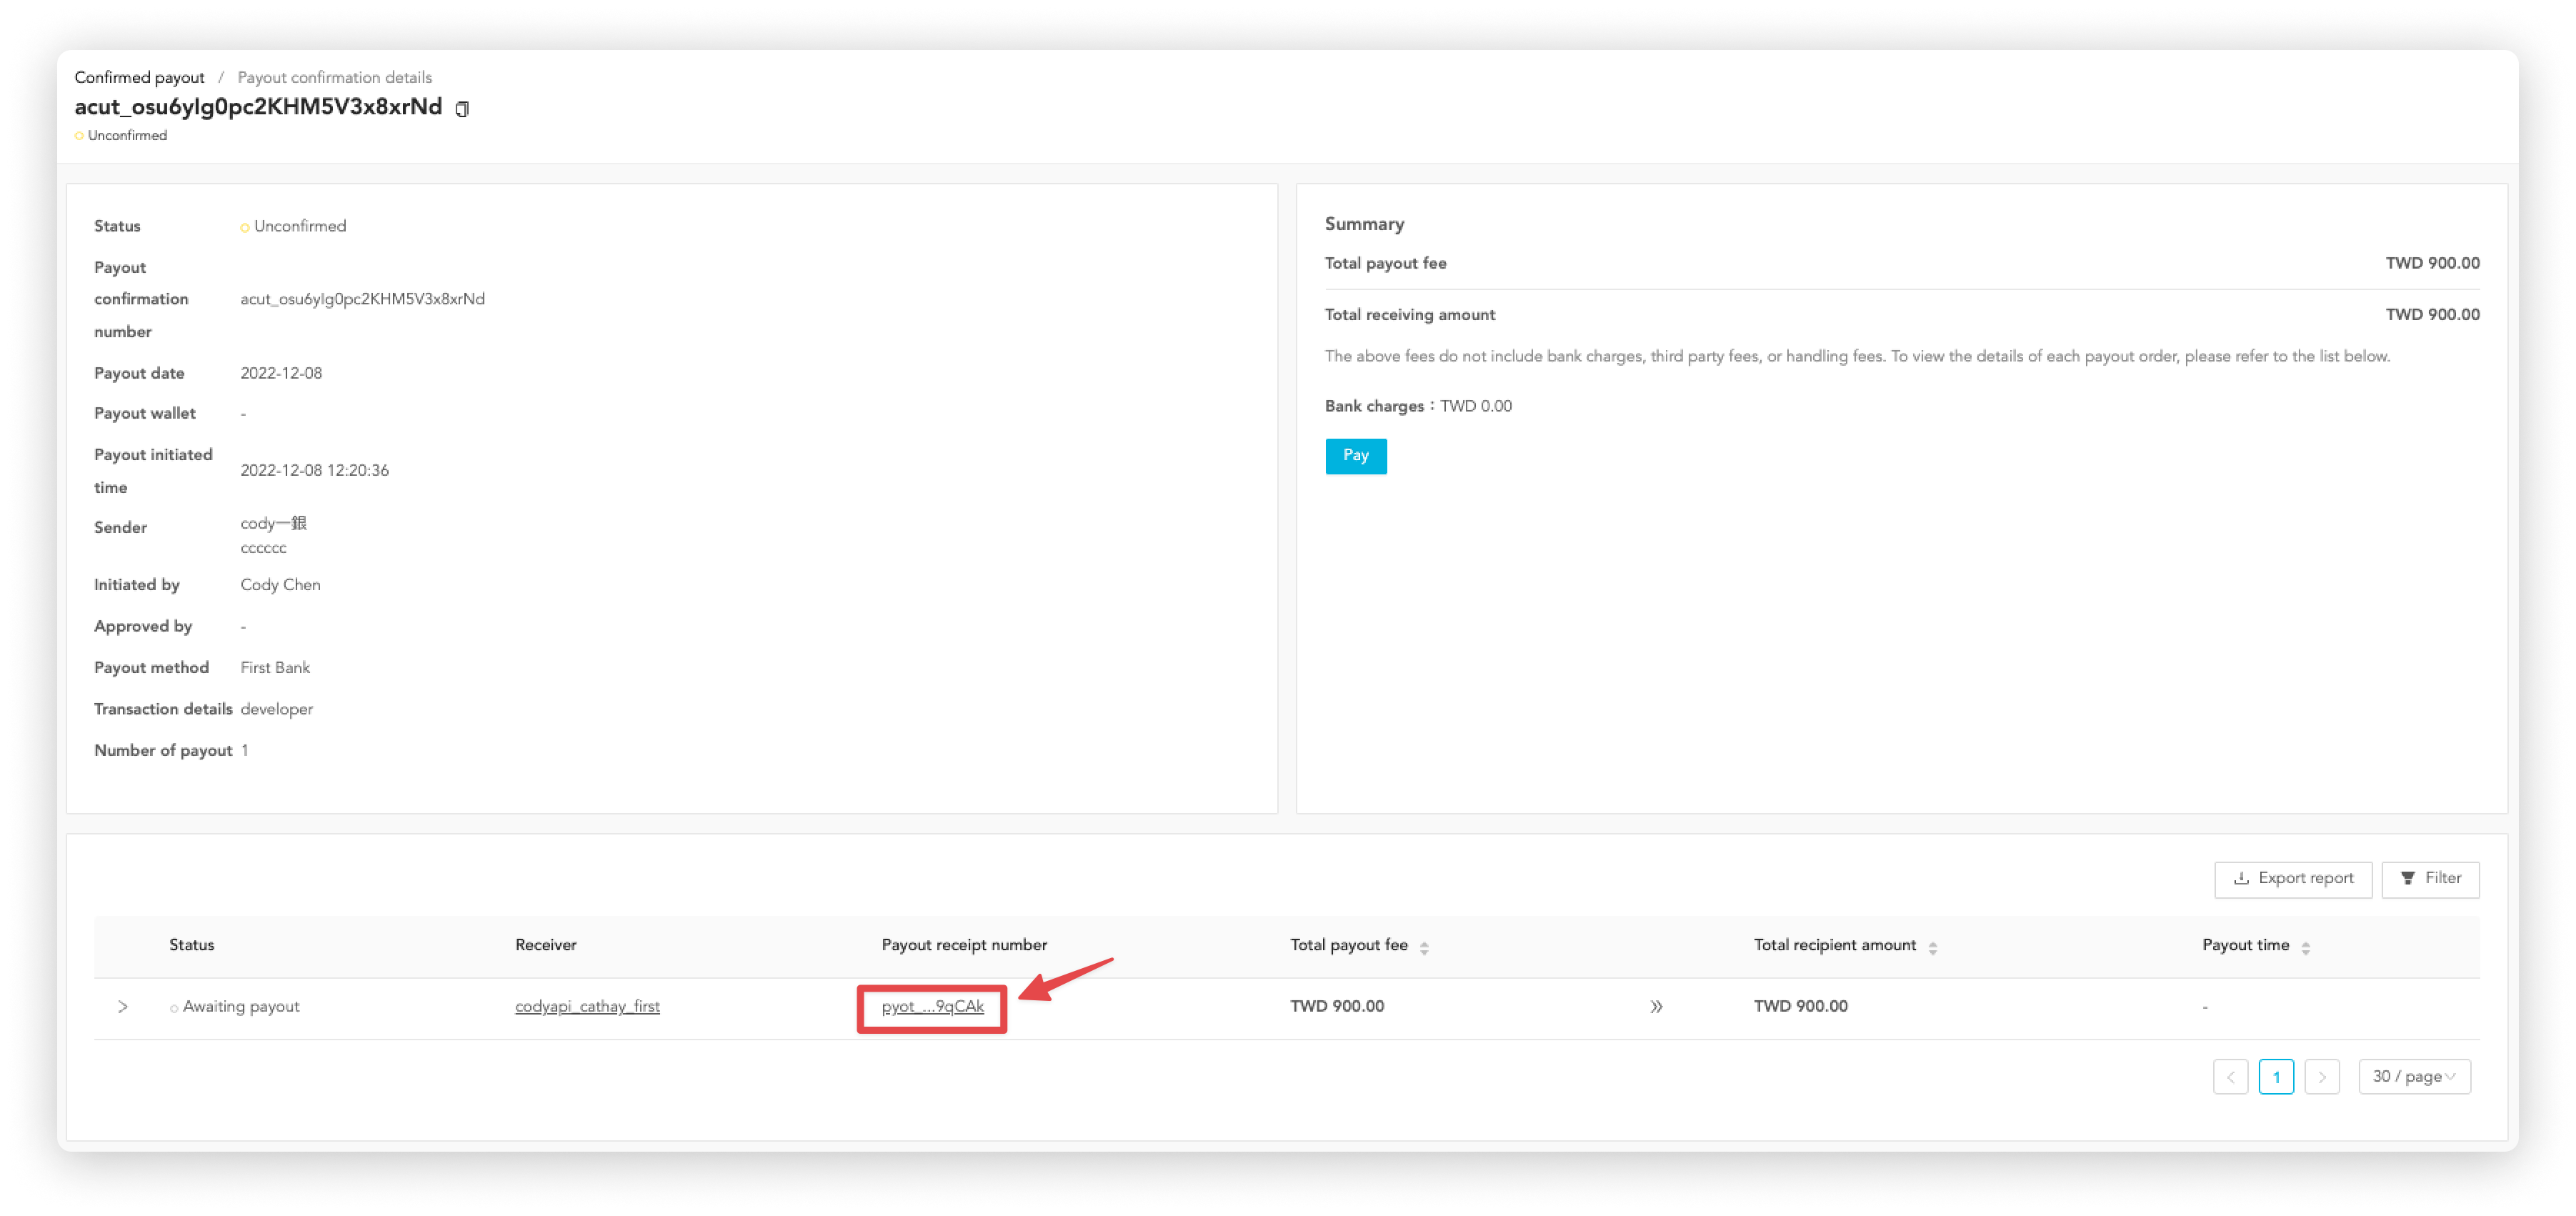
How to view paid/scheduled payout confirmation orders
After completing the payout setup, you can see the paid/scheduled payout confirmation orders on the "Payout > Confirmed" page.
Clicking on the specific number in the "Payout confirmation number" column, you can go to the Payout confirmation order page.
Below are columns you can see about this payout confirmation order.
- Status: status of the payout request, please refer to Payout status for more details
- Payout confirmation number: payout confirmation order number on OwlPay system
- Payout date: the date that payout occurs
- Payout wallet: display balance currency when payout method is NIUM
- Payout initiated time: the time when the payout is sent
- Sender: the company name of the payout
- Initiated by: user who sends this payout request on the "Awaiting payout" page
- Approved by: user who clicks "pay" on the "Unconfirmed" page
- Transfer amount: the total amount of payout
- Payout method: a method that pays the vendor
- Transaction details: note in the payout confirmation
- Number of payout: number of payouts included in this payout confirmation
- Transfer fees: additional fees included in the payout
How to view payout order
Click "Payout order" to enter the Payout order page.
There are two sections on this page:
- Account information
- Receipt
Section 1. Account information
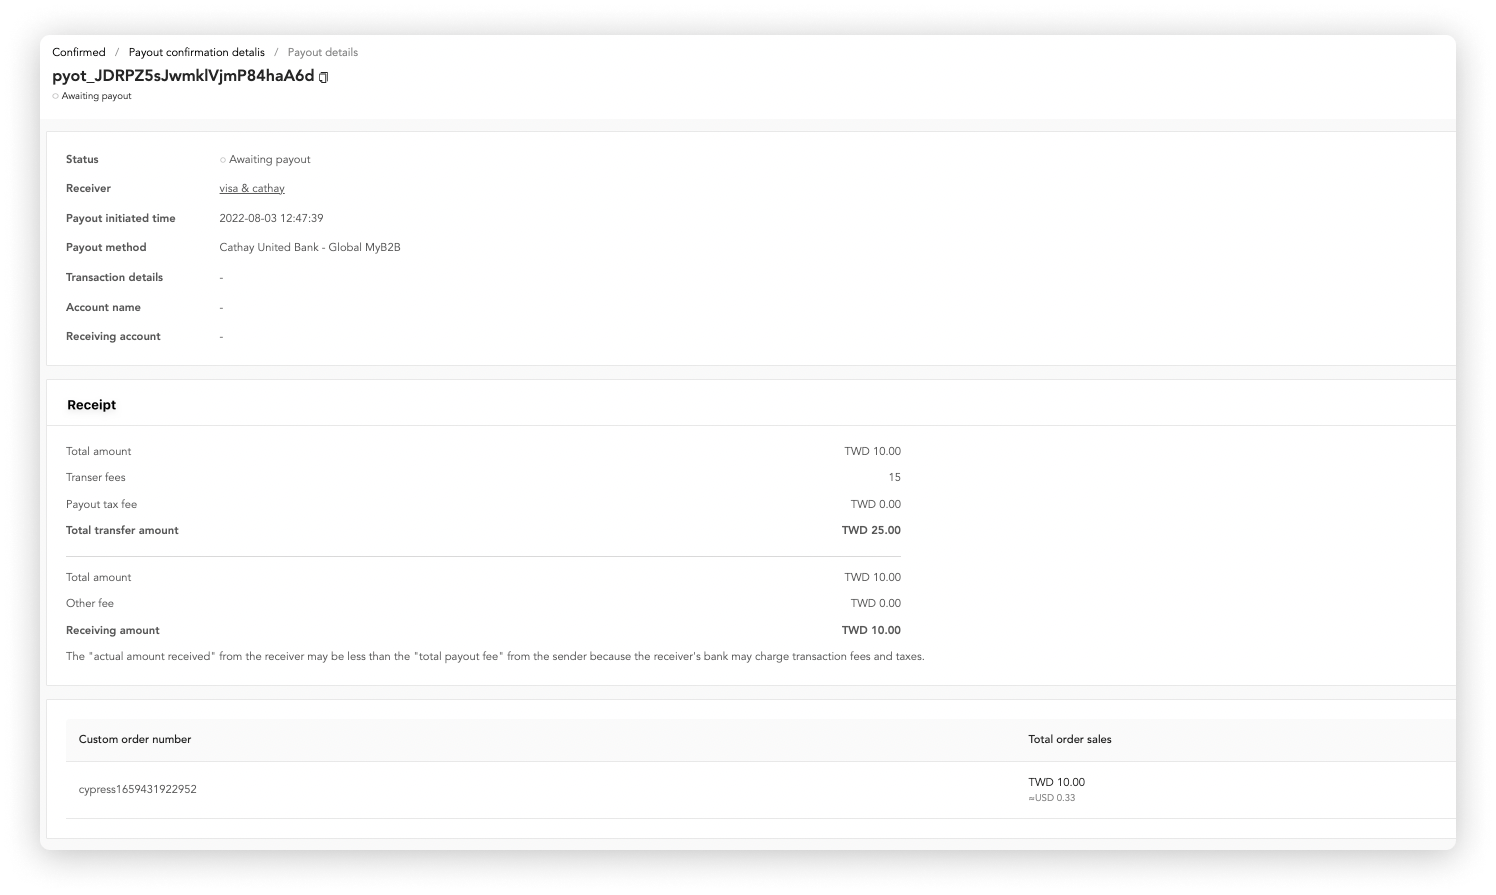
Below are columns you can see about this payout order.
- Status: Payment status of this payout order, refer to Payout status for more details
- Receiver: name of the receiver
- Payout initiated time: the time when the payout is sent
- Payout method: the method that the payout is sent through
- Transaction details: The transaction notation on this payout order
- Receiver's account name
- Receiver's account number
Section 2. Receipt
Sender
- Transfer amount: amount to be paid
- Transfer fee: additional fee required for payout
- Payout tax fee: tax on the payout
- Total transfer amount: amount actually paid
Receiver
- Transfer amount: amount to be paid
- Other fee: additional fees required for payout
- Receiving amount: Actual amount received by the receiver
How to calculate deposit fees
If you want to calculate the amount to deposit before making a payout, you can use the "Display Total" feature.
You have already created a payout confirmation order.
Follow the steps below:
- Click
Confirmed. - Click the top right
Display Total - Select the payout confirmation orders you want to pay.
The system will sum up and display the amount you need to deposit.
Example
Refer to the image below.
If the total payment amount is GBP 181.50 and the GBP wallet balance is GBP 9.21, then the deposit amount is GBP 174.02.
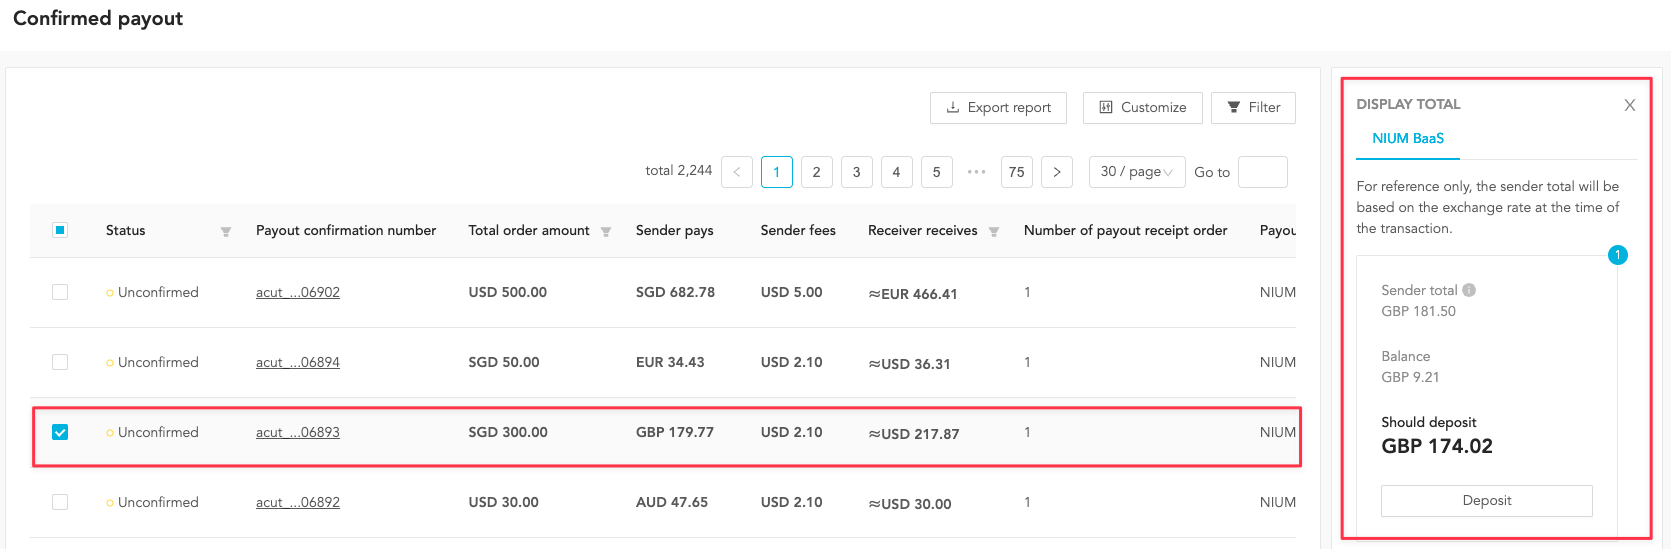
The deposit button will not be displayed if the payout method is manual, VISA Commercial Card, or First Bank.