Order
Managing your orders on OwlPay to verify your company's payment status.
"Orders" is transaction information between company and vendor.
On the “Order” page, you can quickly view the details of each order, including
- the order's reconciliation status
- total order sales
- order from which vendor
- order serial number
- ... etc.
How to view Order information
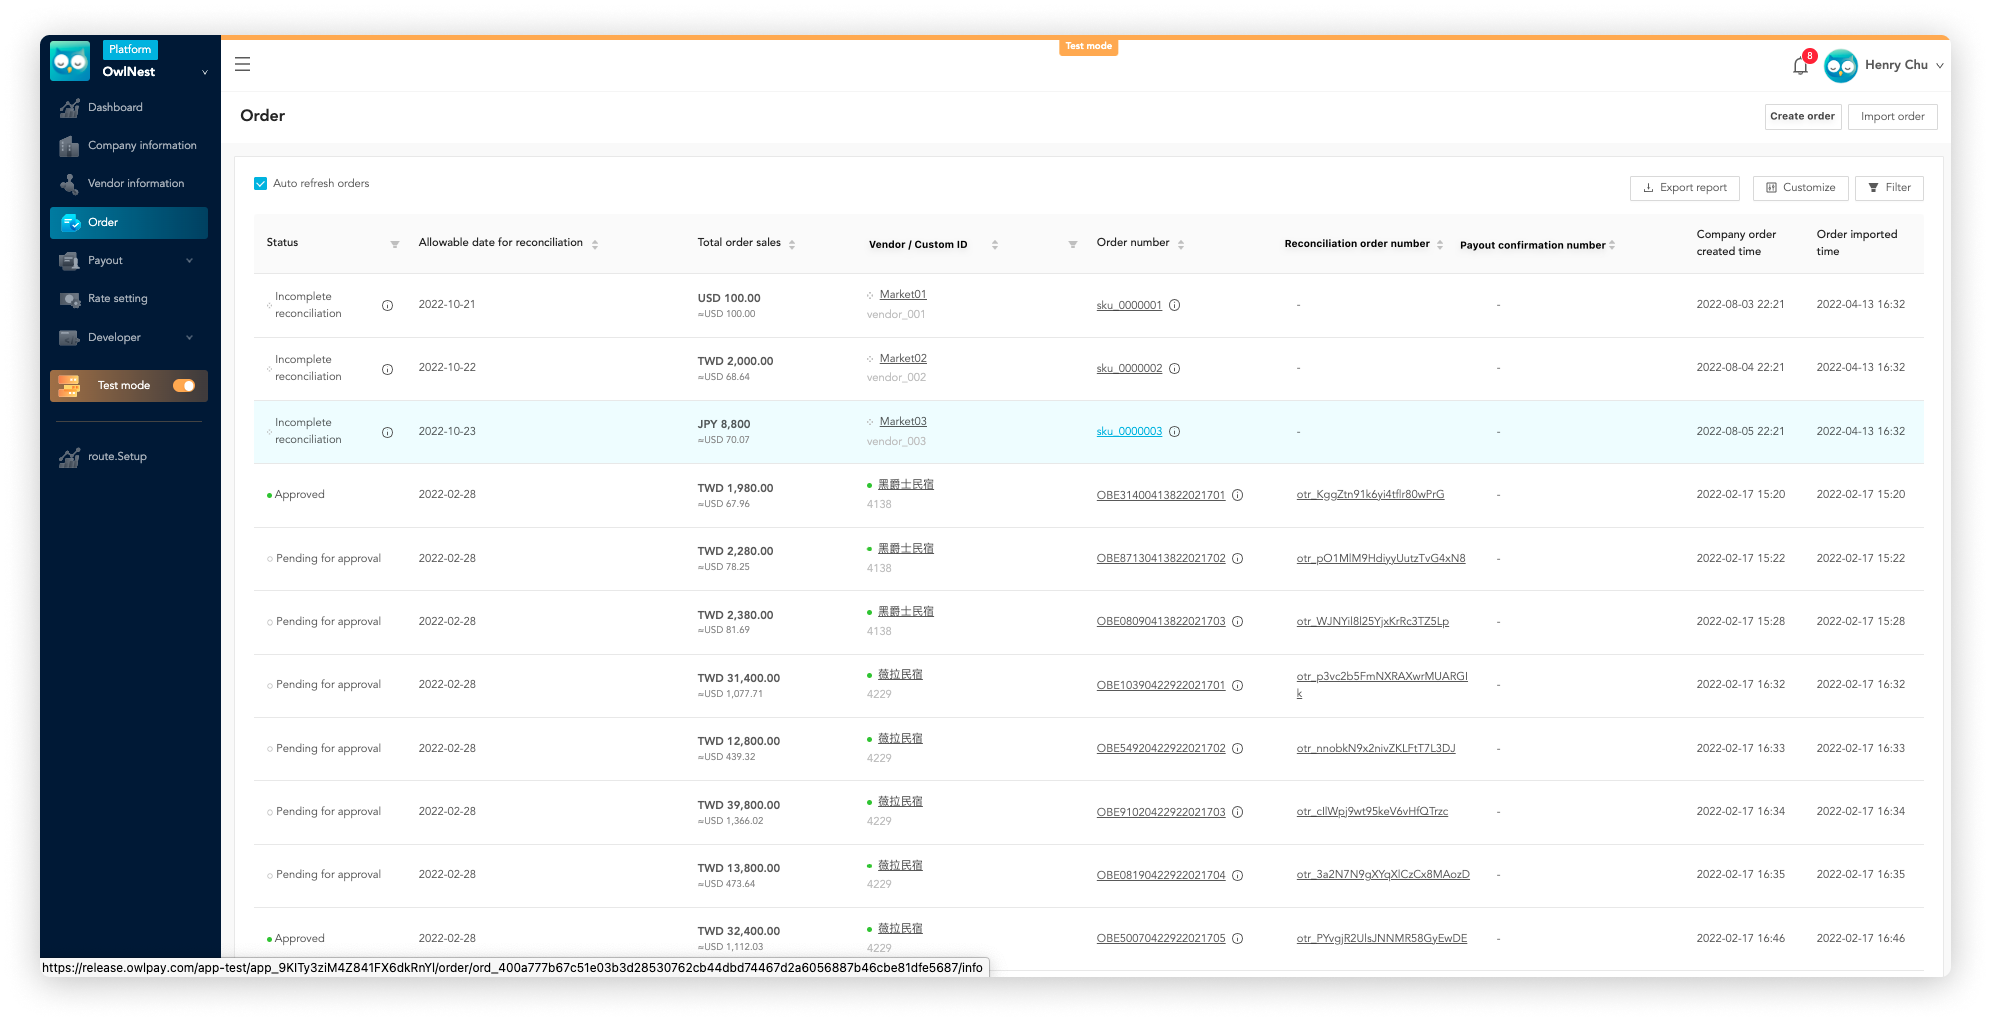
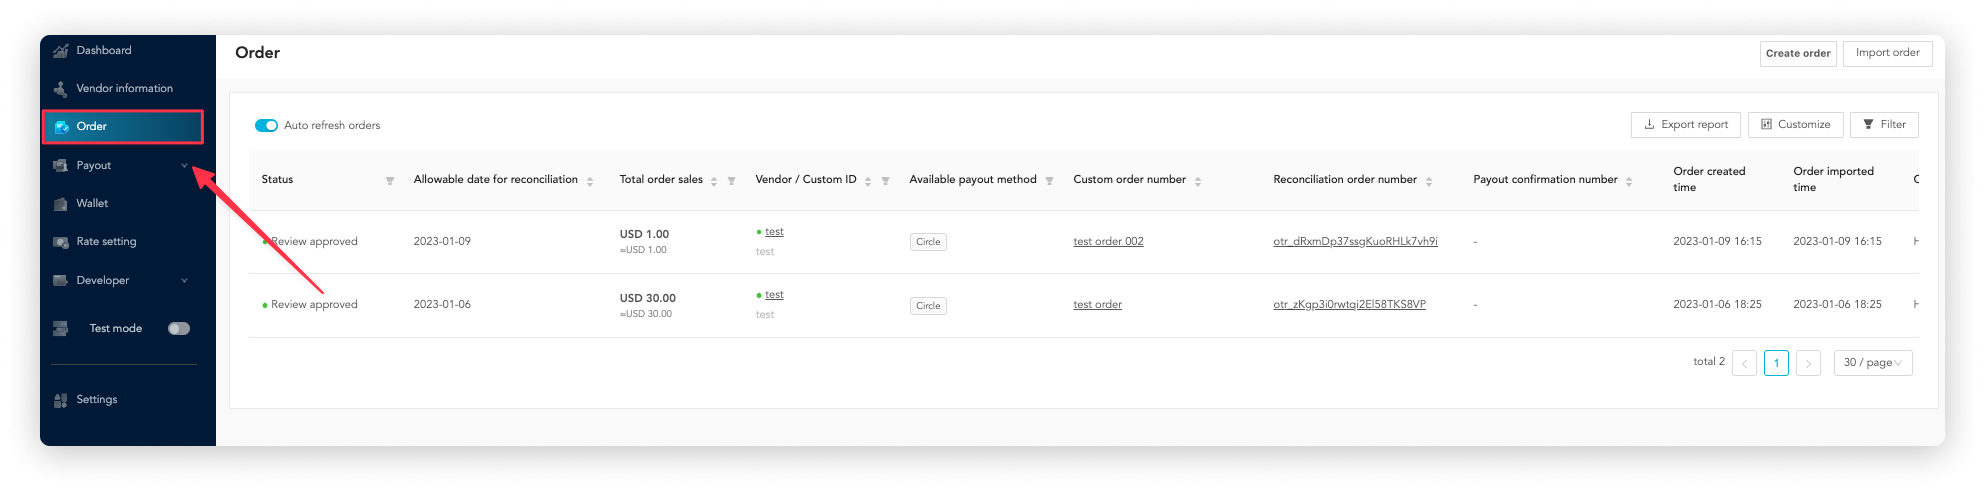
On the “Order” page, you can view all of the orders from your vendors here. The default table columns are as follows.
You can adjust the display table columns by clicking the "Customize" and "Filter" button.
- Status: order reconciliation status, please refer to the order reconciliation status for more details.
- Allowable date for reconciliation: the date that this order can be applied for reconciliation
- Total order sales: total Transaction Amount for this order
- Vendor: vendor of this order
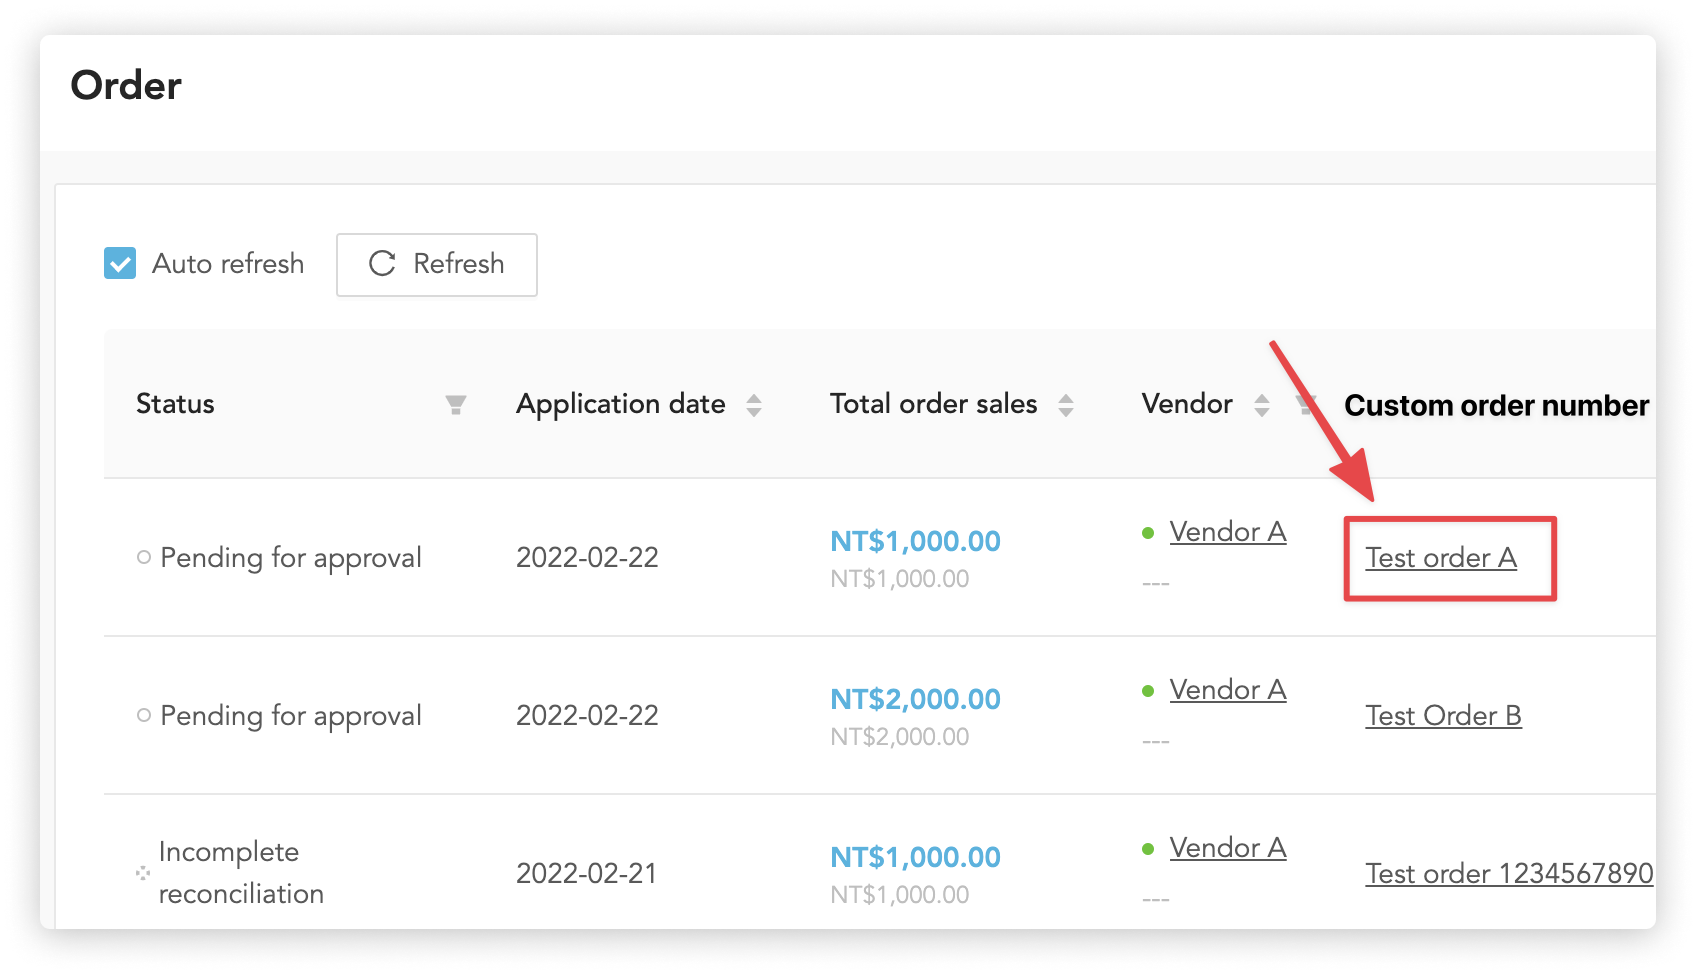
- Custom order number: custom order number you name on OwlPay
- Order created time: order creation time (orders automatically imported from your system to OwlPay)
- Order Imported time: order Creation Time (order is created manually from OwlPay)
How to create an order
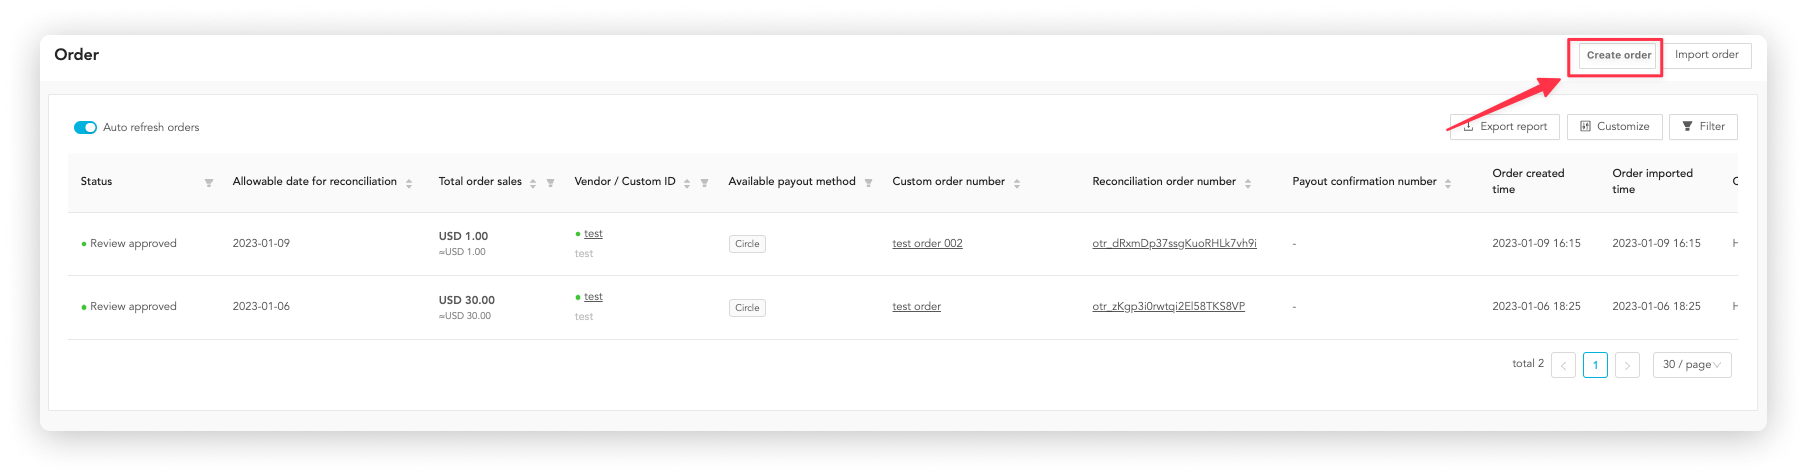
There are 3 ways to add an order:
- Create order manually
- Import order through the xls/csv file
- Import order through API
Create order manually
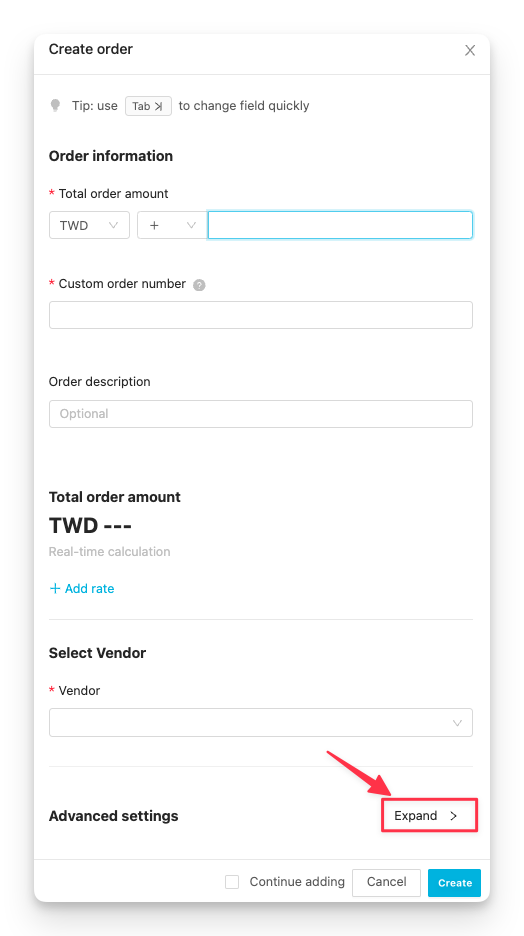
If you want to create an order on OwlPay manually, click "Create order".

Below are order details you can fill in.
- Total order sales: Total sales of this order. We support TWD, JPY, USD, MYR, VND, positive and negative sales (successful transaction/refund)
- Custom order number: You can define your own order number for easy management and search on OwlPay.
- Order description: Remarks for this order
- Select vendor: Set which vendor this order comes from, you must set the vendor list on [Create vendor](/owlpay-guideline/en/docs/page-introduction/role-company/vendor-information#how-to-create-a-vendor first.
- Advanced settings
- Reconciliation request time: If you have to complete the order reconciliation by a certain date, please set the date.
- Extra details: Any other information you would like to add to this order, such as the time zone the order comes from.
Click "Create" to create this order. If you check "Continue adding", you can quickly add another order.

Import order through the XLS/CSV file
Please refer to How to import the order.
Import order through API
Please refer to Manage order.
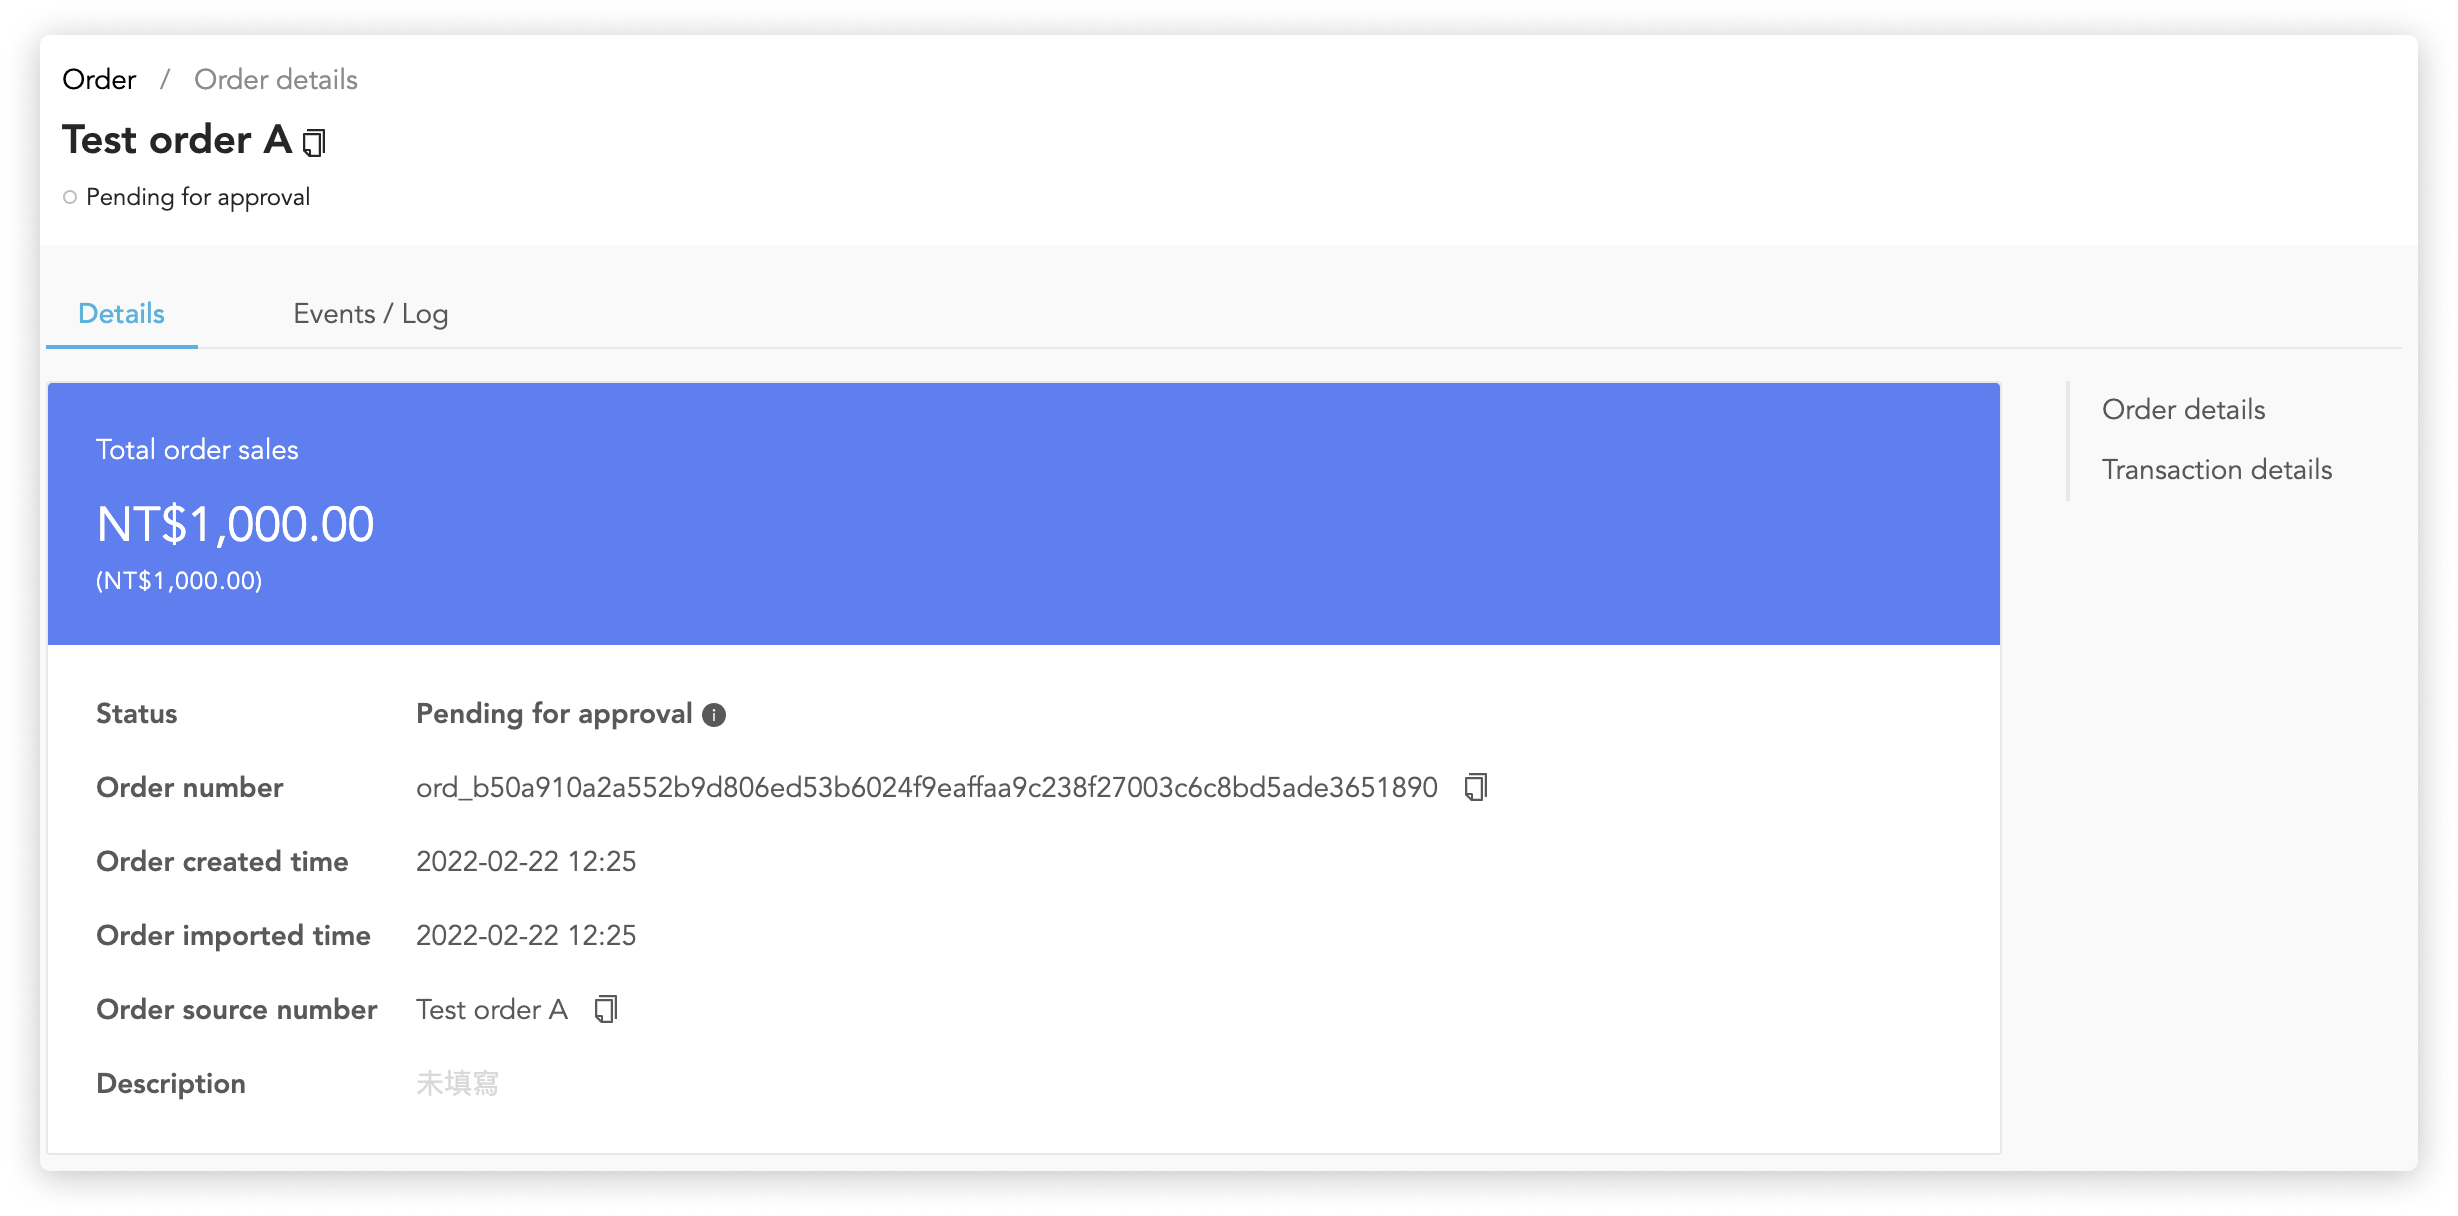
How to view order details
If you want to view the details of a specific order, you can click on the order number on to order detail page.
Order details
OwlPay order detail page will display the order information from your company's system. Here is an example from OwlNest (An online travel agency under OwlTing Group).
If you click "Close order", the order will be canceled from OwlPay and no subsequent reconciliation will be possible.
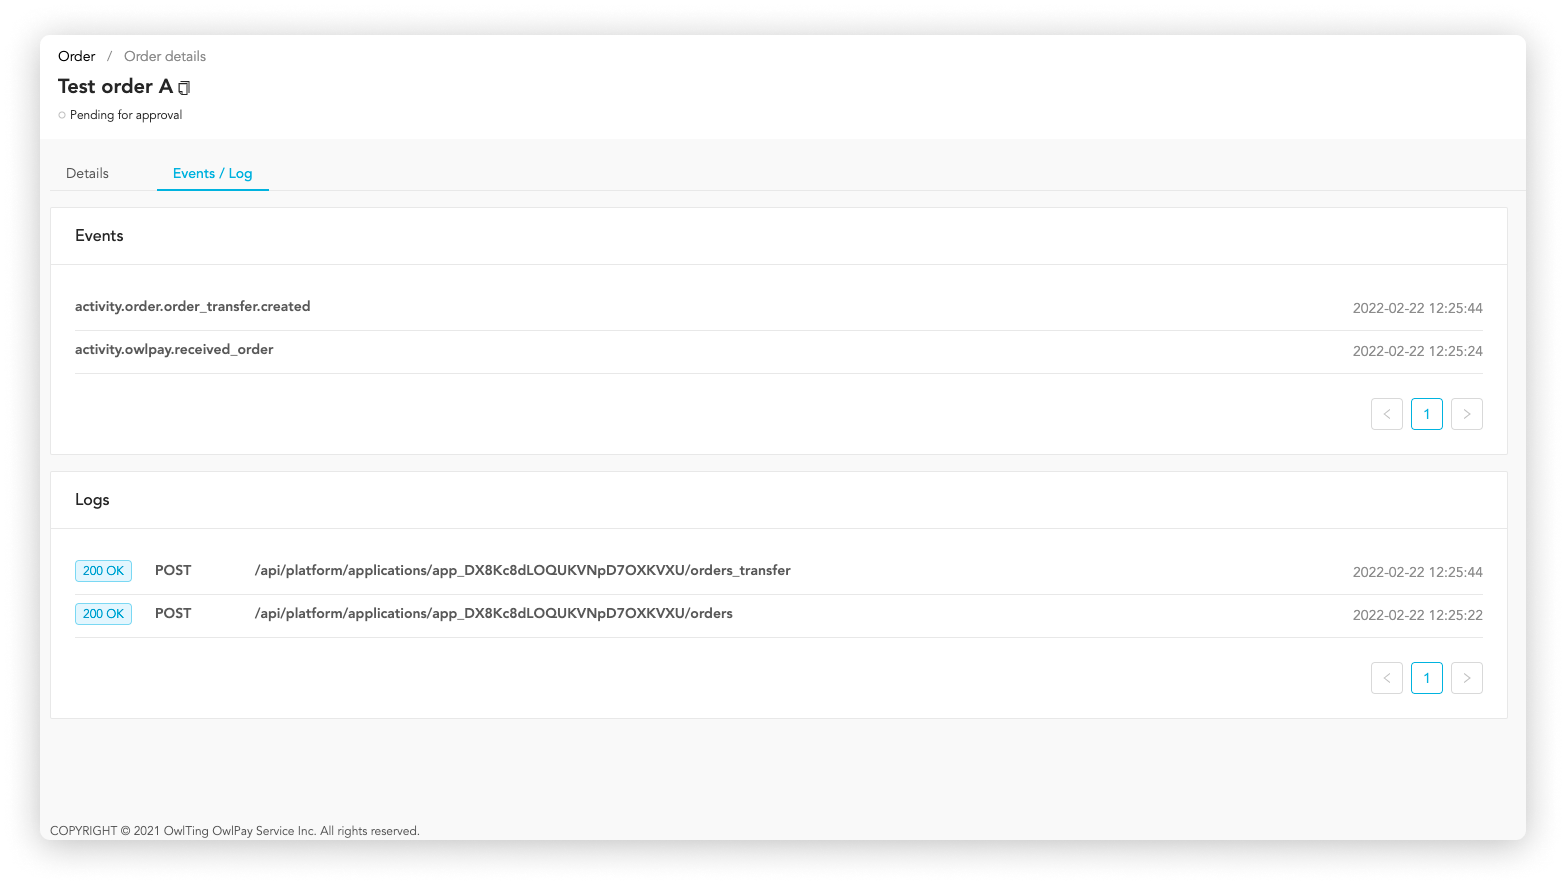
Events/ Log
This page will record API events when your developer accesses OwlPay, please refer to the Developer API Documentation.
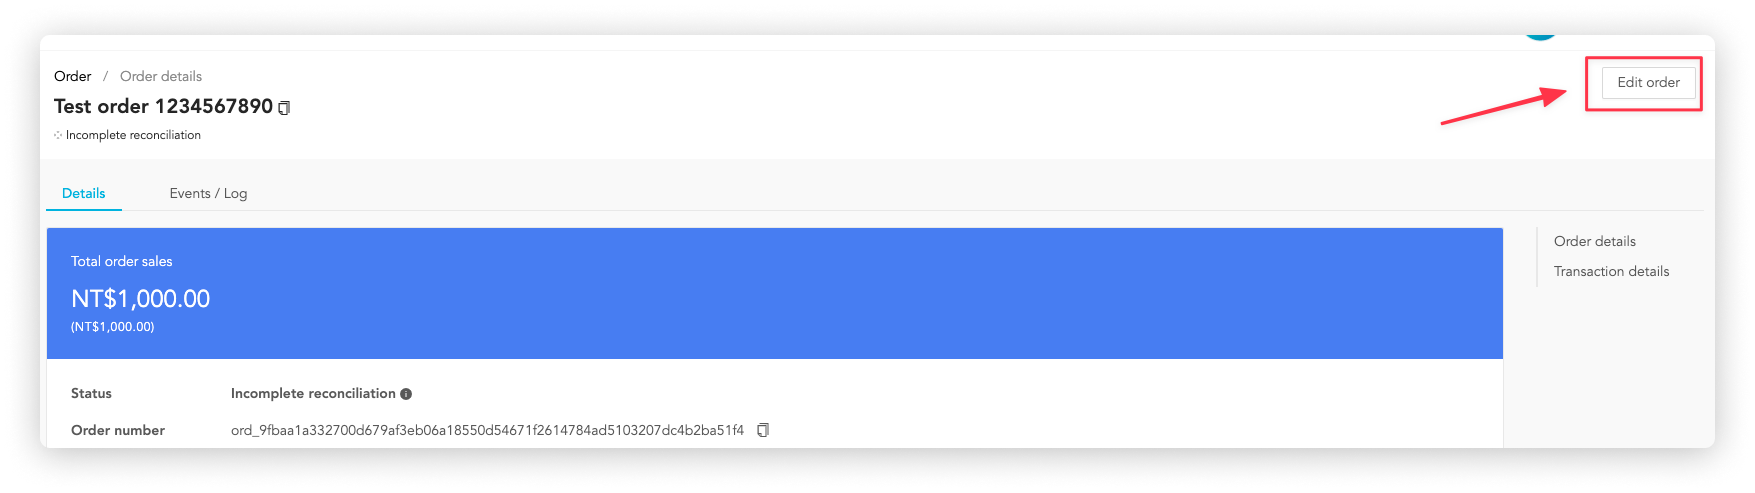
How to edit an order
Before the order is approved, you can click "Edit Order" to modify the order if necessary.
Follow the steps below:
Click the order number you want to edit. For example,
Test order 1234567890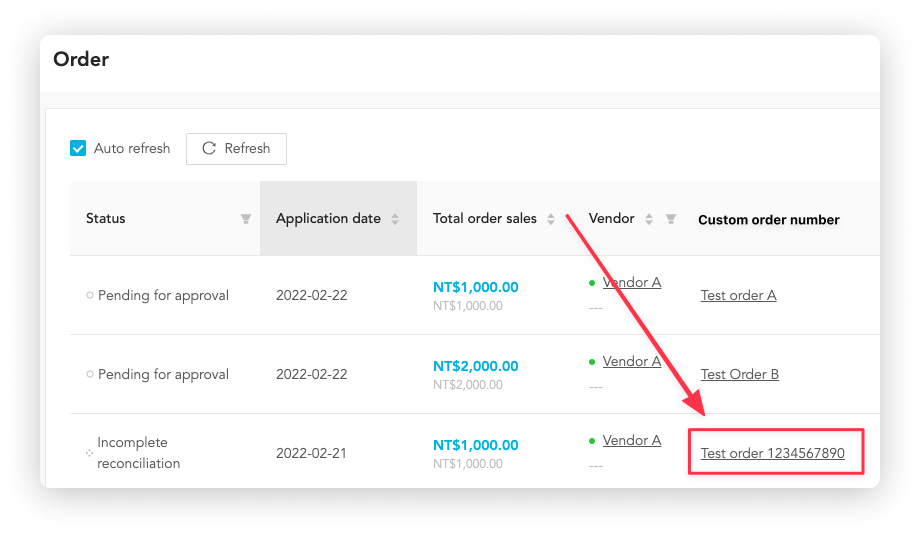
Go to the order details page and click "Edit Order" in the upper right corner
You can edit the content below:
- Order sales
- Extra details: customizable order column
- Description: order remark
- Advanced Settings: reconciliation request time

- After editing, click "Save" to save this modification.
How to link an order
If some of your orders have special relations, such as
- Memo: remind yourself or your employees to check a specific order
- Positive and negative orders: refund to a vendor
- One main order + multiple sub-orders: group buying
You can use the linked order feature.
You can use it in 2 ways
- when creating order
- on an existing order page
When creating order
1. Click "Order" on the sidebar
2. Click "Create order"
3. In the advanced settings section, click "Expand"
4. Click the dropdown under the Linked Order
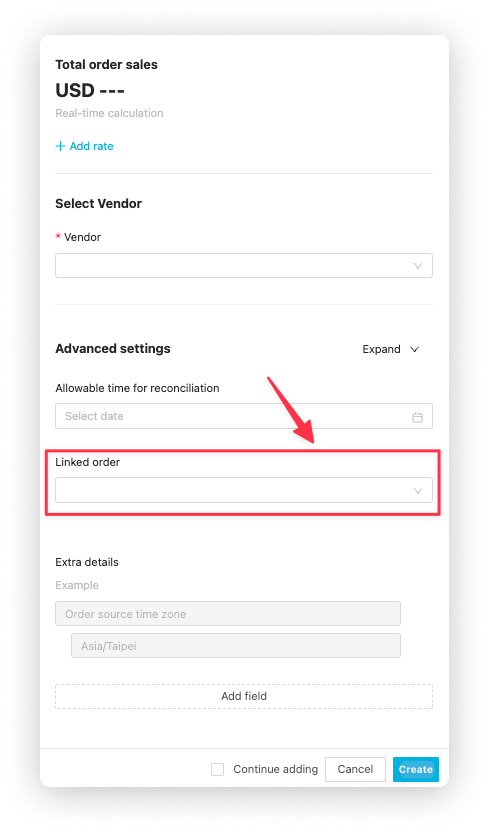
5. Click the order you want to link

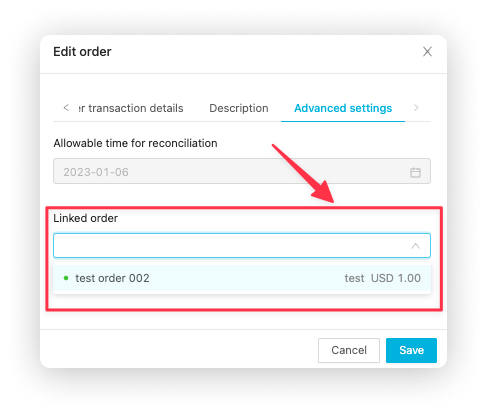
On an existing order page
1. Click "Order" on the sidebar
2. In the "Custom order number" field, click the order you want to set up the relation

3. In the Linked order section, click "Edit linked order"
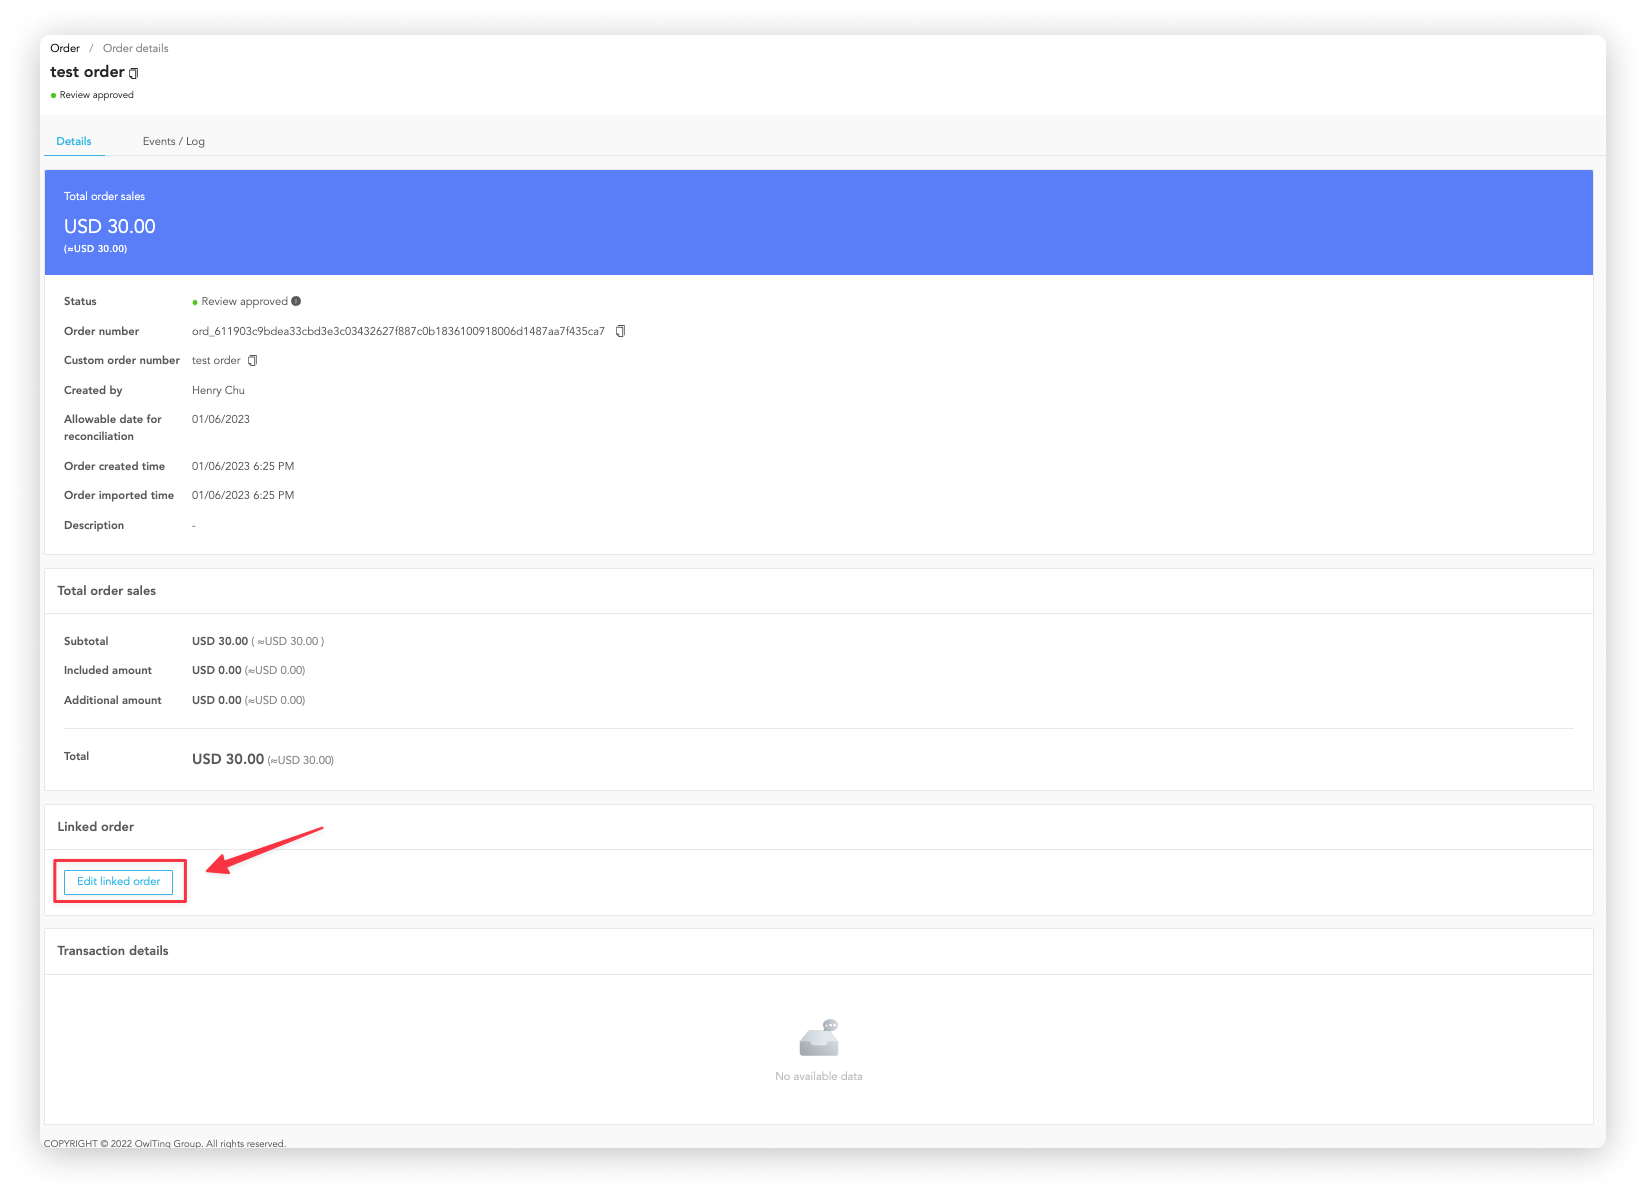
4. Click the dropdown under the Linked Order
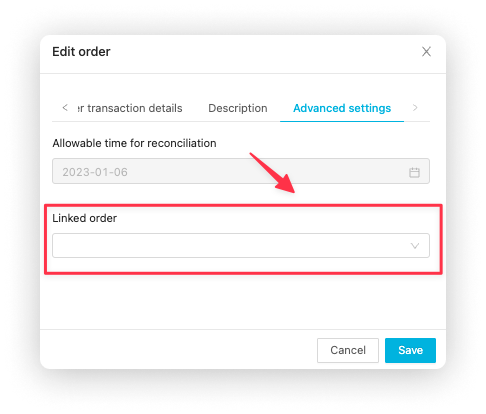
5. Click the order you want to link
How to import order
If you have a .csv, .xlsx order information file, you can quickly import the order information to OwlPay through "Import Order". Follow the 4 steps below.
1. Upload file
- Click "Import Order" at the top right corner
- Refer to the "OwlPay Order Format Example.csv" or "OwlPay Order Format Example.xlsx" file to adjust your order data field format. After confirming, click "Upload"
- After uploading, click "Next".

2. Map table fields
OwlPay will compare the field names automatically, if the field name in your file is different from OwlPay's, you need to manually select the field to map. After selecting, click "Next".

3. Check the content
OwlPay automatically
- checks whether there are duplicate fields in "Your file" and "OwlPay existing order"
- shows the fields that need to be modified.
If there are duplicate fields or fields that need to be modified, please follow the instruction message.
After confirming, click "Next".

4. Import orders
After the OwlPay system is ready, click "Confirm" to import orders.

- The uploaded file size should not exceed 30 MB
- If there are duplicate orders, you can still upload the file. You will be asked whether to overwrite "OwlPay Existing Order" with "Uploaded file".
How to export order information
Click "Export" to download all the order information to your computer as .csv.
