Payout extensions
Setting up payout extensions to start payout.
"Payout extension" refers company setting up different payout methods to pay the vendor。
Click "Setting" > "Payout extensions"
How to set up payout extensions
Each payout extension has different settings, please refer to the steps below.
Set up "Cathay United Bank | Global MyB2B"
Follow the steps below:
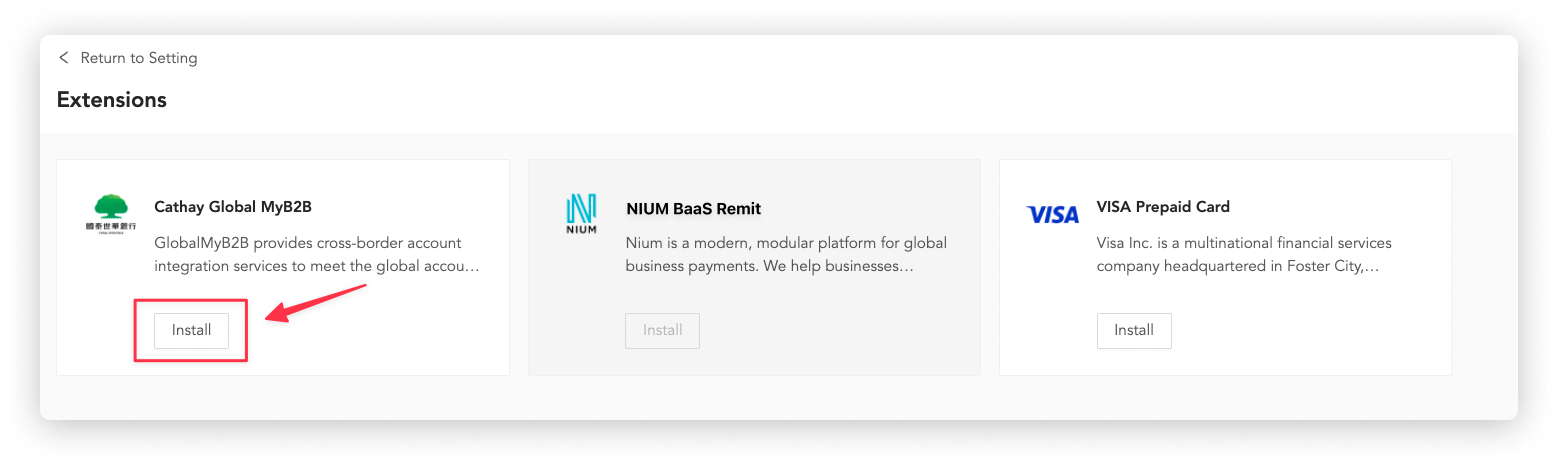
1. Click "Install" on Cathay United Bank Global MyB2B
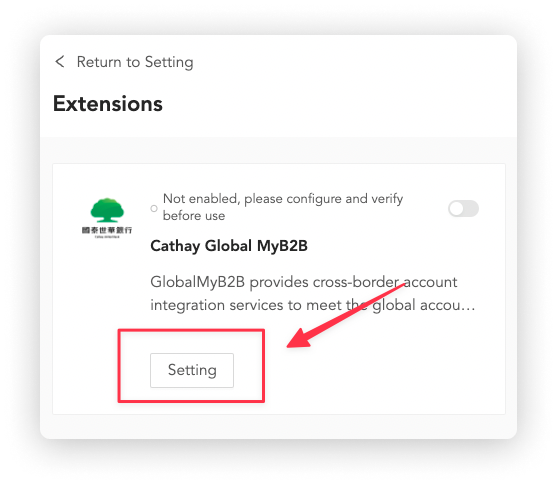
2. Click "Setting"
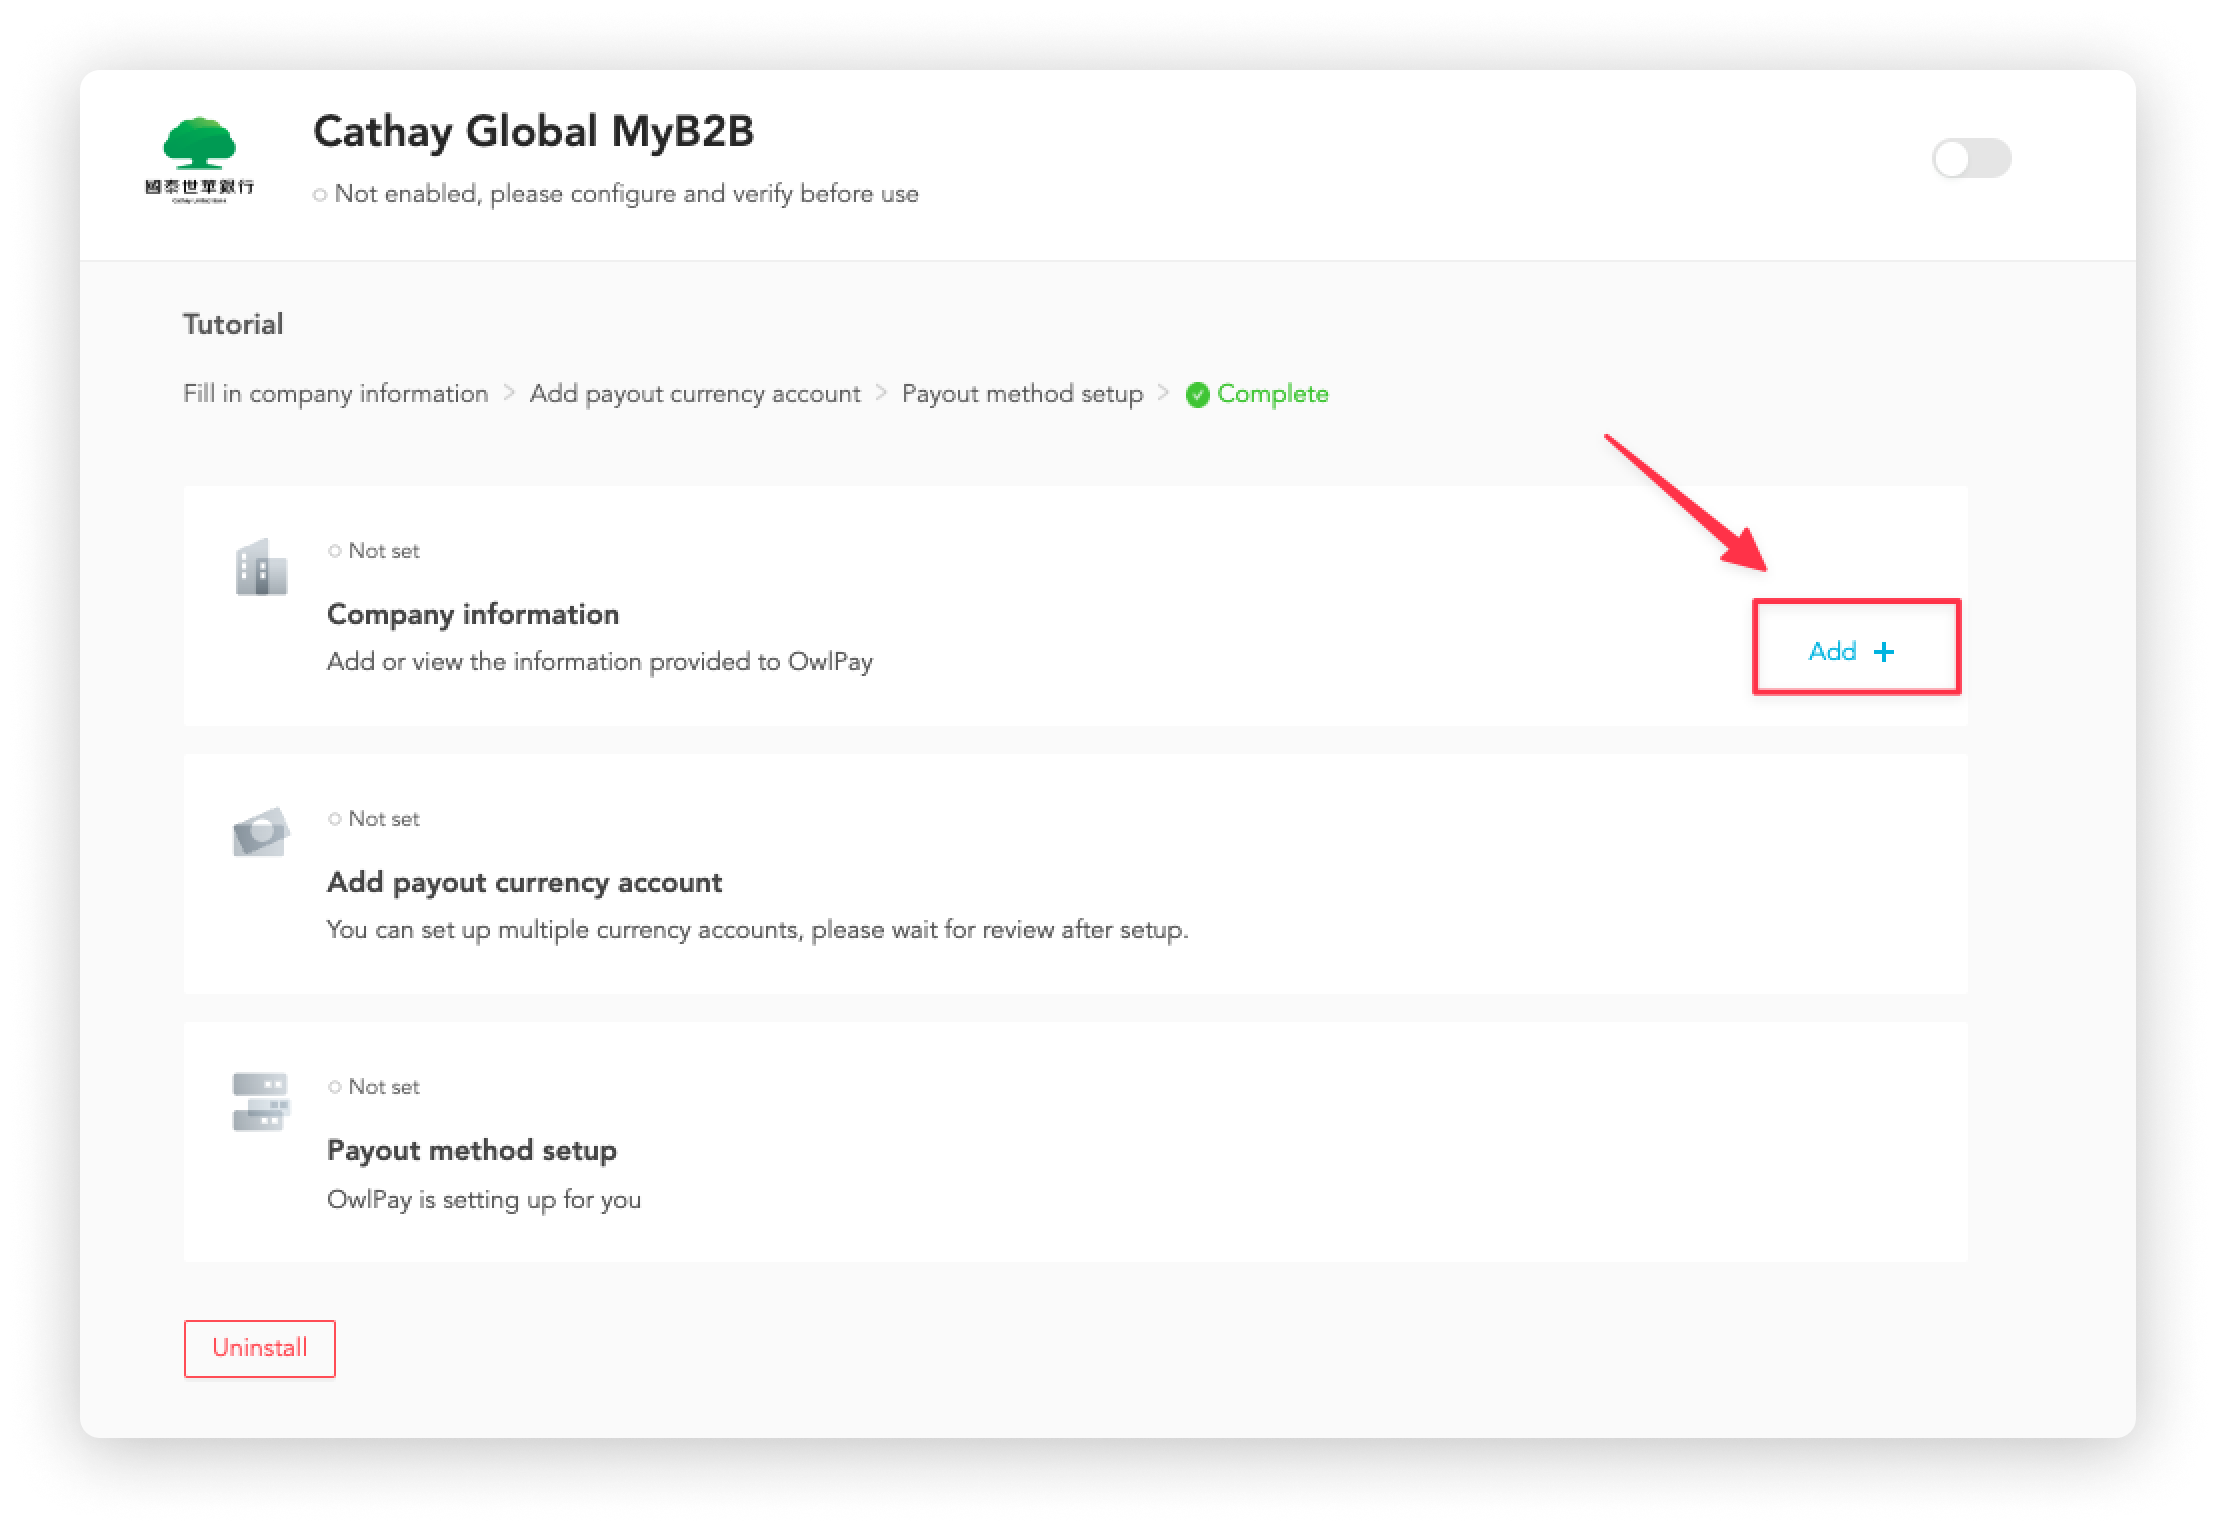
3. Add "Company information"
Click "Add".
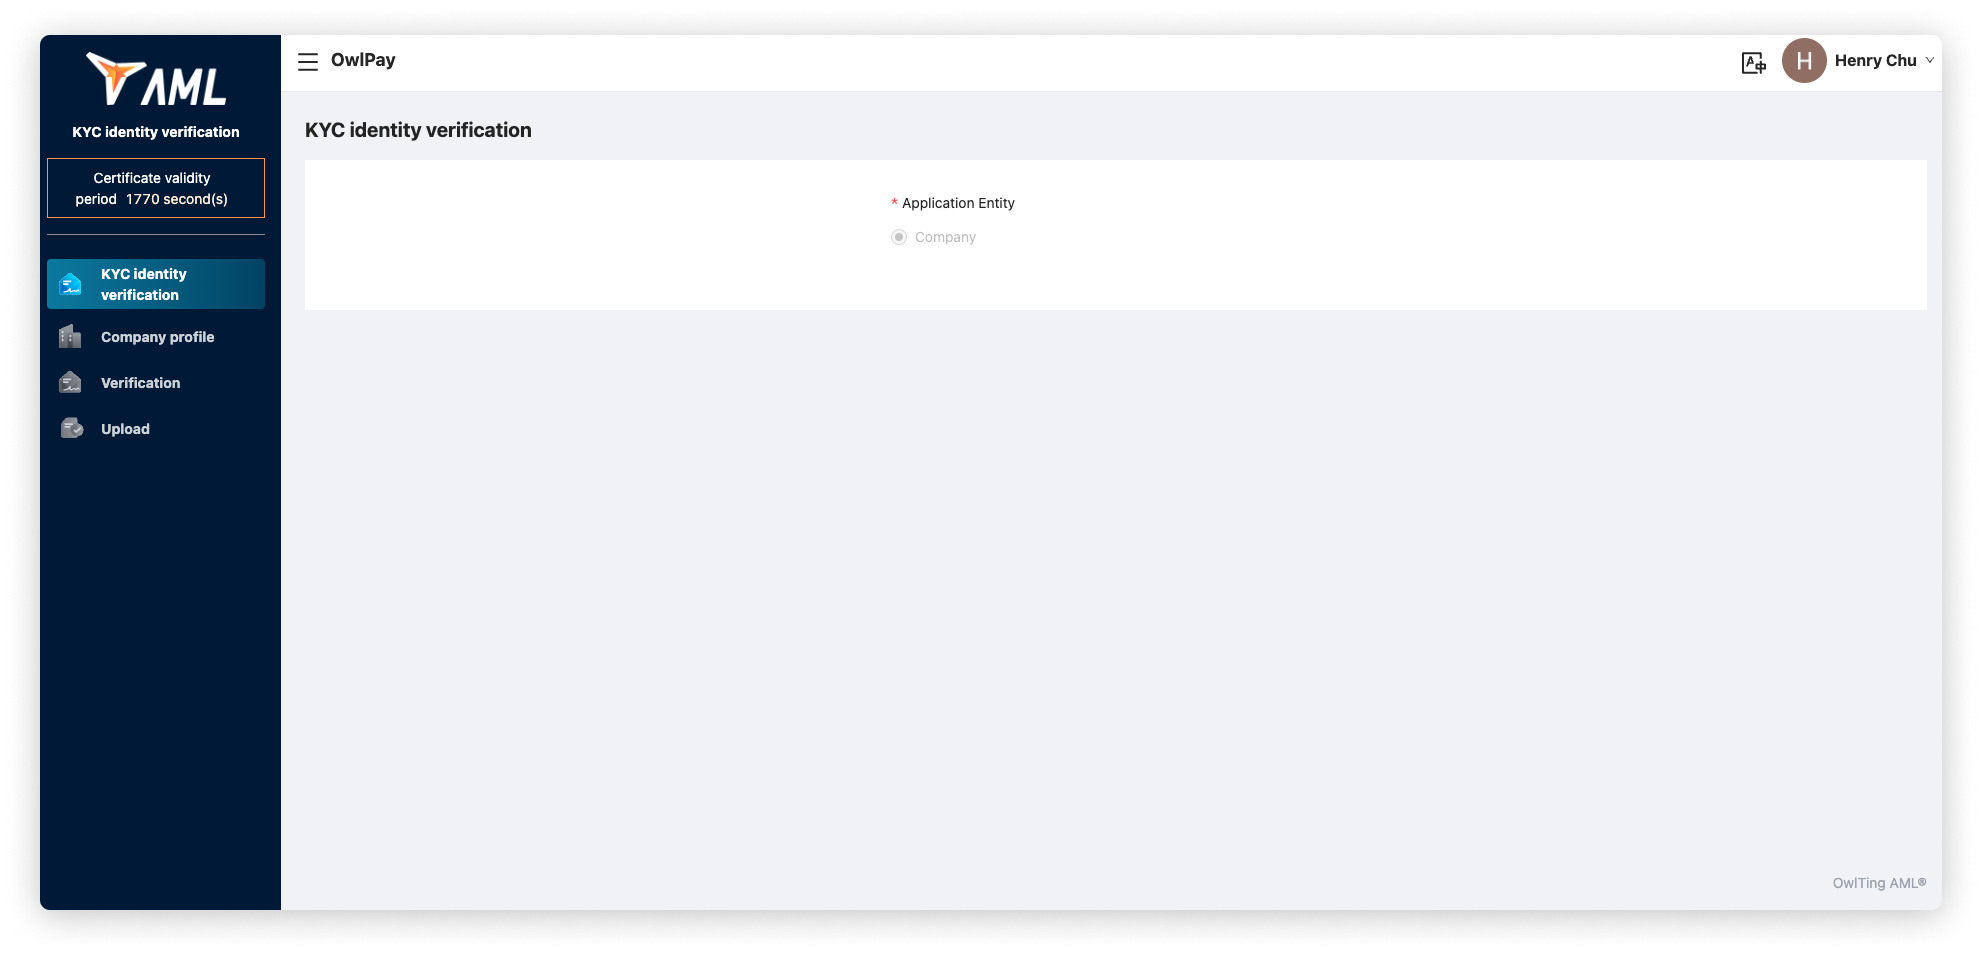
You will be redirected to the "AML KYC Identity Verification" page; follow the instructions to complete your bank information and click "Send".
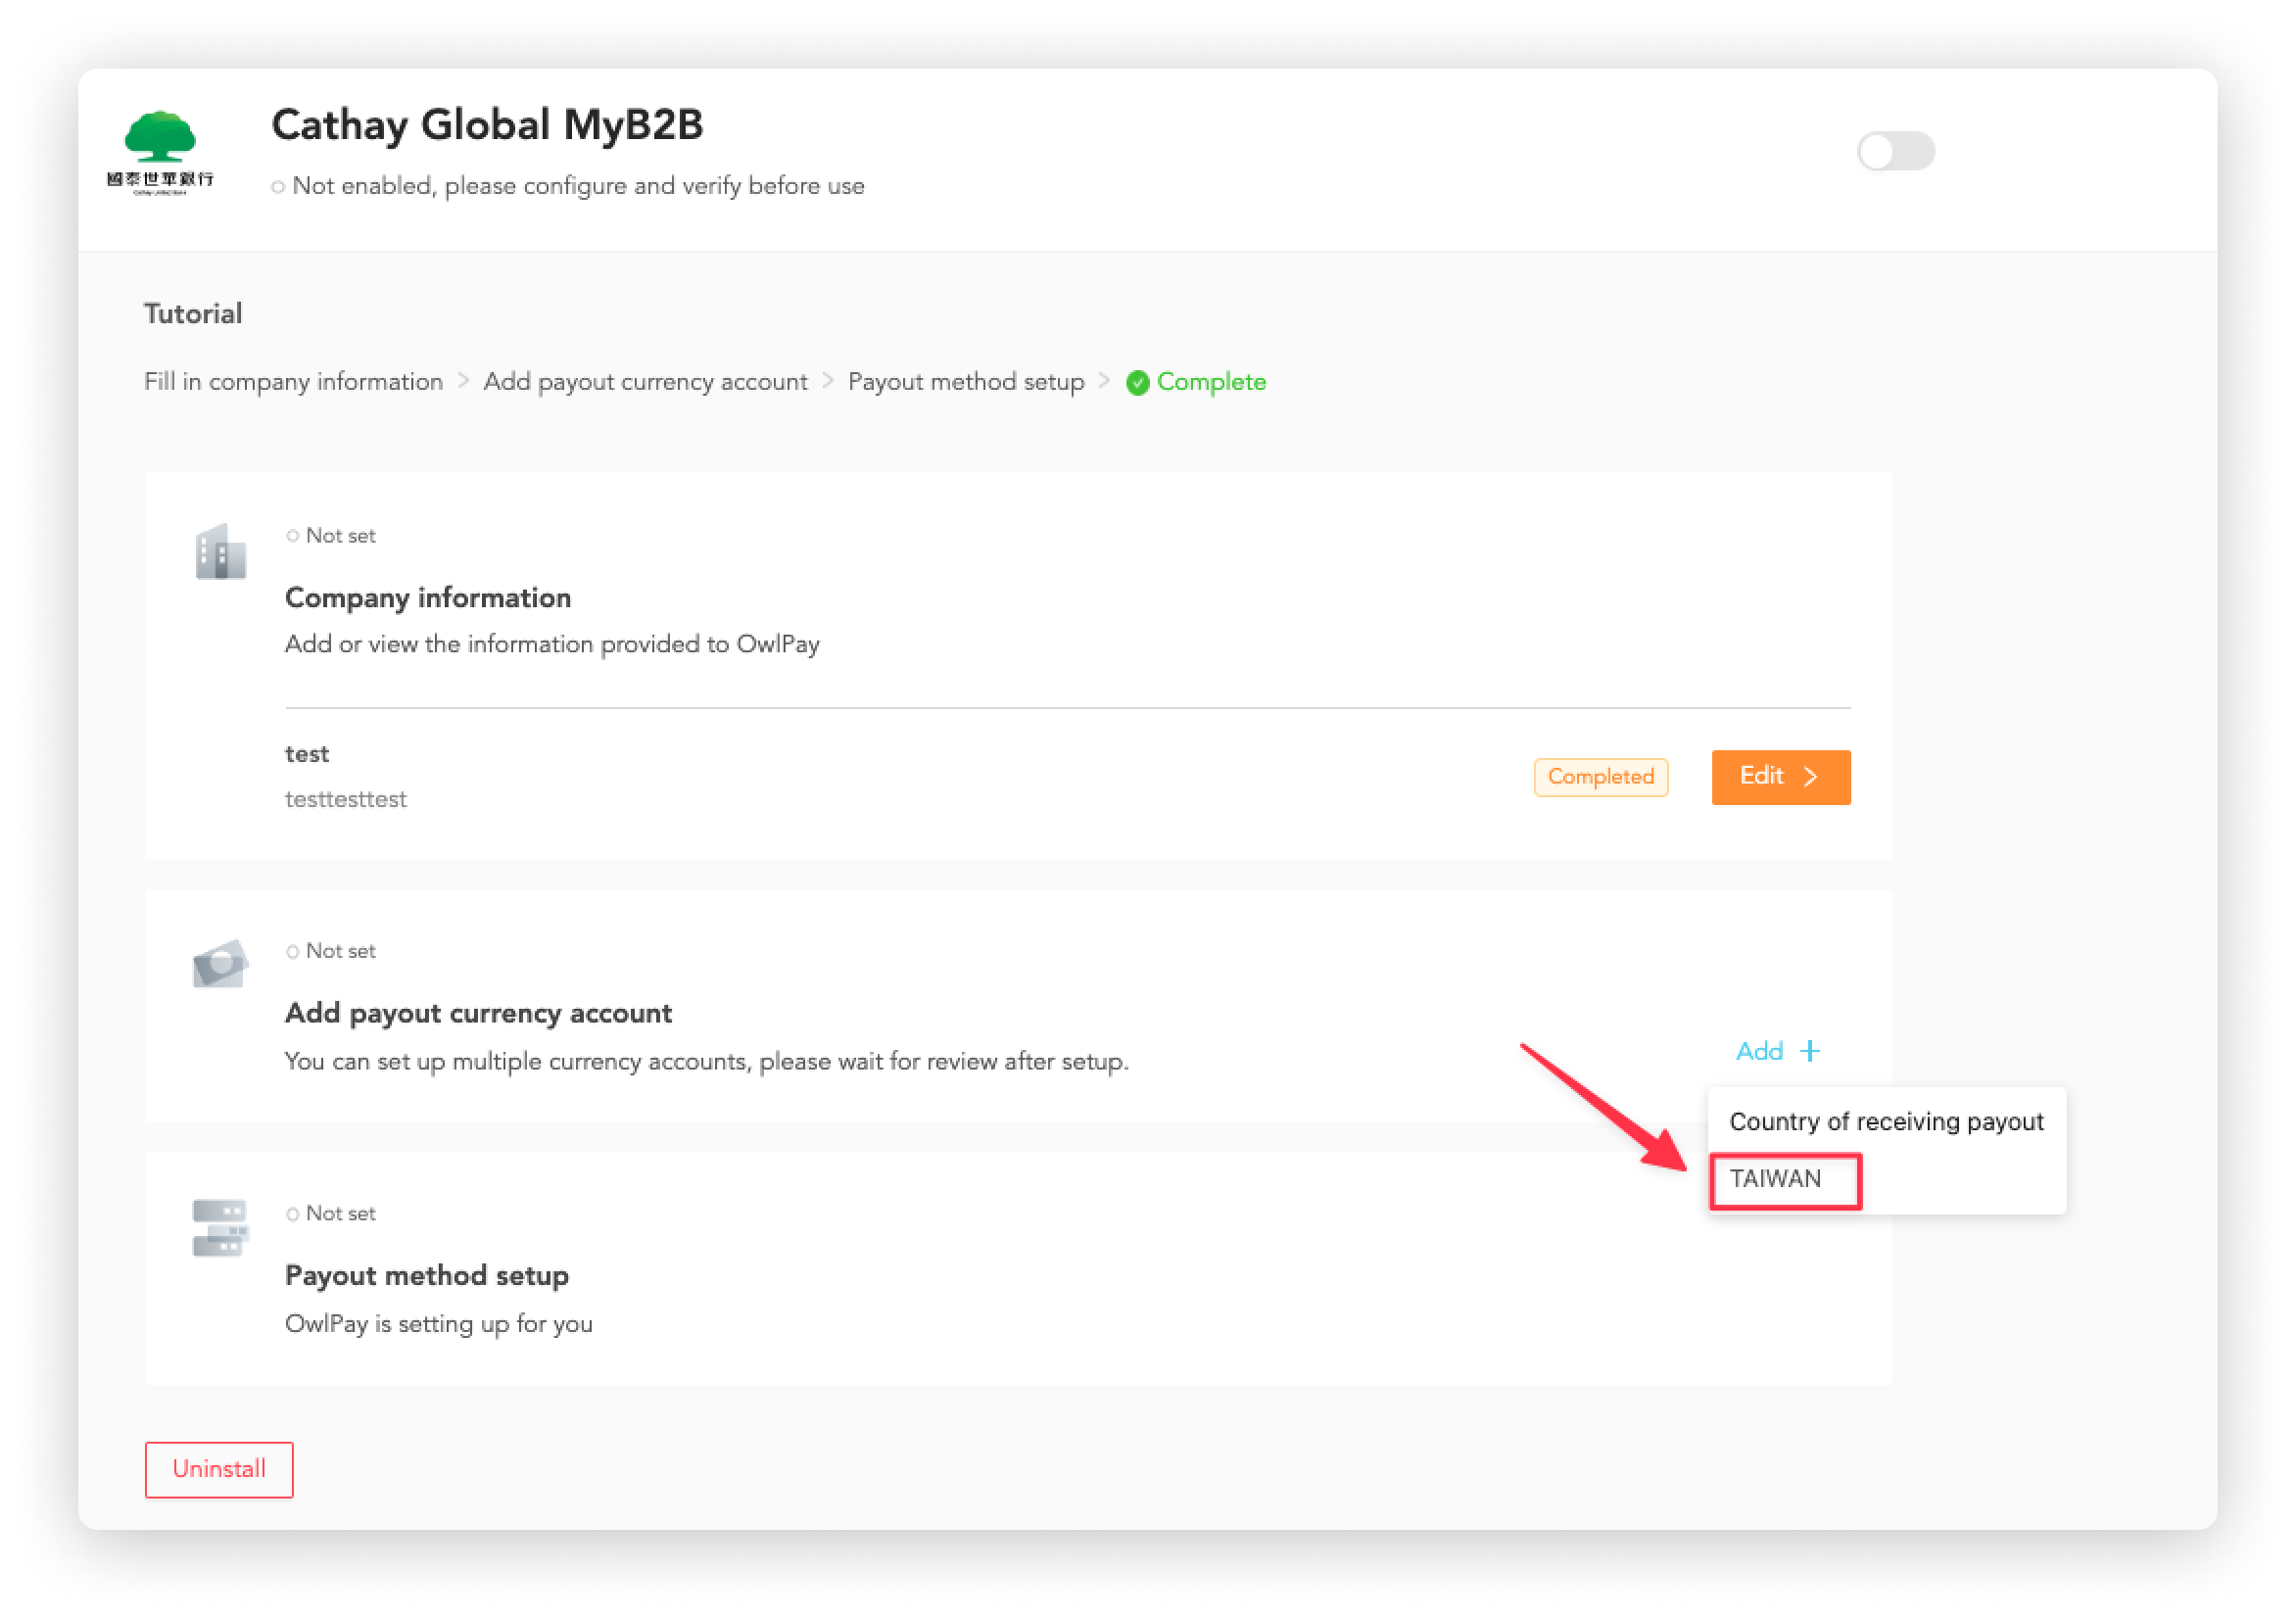
4. Add "Payout currency account"
Click "Add" > "TAIWAN". You will be redirected to the "AML KYC Identity Verification" page; follow the instructions to complete your bank information and click "Send".
After sending the application information, you will:
- receive a confirmation email.
- see the "Verifying" status on the "Payout extensions" page
Please wait for the verification, OwlPay team will take the initiative to inform you of the verification result.
Each payout method has different settings, please refer to the detailed setup steps below.
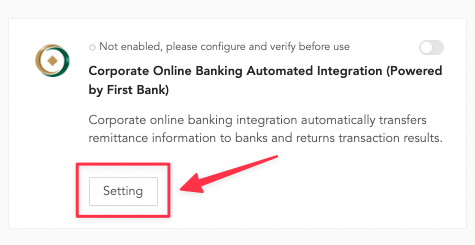
Set up "First Bank | e-Bank"
Follow the steps below:
1. Click "Install" on First Bank - eBank

2. Click "Setting"
3. Add "Company information"
Click "Add".
You will be redirected to the "AML KYC Identity Verification" page; follow the instructions to complete your bank information and click "Send".

4. Set up "Add payout currency account"
Click "Add" > "TAIWAN". You will be redirected to the "AML KYC Identity Verification" page; follow the instructions to complete your bank information and click "Send".
After sending the application information, you will:
- receive a confirmation email.
- see "Verifying" status on the "Payout extensions" page
Please wait for the verification, OwlPay team will take the initiative to inform you of the verification result.
Each payout method has different settings, please refer to the detailed setup steps below.
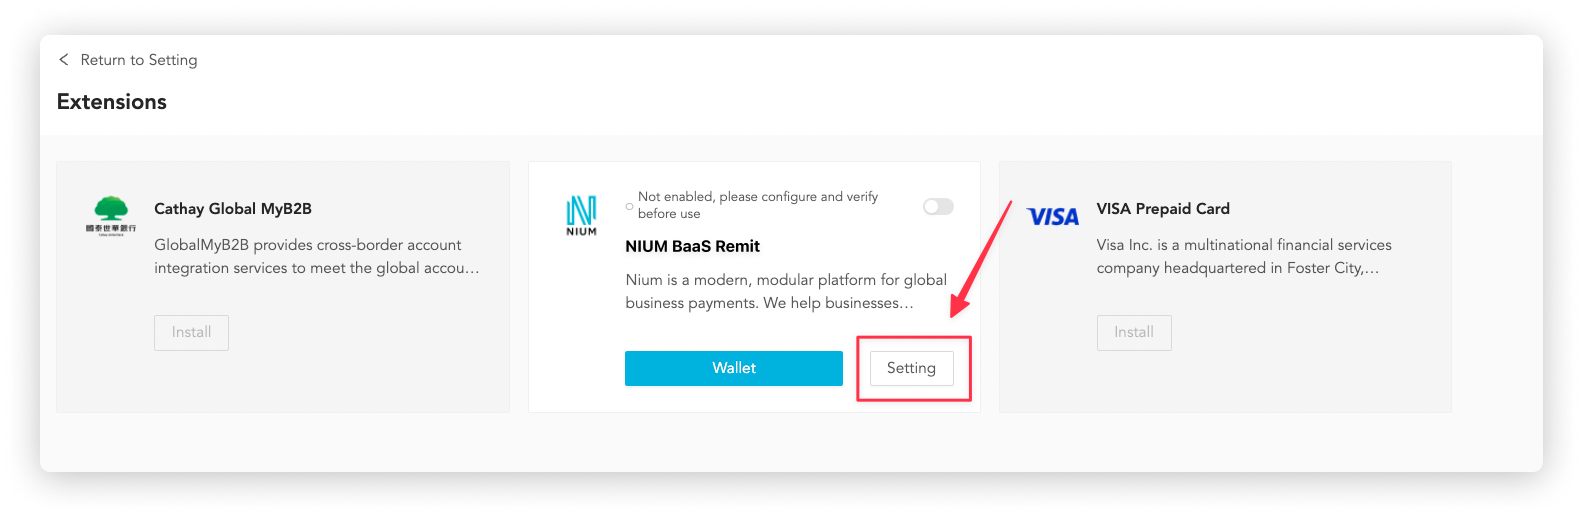
Set up "NIUM"
Follow the steps below:
1. Click "Install" on NIUM

2. Click "Setting"
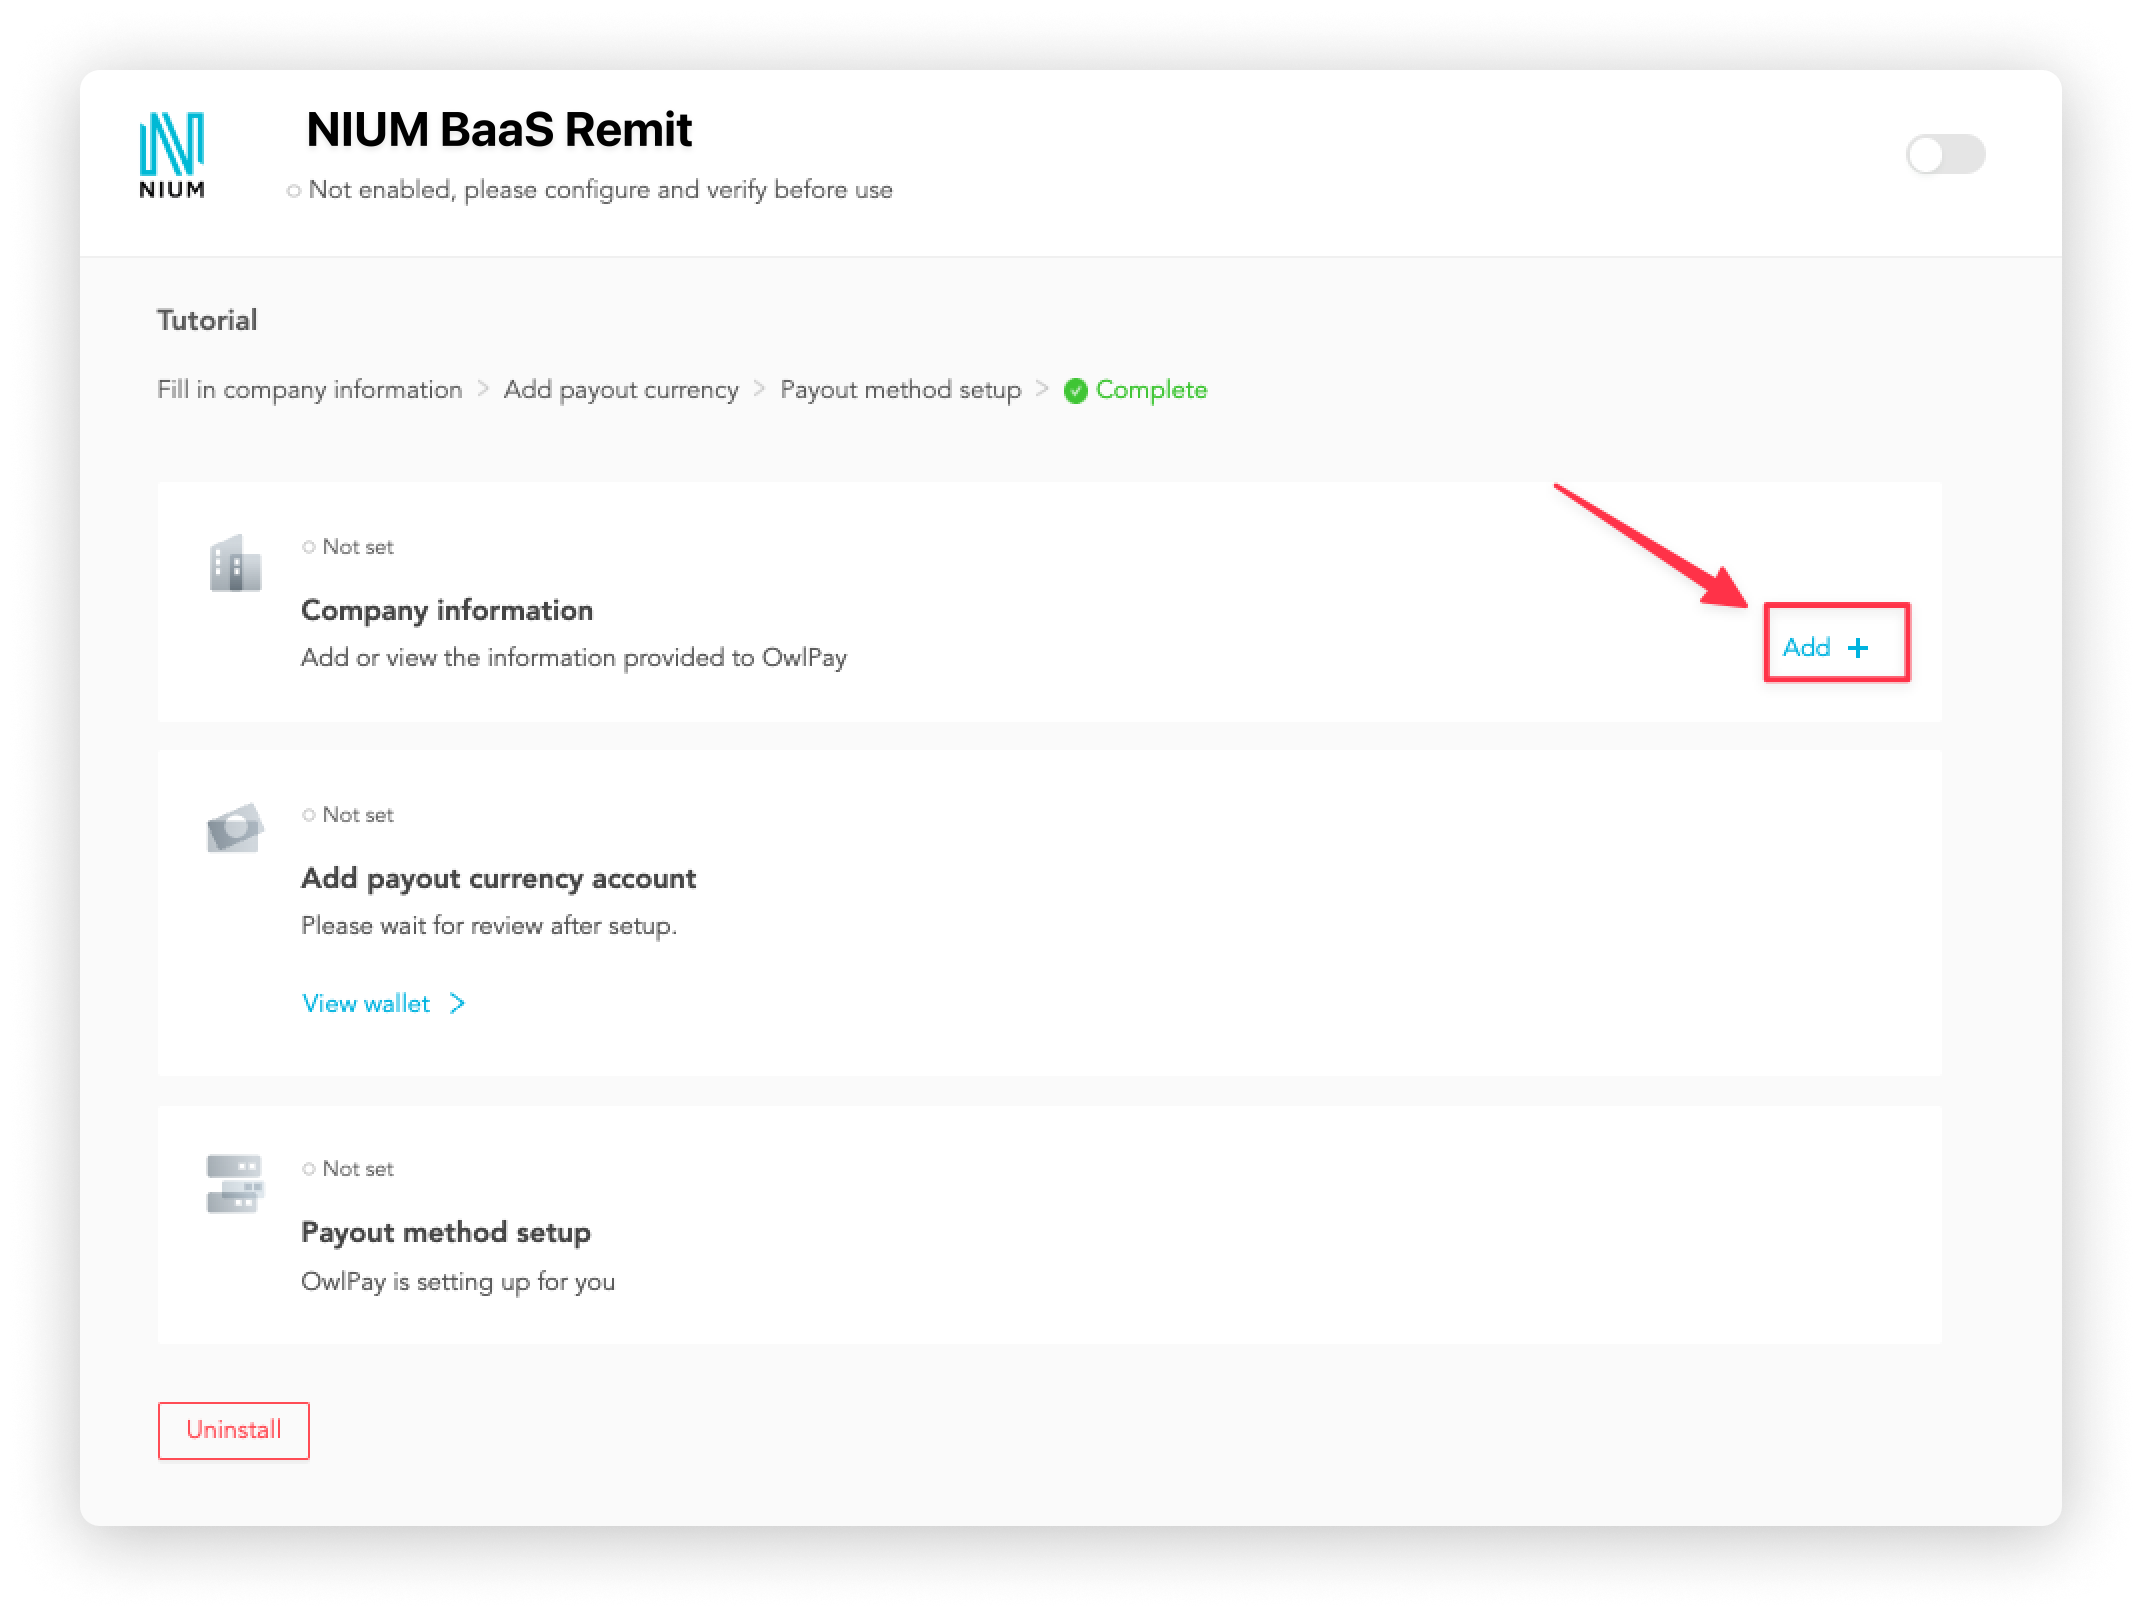
3. Add "Company information"
Click "Add".
You will be redirected to the "AML KYC Identity Verification" page; follow the instructions to complete your bank information and click "Send".
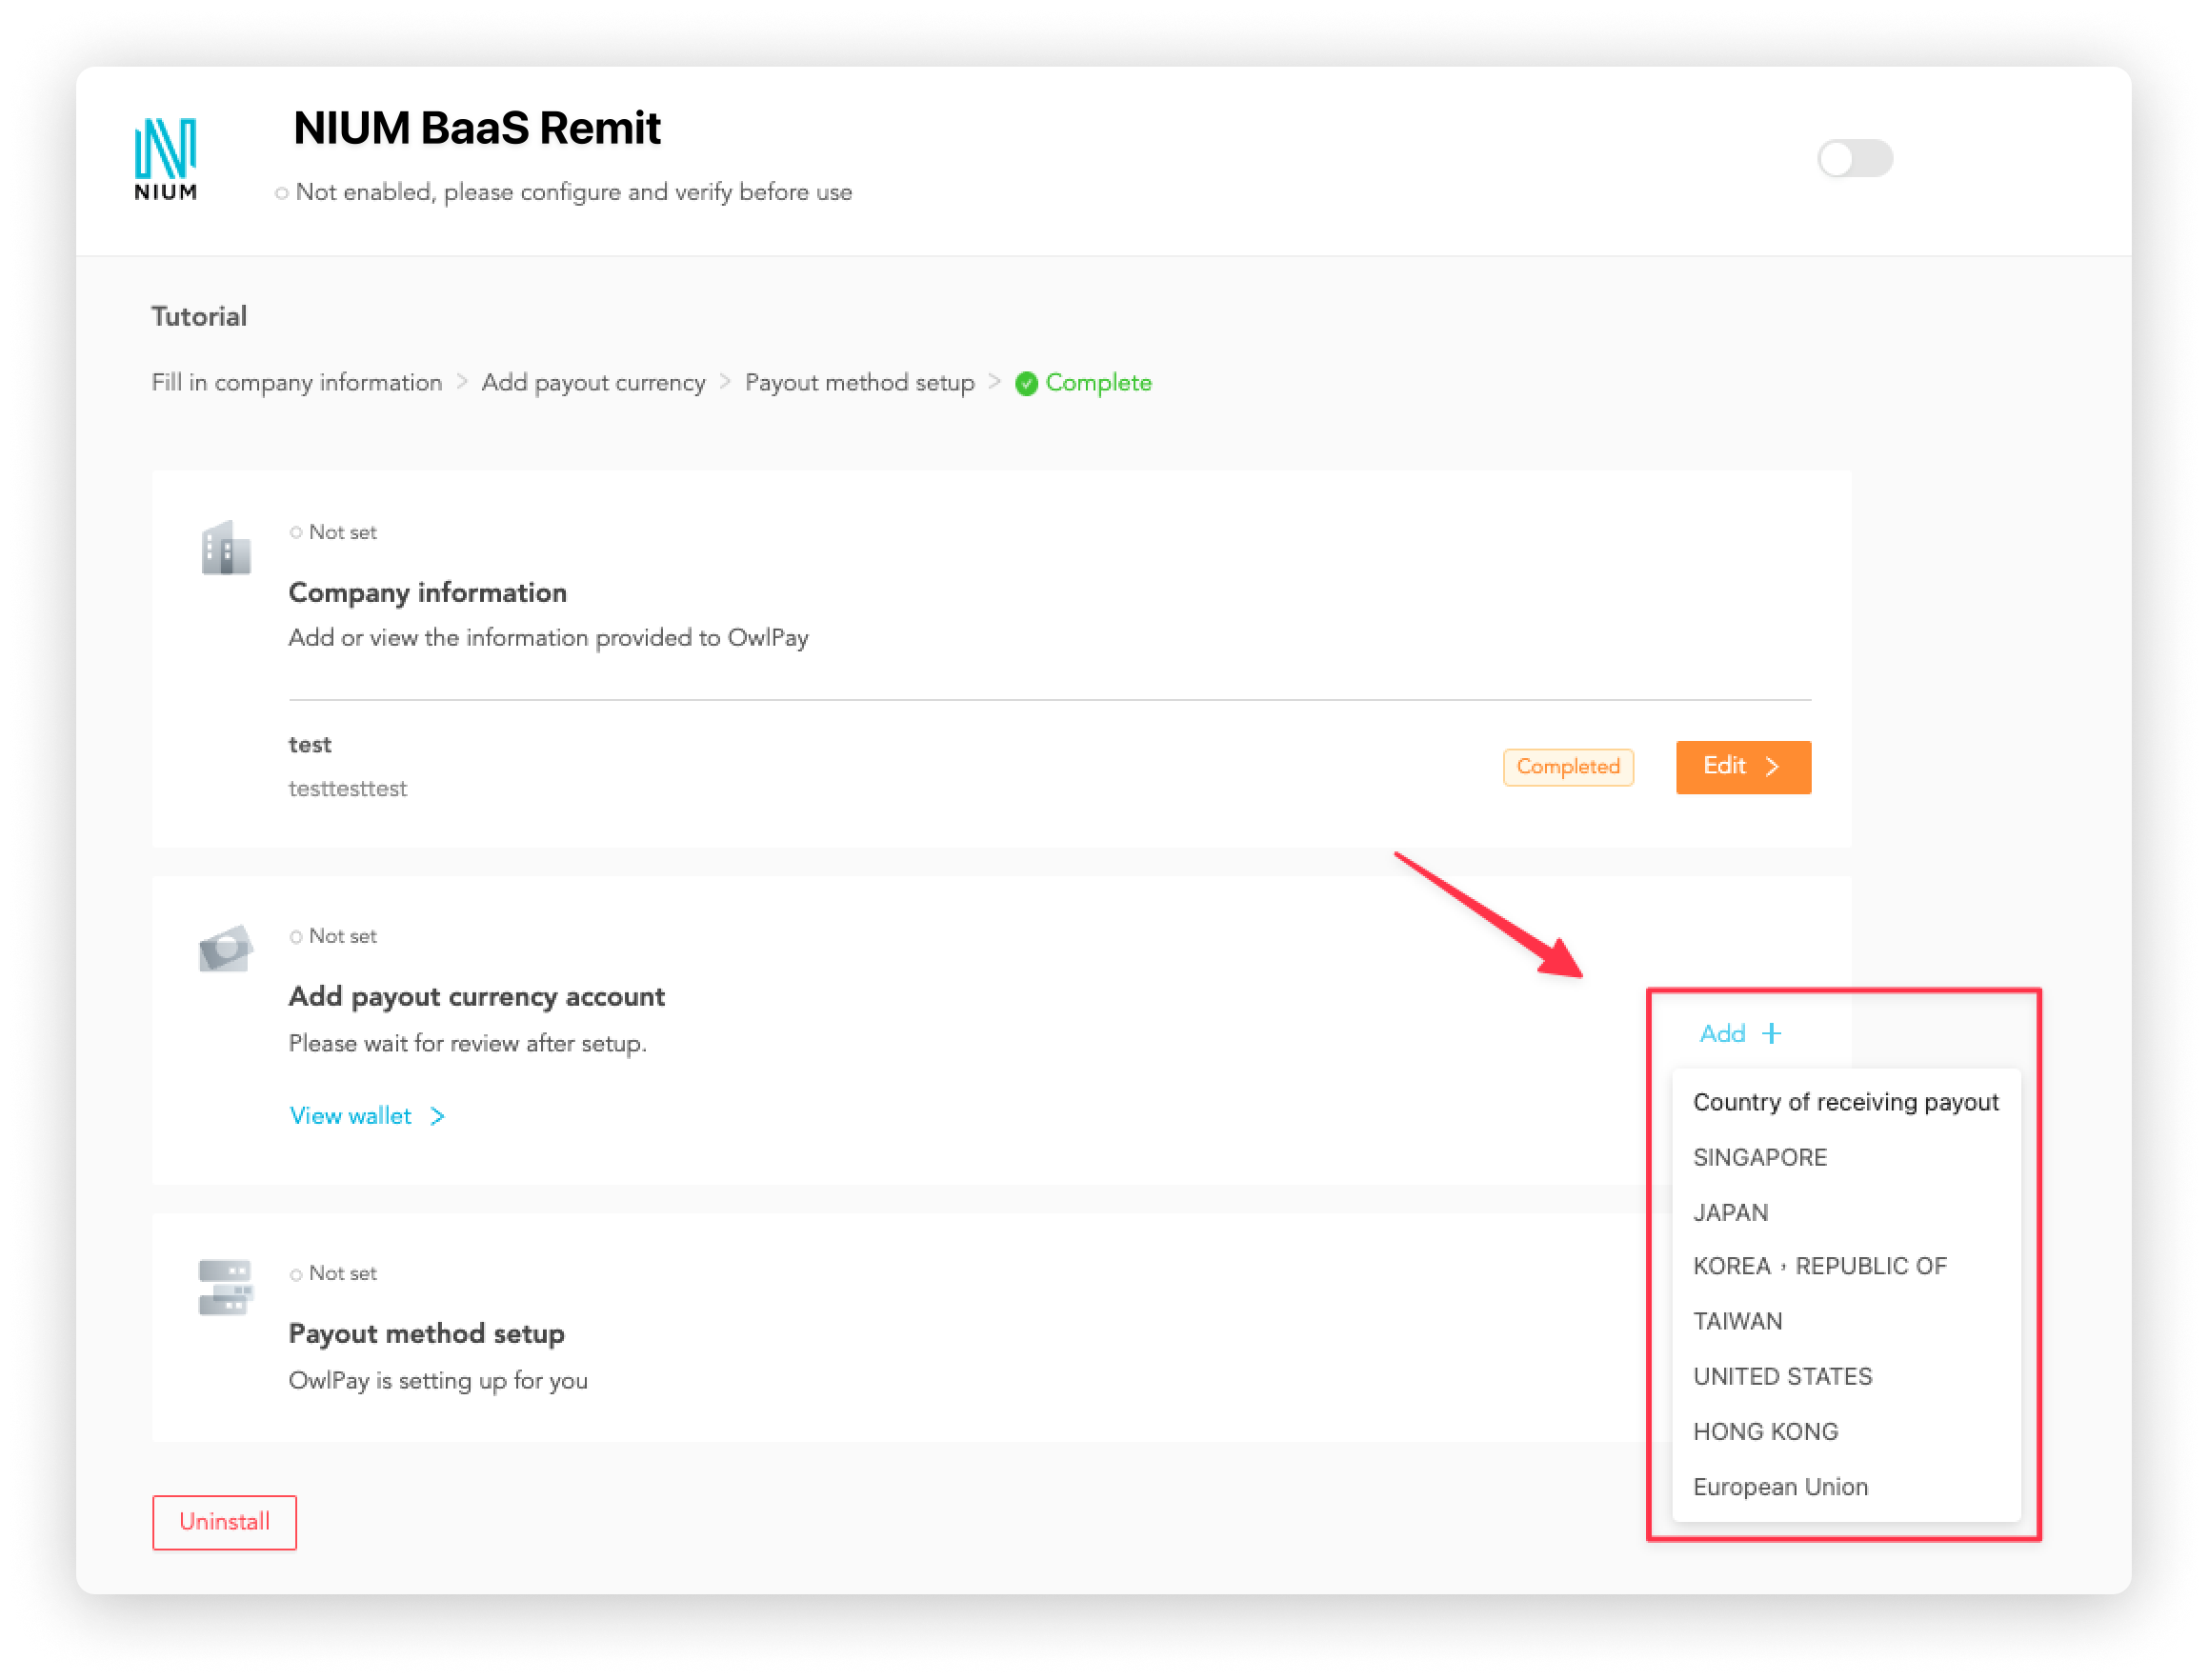
4. Set up "Add payout currency account"
Click "Add" > "Country of receiving payout". You will be redirected to the "AML KYC Identity Verification" page; follow the instructions to complete your bank information and click "Send".
After sending the application information, you will:
- receive a confirmation email.
- see the "Verifying" status on the "Payout extensions" page
Please wait for the verification, OwlPay team will take the initiative to inform you of the verification result.
If the payout method cannot be activated, it means that you need to fill in additional information. OwlPay specialist will reach you to complete this process.
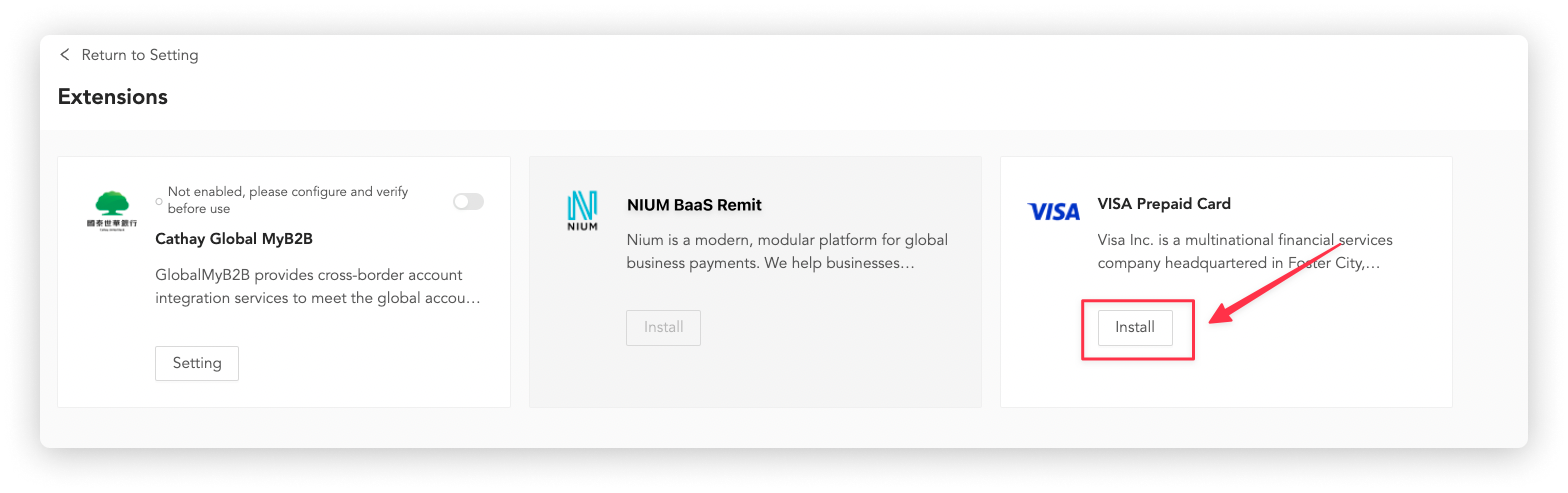
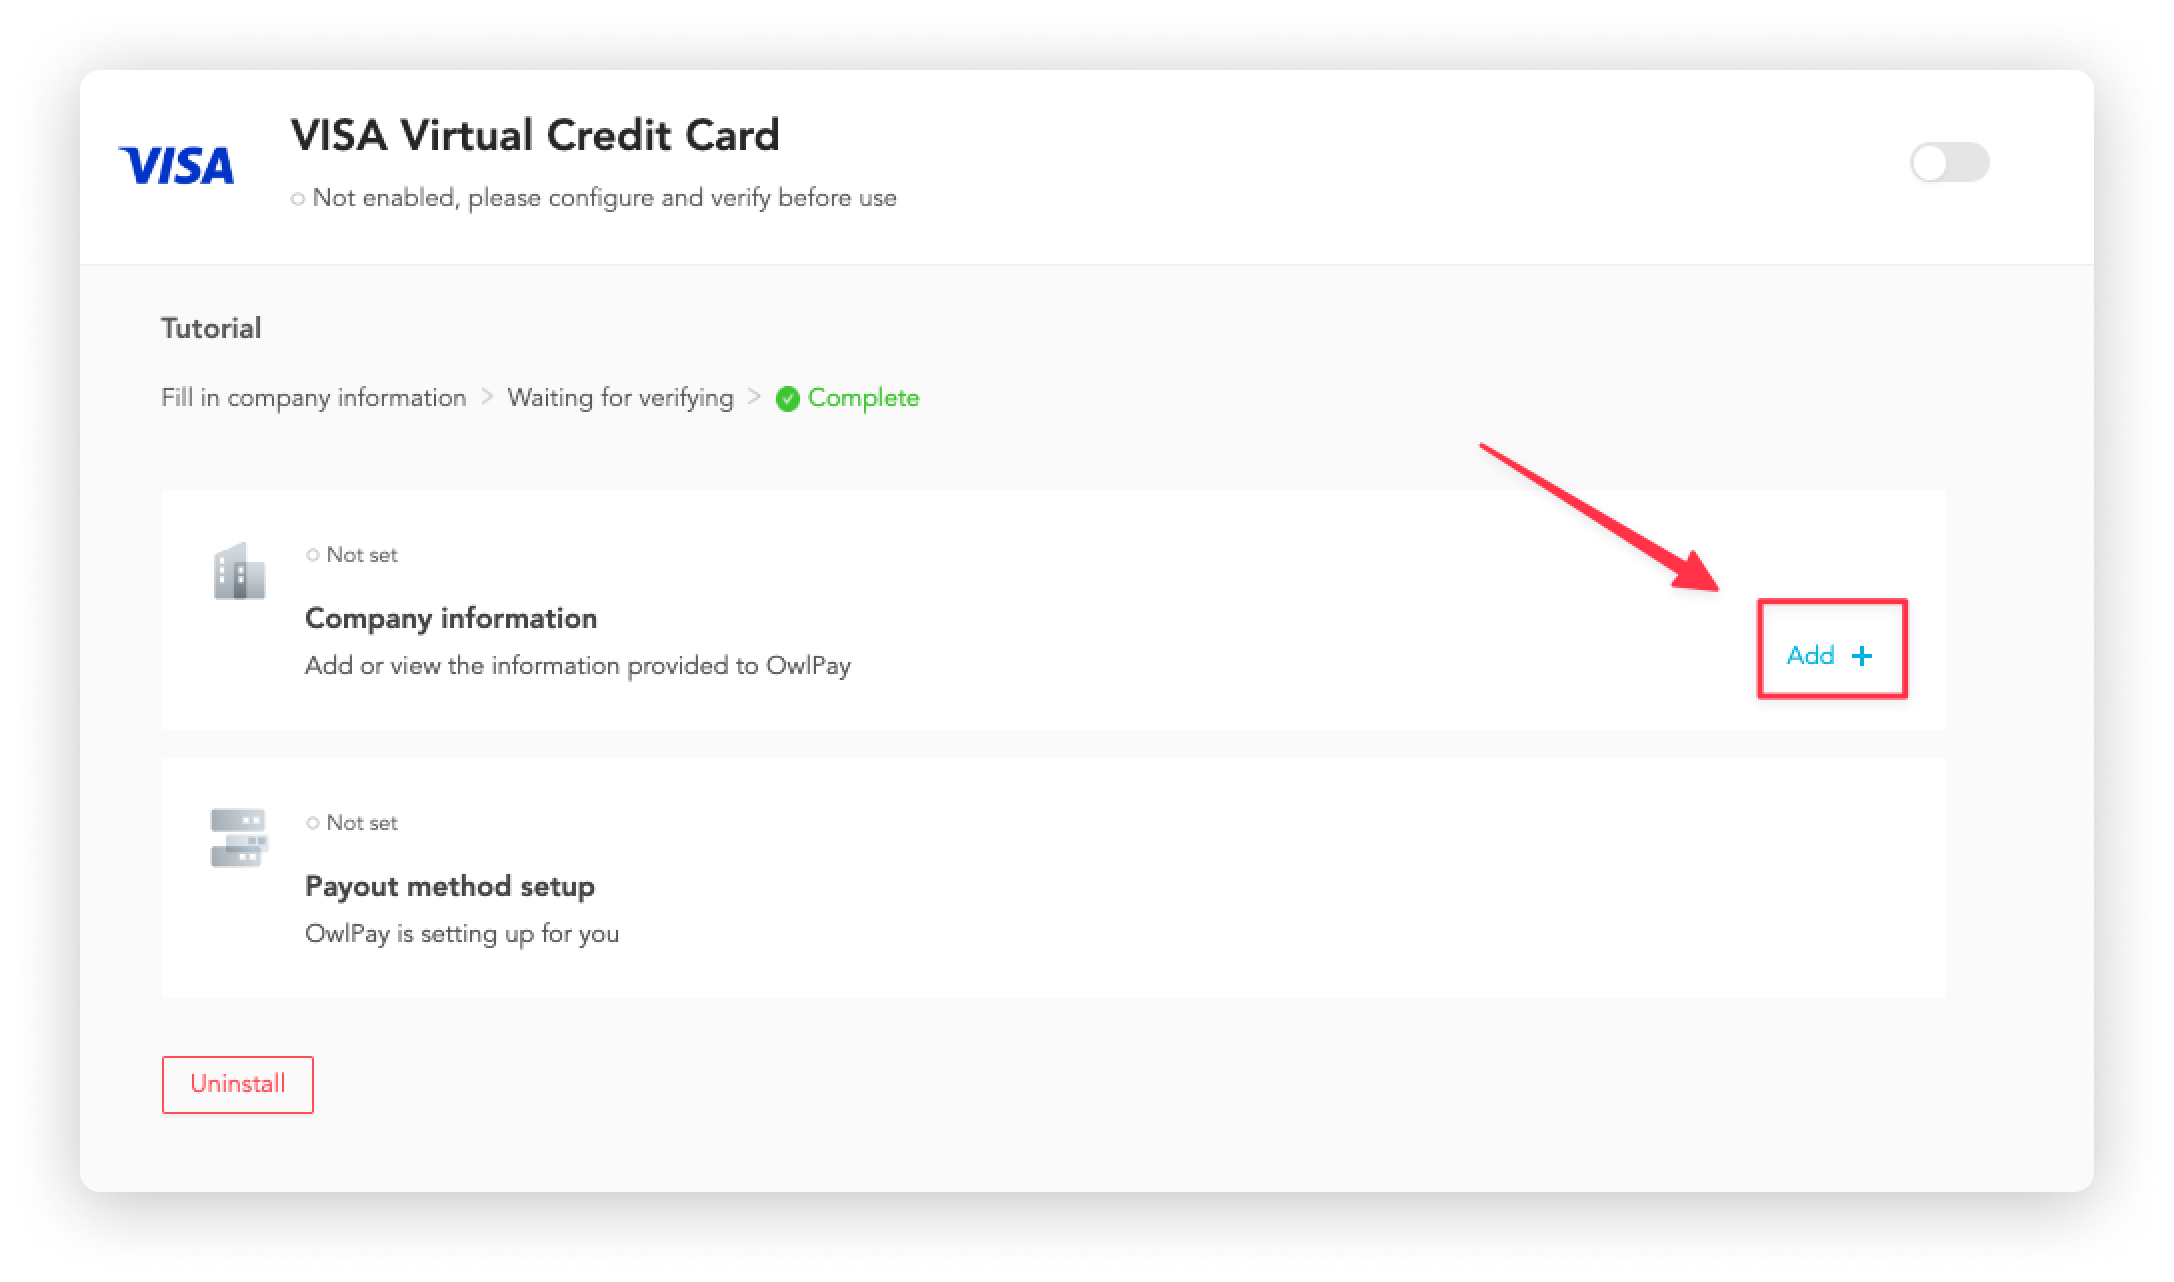
Set up "VISA Commercial Card and Account Payables"
Follow the steps below:
1. Click "Install" on VISA
2. Add "Company information"
Click "Add".
You will be redirected to the "AML KYC Identity Verification" page; follow the instructions to complete your bank information and click "Send".
After sending the application information, you will:
- receive a confirmation email.
- see the "Verifying" status on the "Payout extensions" page
Please wait for the verification, OwlPay team will take the initiative to inform you of the verification result.
If the payout method cannot be activated, it means that you need to fill in additional information. OwlPay specialist will reach you to complete this process.
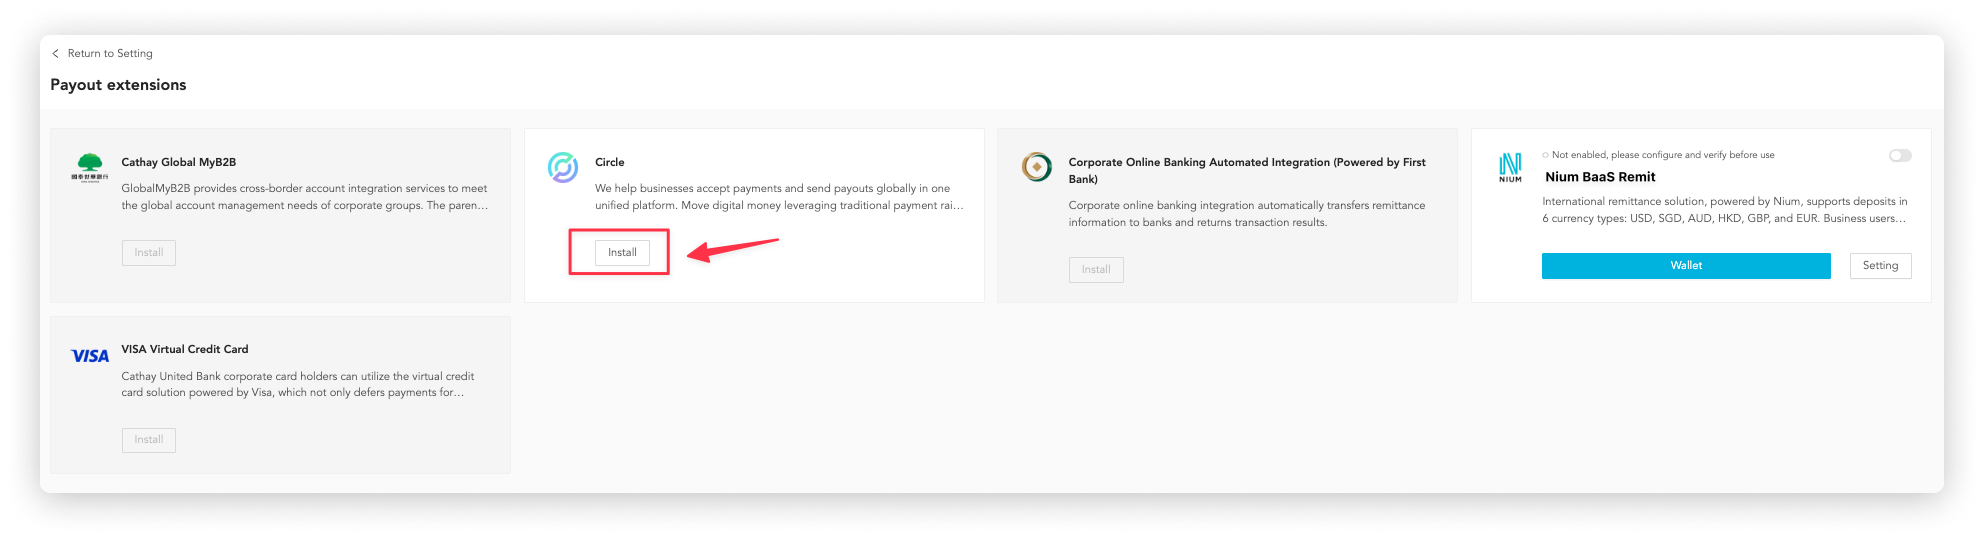
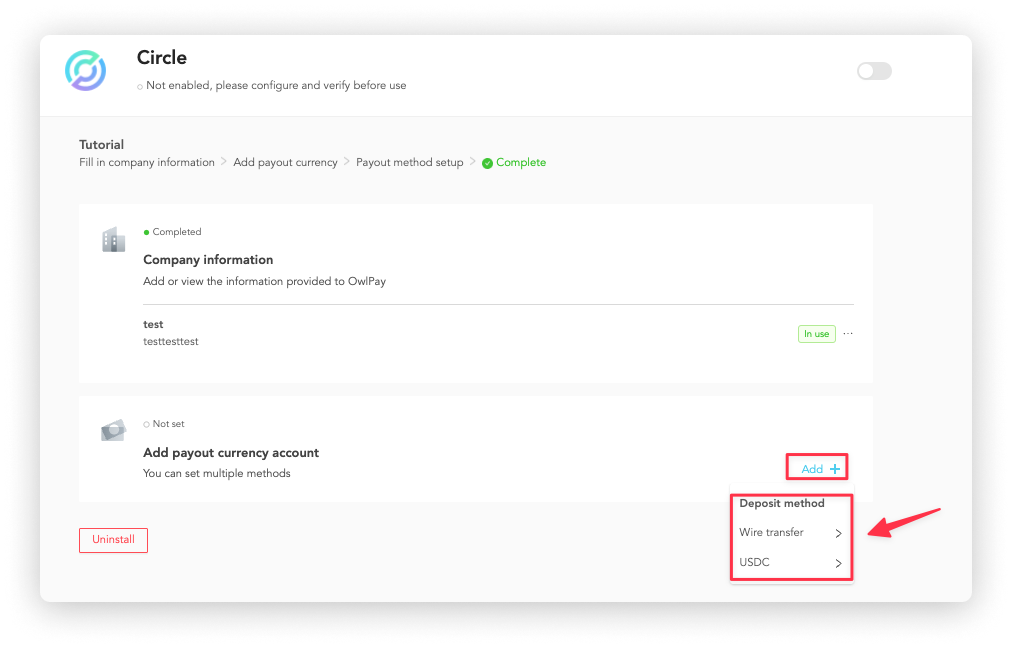
Set up "Circle"
To set up Circle, follow the steps below:
1. Install Circle
Click "Install" on Circle
2. Click "Setting"
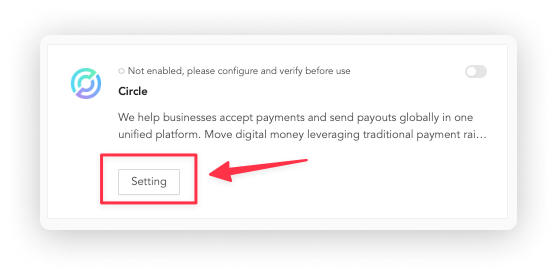
3. Add "Company information"

Click "Add".
You will be redirected to the "AML KYC Identity Verification" page; follow the instructions to complete your company information and click "Send".
After sending the application information, you will:
- receive a confirmation email.
- see the "Verifying" status on the "Payout extensions" page
Please wait for the verification, OwlPay team will take the initiative to inform you of the verification result.
If the payout method cannot be activated, it means that you need to fill in additional information. OwlPay specialist will reach you to complete this process.
4. Add payout currency account
Click "Add" and select the method to deposit, you have 2 choices:
- Wire transfer
- USDC
Wire transfer
Choose the bank type:
- US Bank Account
- Non-US Bank Account - IBAN Supported
- Non-US Bank Account - IBAN Not Supported
Follow the instructions on the screen to complete the setup.
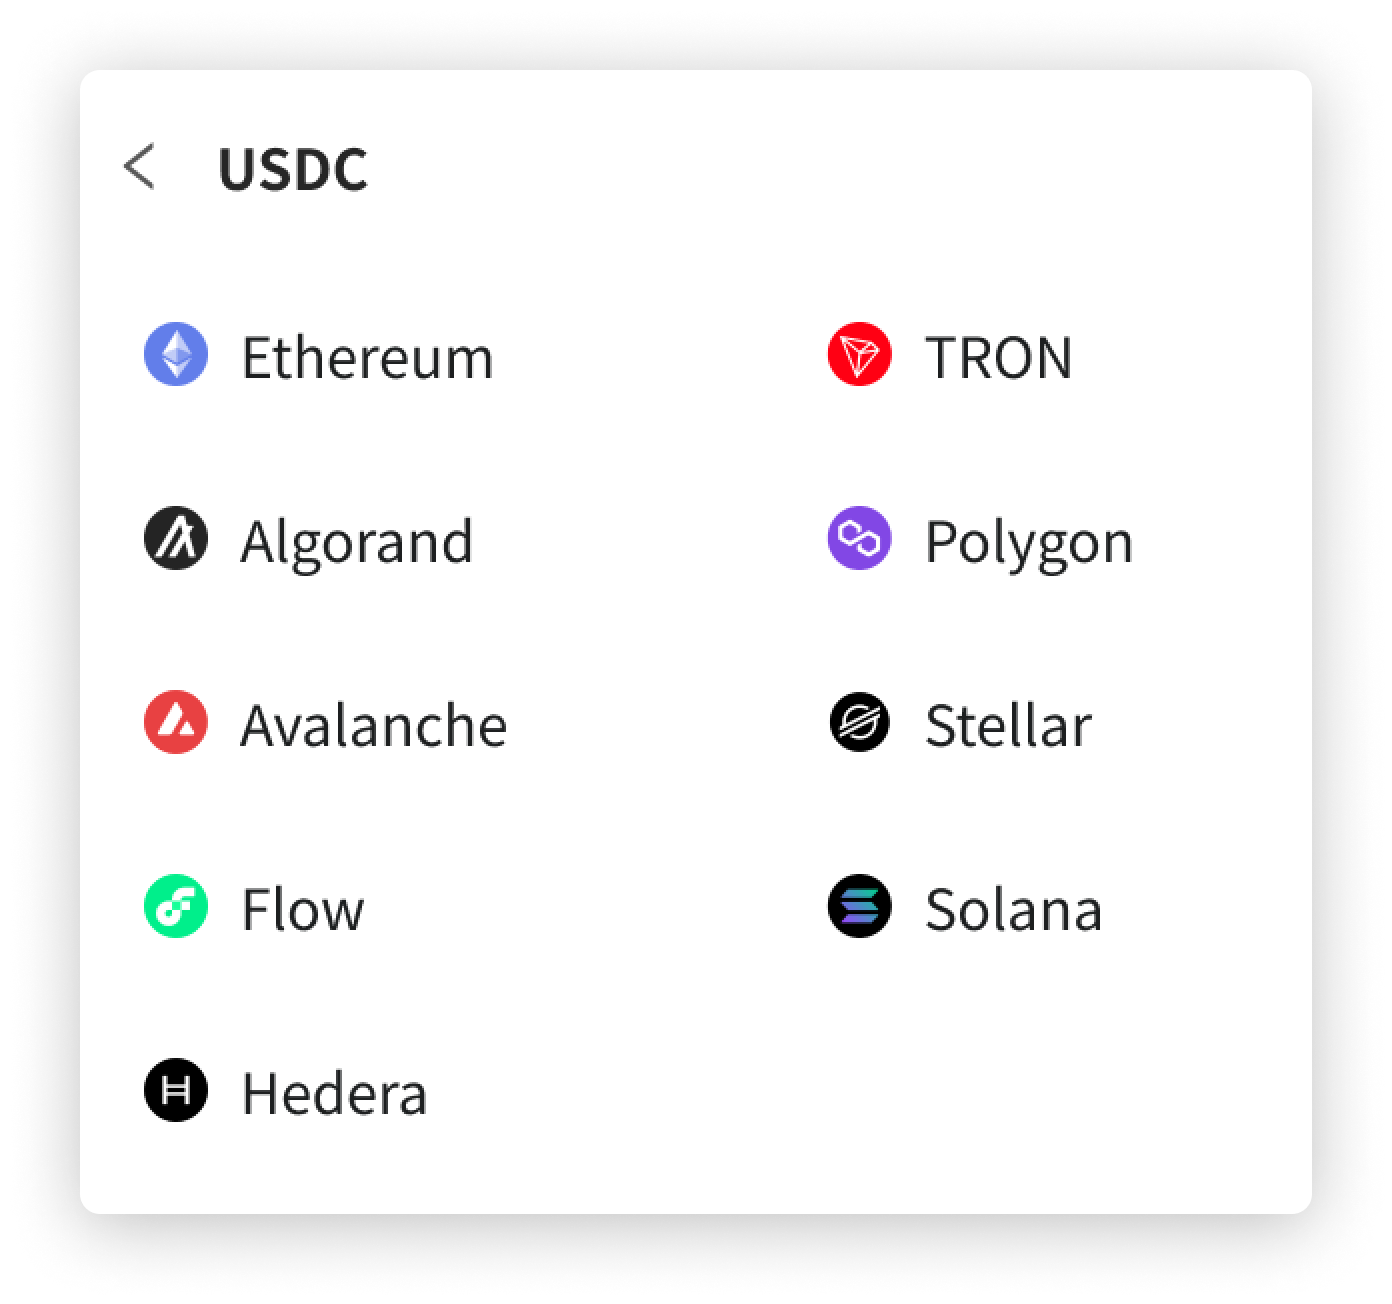
USDC
Choose the Mainnet to deposit the USDC. OwlPay supports:
- Ethereum
- Algorand
- Avalanche
- Flow
- Hedera
- TRON
- Polygon
- Stellar
- Solana
If you use Ethereum as your USDC deposit Mainnet, a fee will be charged for generating the wallet address.
- You will be billed when you click "Confirm"
- You can start using it once payment is made.
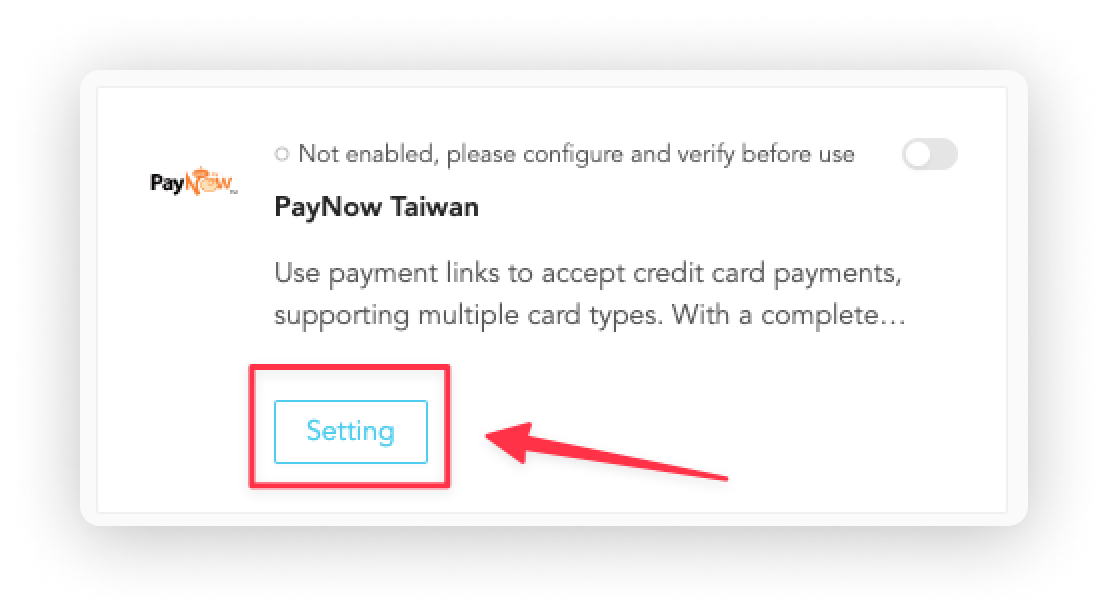
Set up "PayLink"
Follow the steps below.
1. Click "Install" on PayLink
2. Click "Setting"
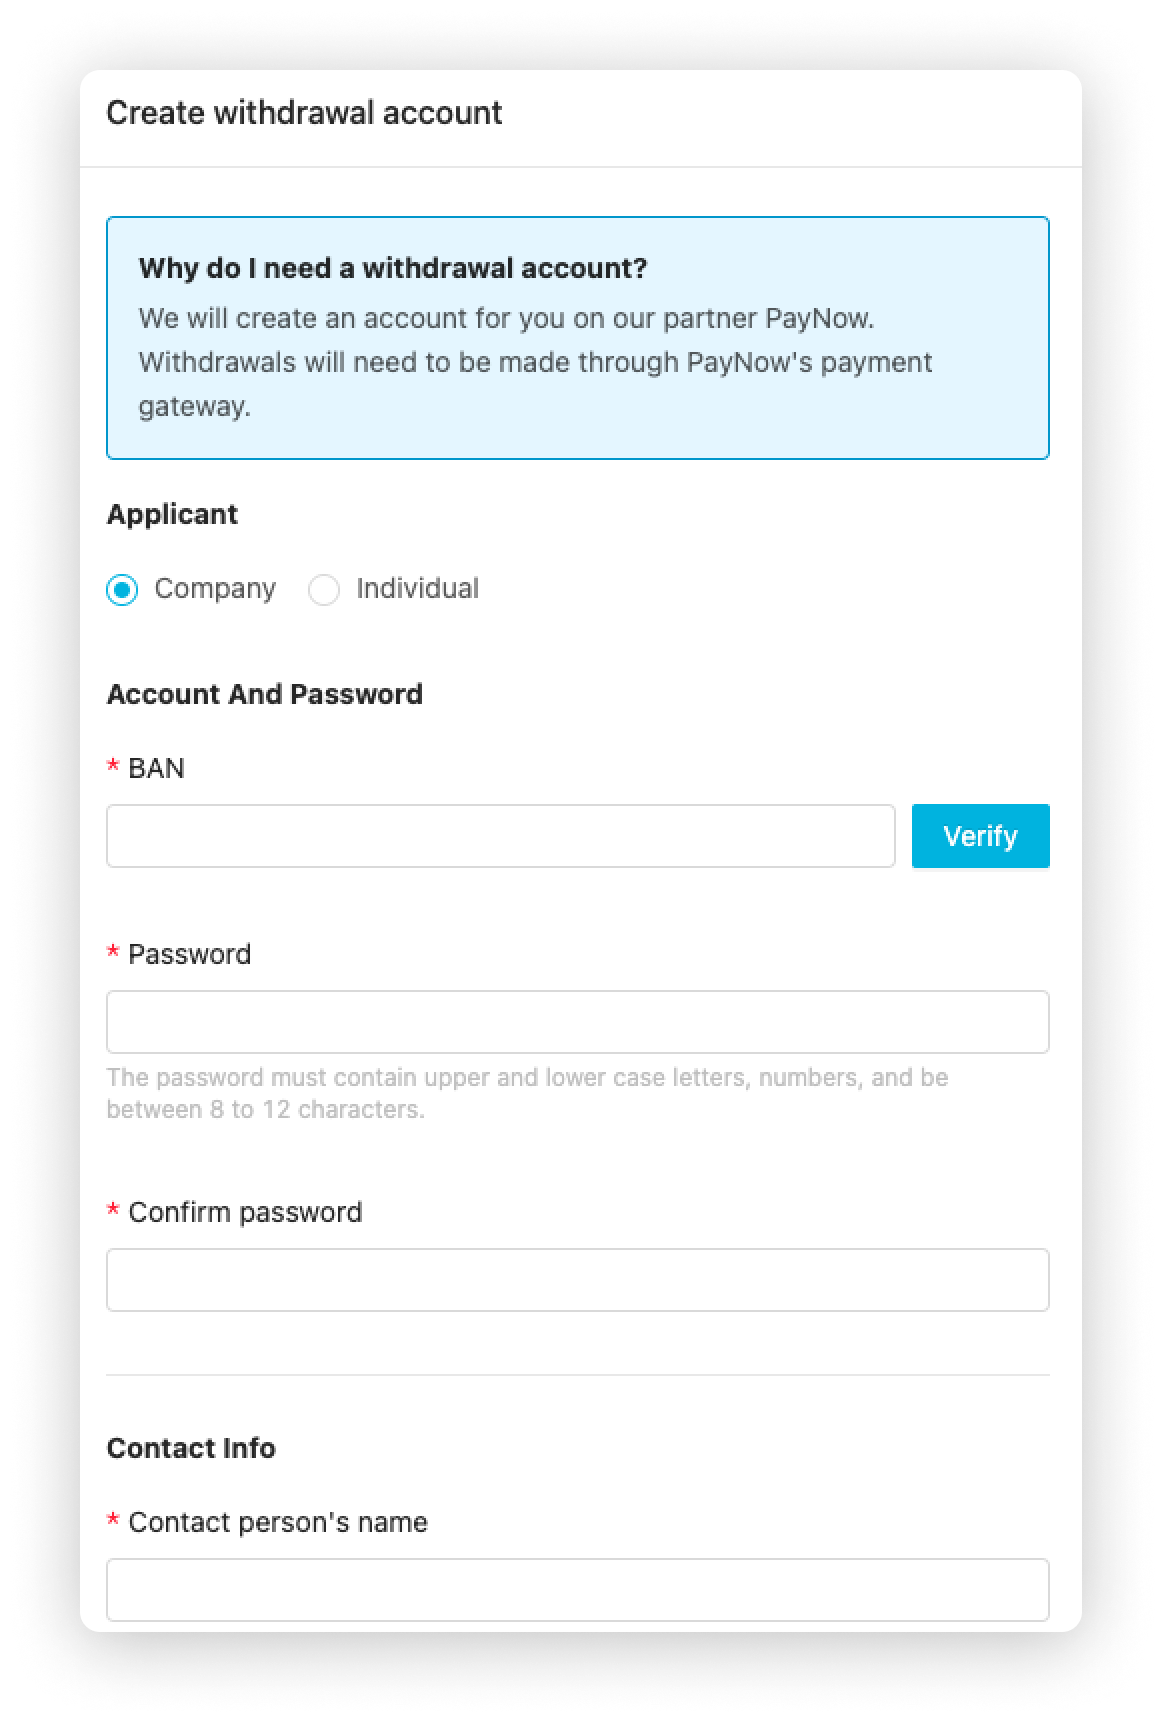
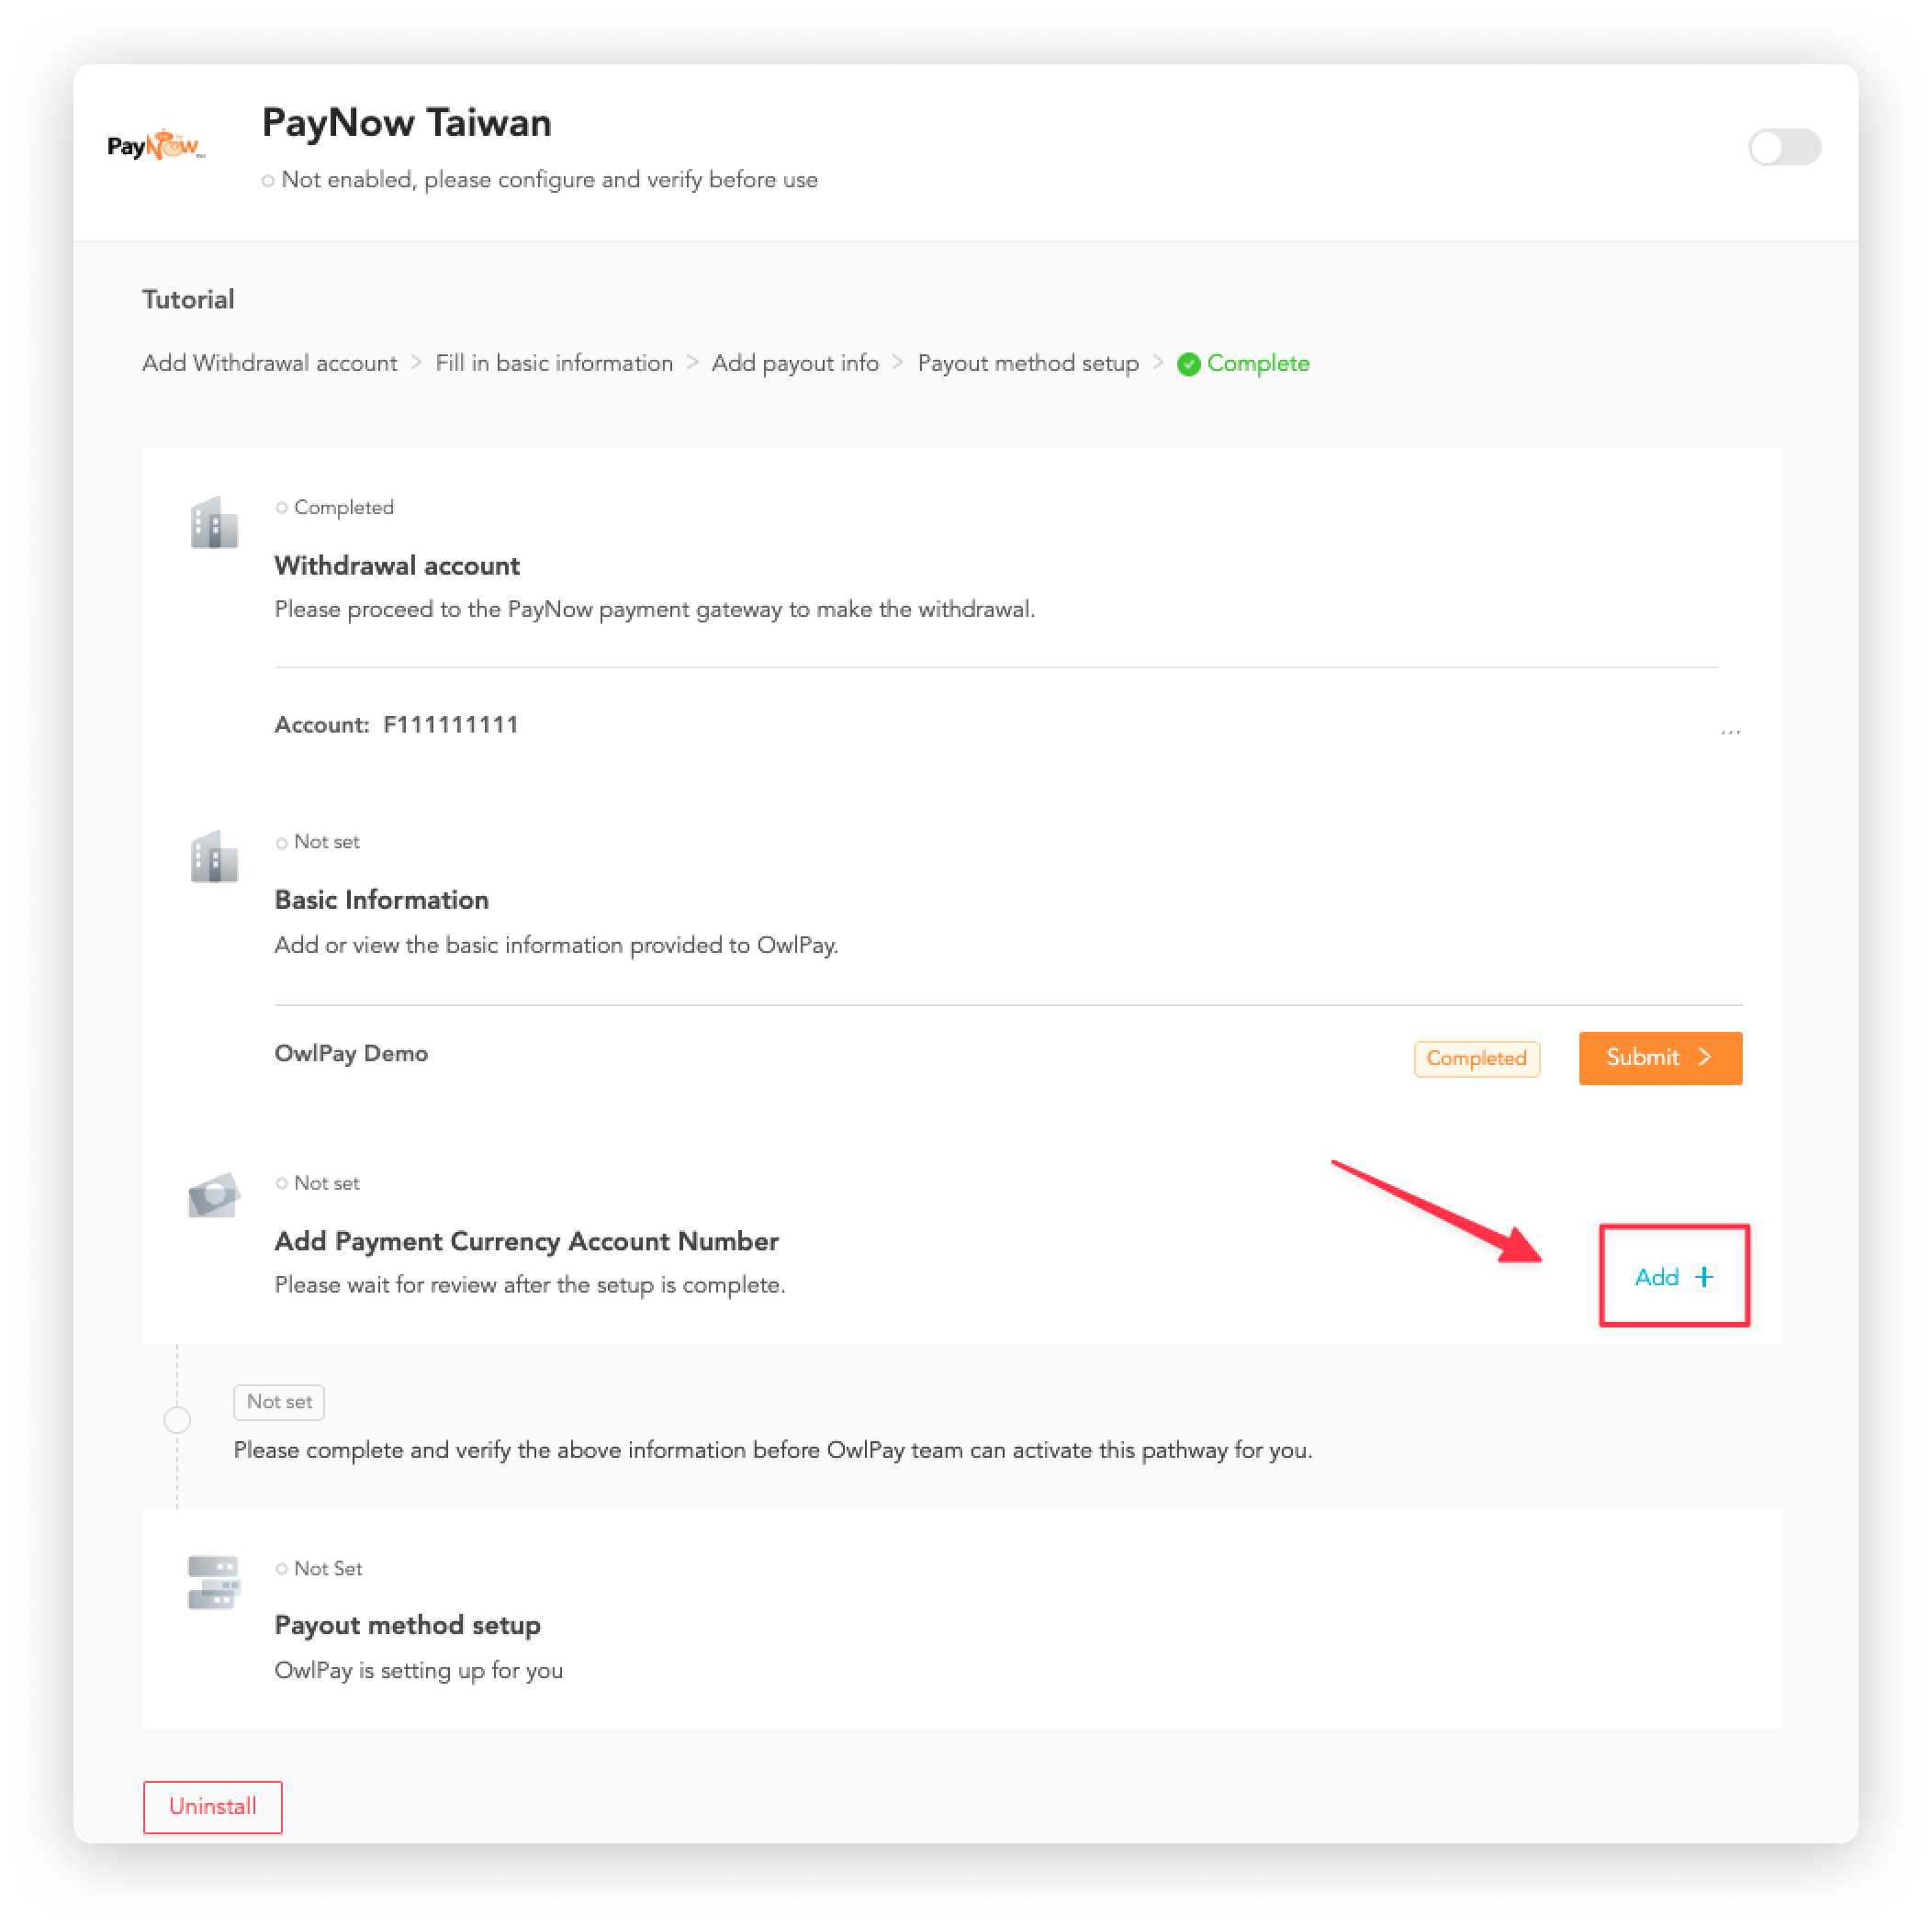
3. Register withdrawal account
OwlPay will create an account for you on our partner platform, PayNow. When making a withdrawal, you will need to visit the PayNow.
4. Add "Company information"

Click "Add".
You will be redirected to the "AML KYC Identity Verification" page; follow the instructions to complete your company information and click "Send".
5. Add payment currency Account Number
Click "Add".
You will be redirected to the "AML KYC Identity Verification" page; follow the instructions to complete your bank account information and click "Send".
After sending the application information, you will:
- receive a confirmation email.
- see the "Verifying" status on the "Payout extensions" page
Please wait for the verification, OwlPay team will take the initiative to inform you of the verification result.
Once your verification is complete, you can start using the PayLink. Please refer to the PayLink for the details.
If the payout method cannot be activated, it means that you need to fill in additional information. OwlPay specialist will reach you to complete this process.
How to modify payout extension information
If your enabled payout method information is rejected by the OwlPay team, you must modify it by following the system instructions.
Take NIUM for example, follow the steps below:
- On the payout method setting page, click "Edit".
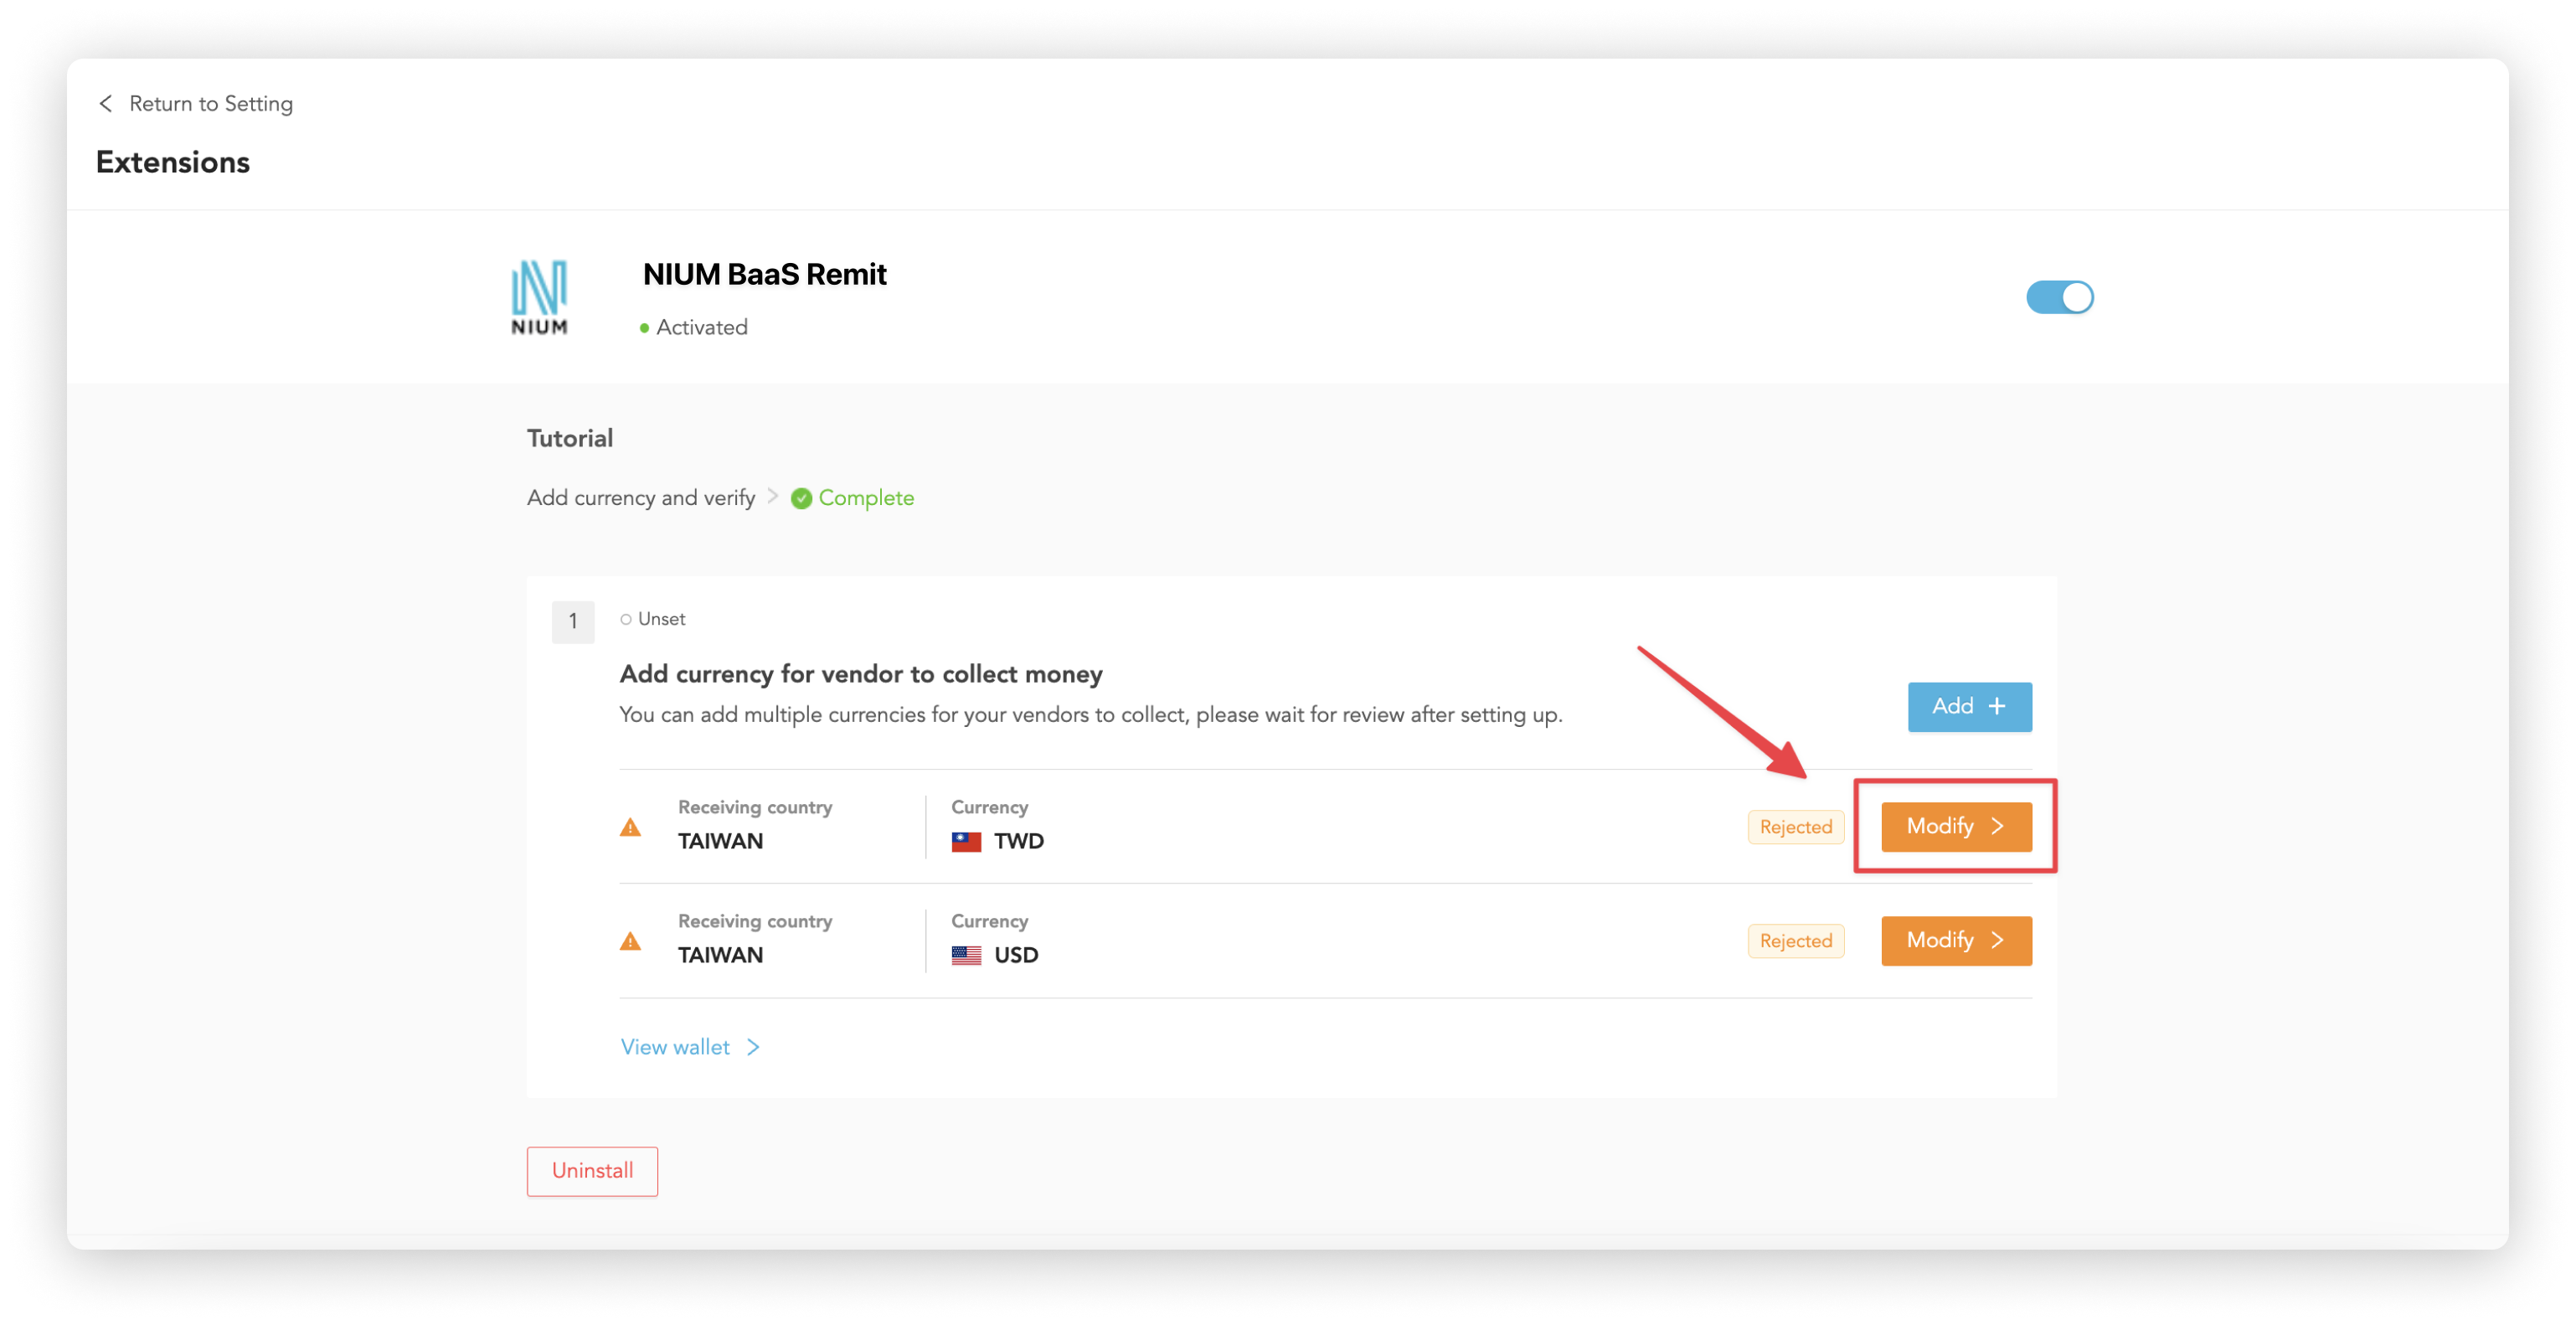
- Modify the information according to the page instruction
After sending modified information, the OwlPay team will conduct the identity check and notify you of the result.
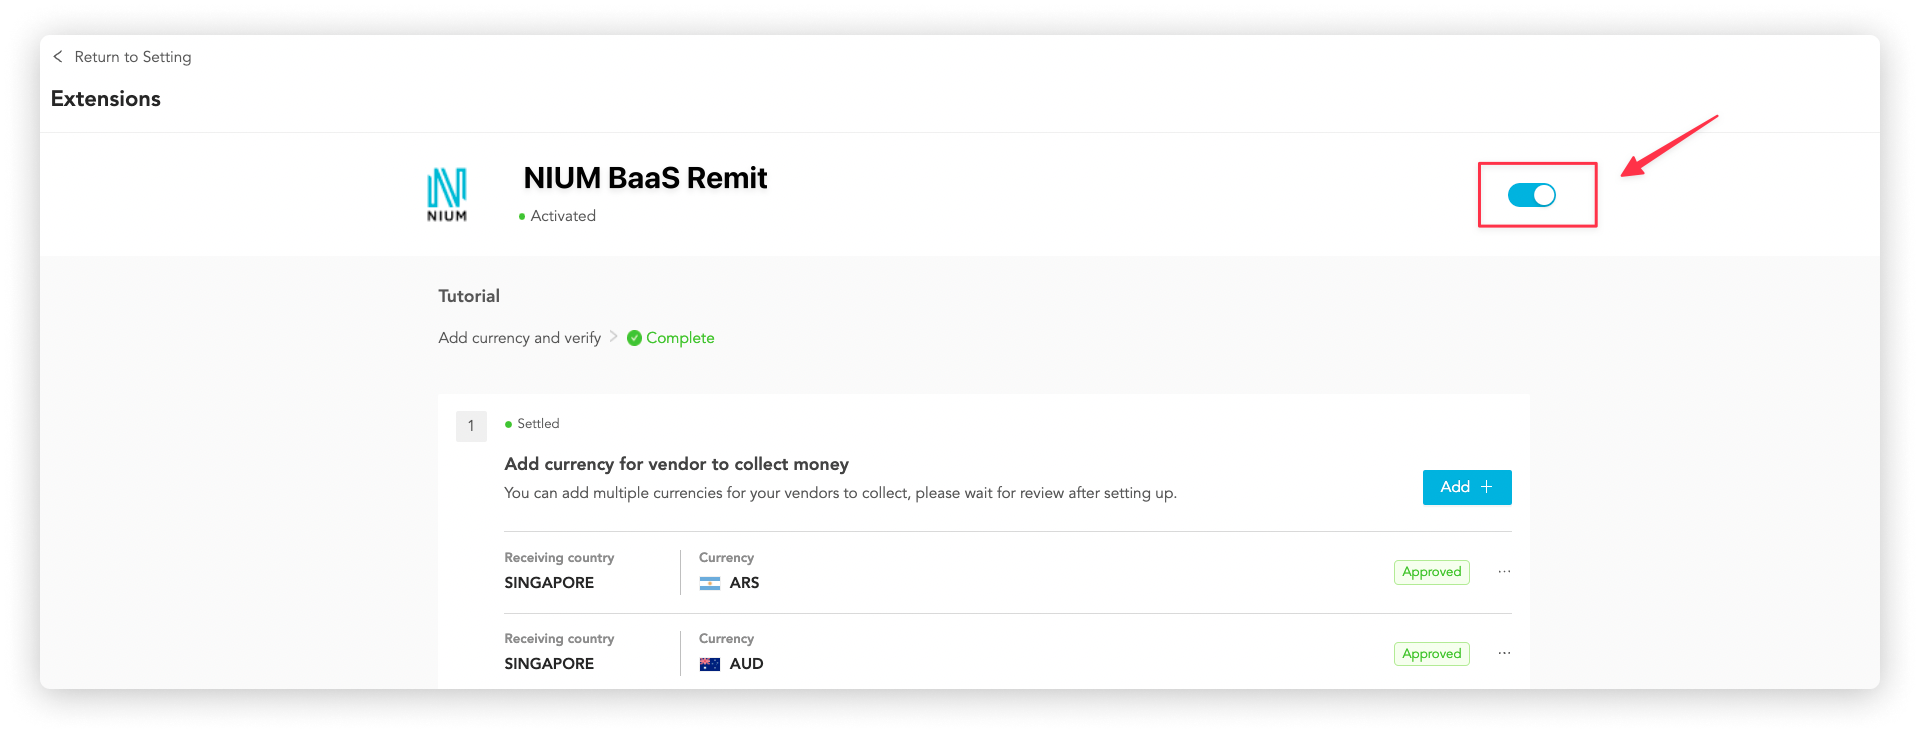
How to deactivate payout extension
To deactivate a specific payout extension (take NIUM for example), follow the steps below:
- Click "Setting" on the payout extension you want to deactivate

- Click the button in the upper right corner
How to uninstall payout extension
To uninstall a payout extension (take NIUM for example), follow the steps below:
- Click "Uninstall" on the bottom left corner
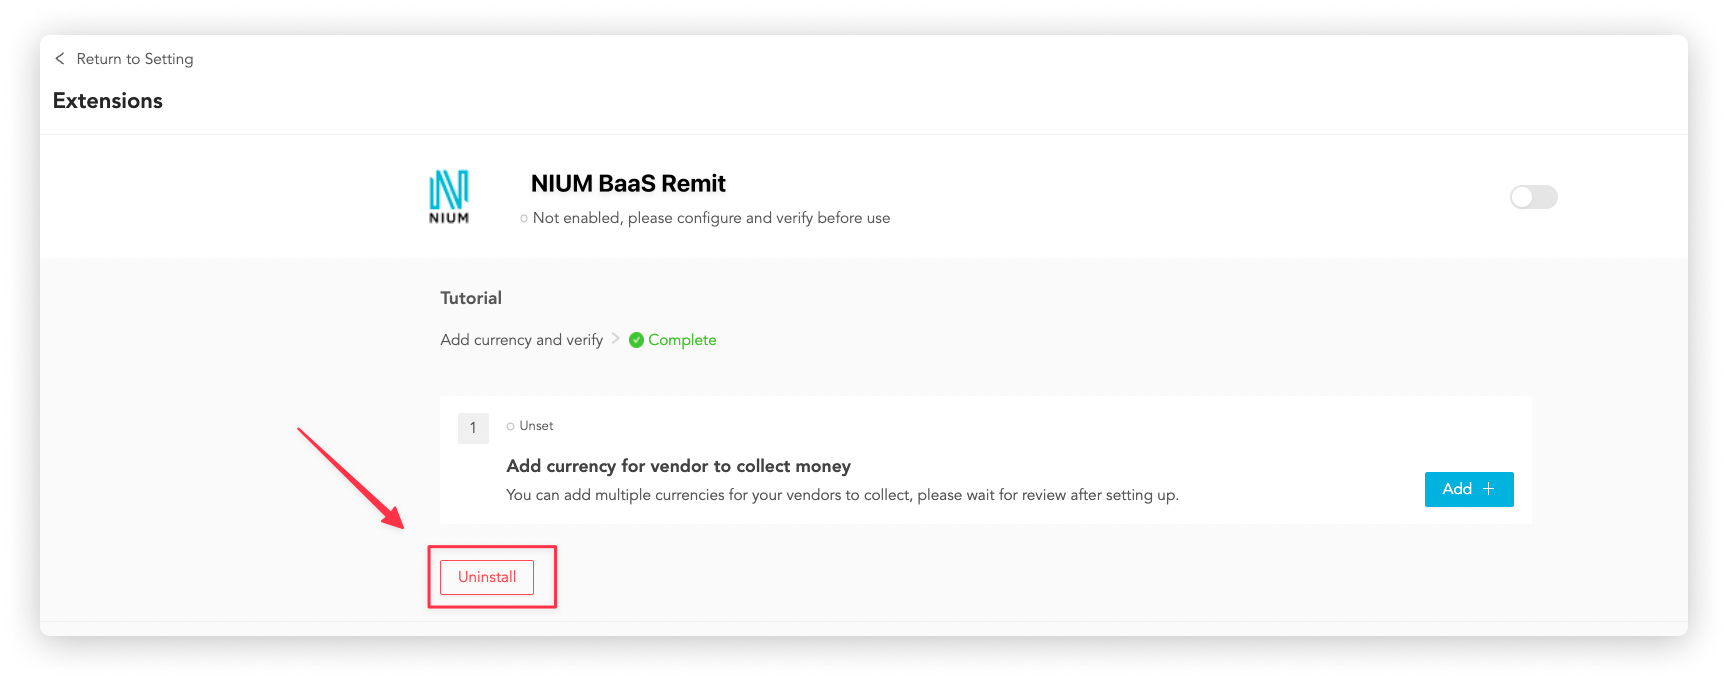
- Click "Uninstall"